Set up Creatio application server on IIS
Setting up Creatio application server (web server) on IIS involves setting up application website in IIS and adding an application pool.
Add an application pool
To add an application pool:
-
Go to the Application Pools section in the Connections area of the IIS control window.
-
Select the Creatio pool.
-
Select the Integrated mode in the Managed pipeline mode field.
-
Fill out the .NET CLR version field:
Fig. 1 Window for Applications Pool parameters 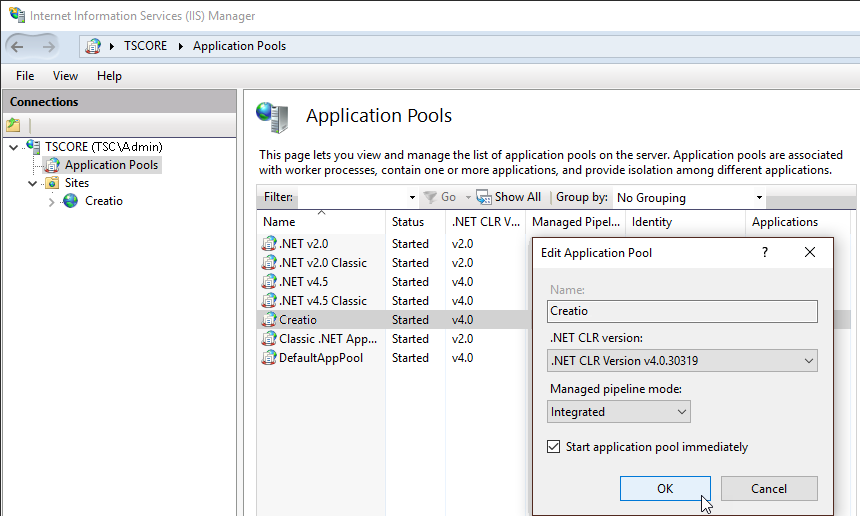
- Specify ".NET CLR Version v.4.0.30319" for .NET Framework.
- Specify "No Managed Code" for .NET.
-
Go to the ISAPI and CGI Restrictions on the web server level (Fig. 2) and check if the specified ASP.NET version is allowed.
Fig. 2 ISAPI and CGI Restrictions menu 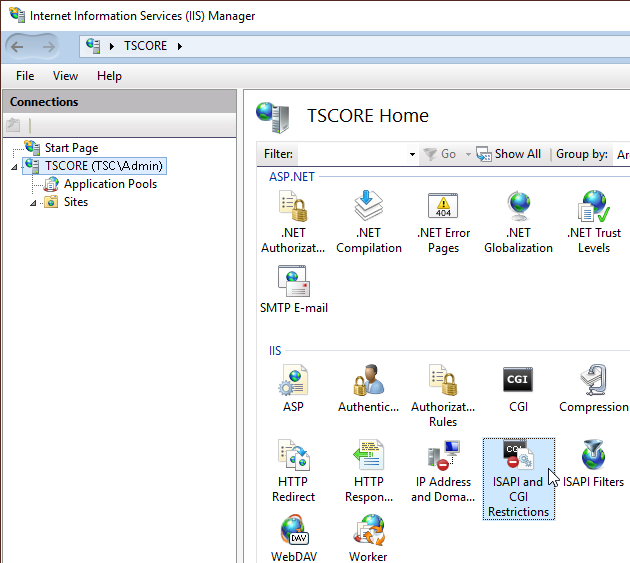
-
Make sure that the Allowed status is set in the Restriction field for the ASP.NET version (Fig. 3).
Fig. 3 Status of the ASP.NET version 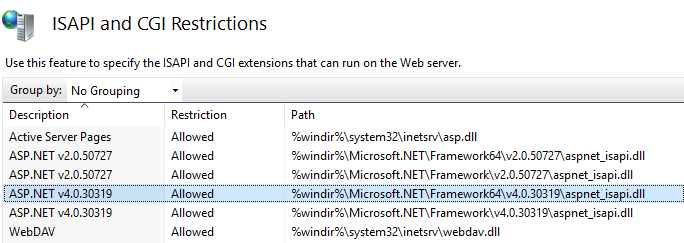
-
Open the Handler Mappings on the server level and make sure that all the required permissions are active (Fig. 4).
Fig. 4 Handler Mappings menu 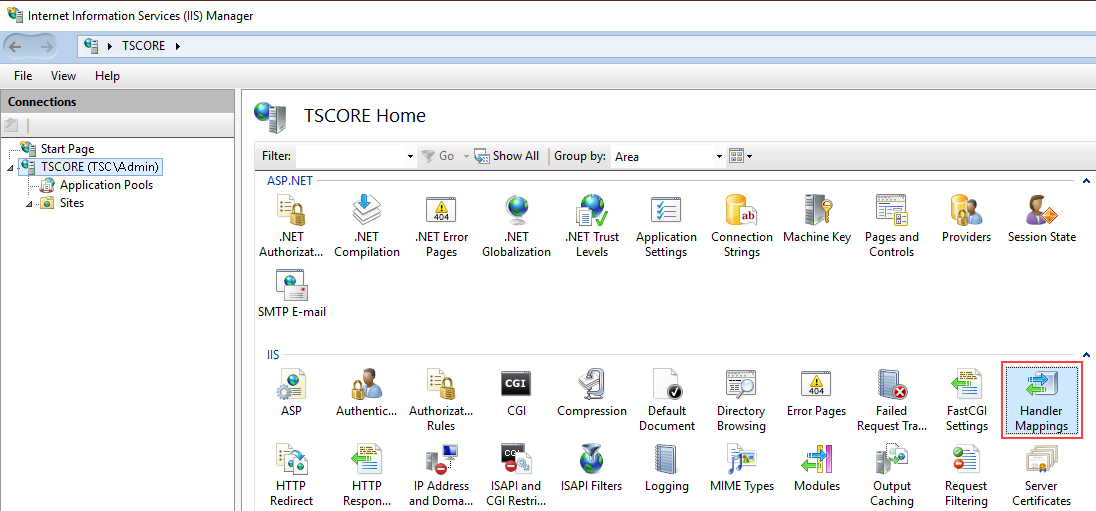
-
Click Edit Feature Permissions in the Actions area.
-
Make sure that all the required checkboxes are selected in the Edit Feature Permissions window (Fig. 5).
Fig. 5 Edit Feature Permissions window 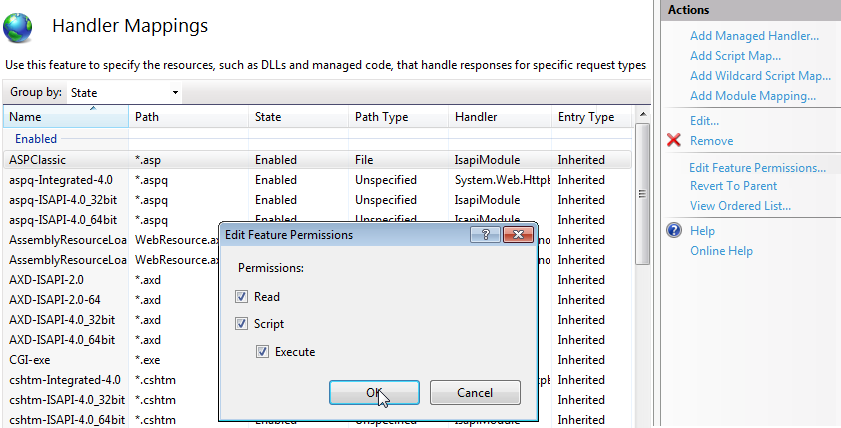
-
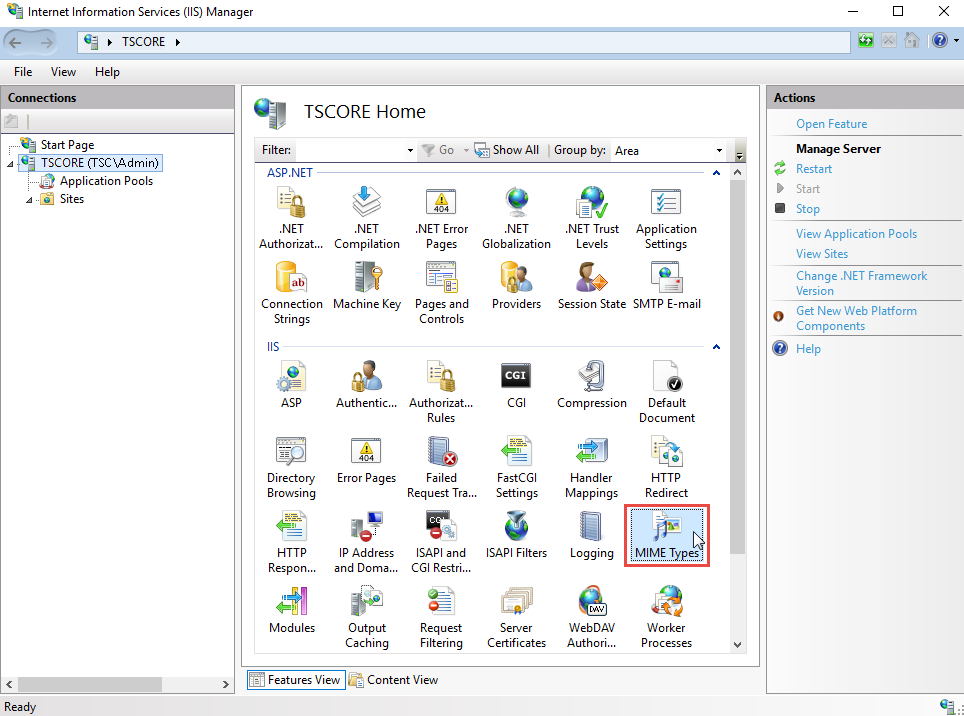
Make sure that MIME-type for .svg and .json files is configured in the new application. This configuration can be performed both on the server (in this case, all applications on this server inherit it) and application level. To check the configuration:
-
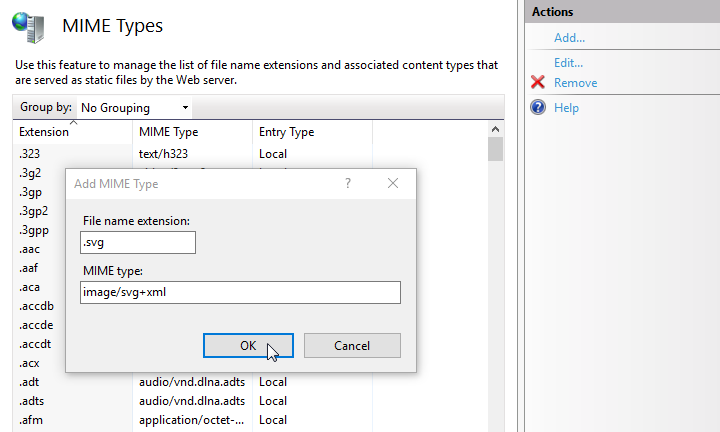
If the configuration is not available, click Add... in the Actions area. This opens a new window. Specify .svg and MIME type of data that corresponds to this extension (Fig. 7) in the window. Repeat the step for .json extension ("application/json" MIME type).
- Restart the website using the Restart command in the Manage Website area (Fig. 8).
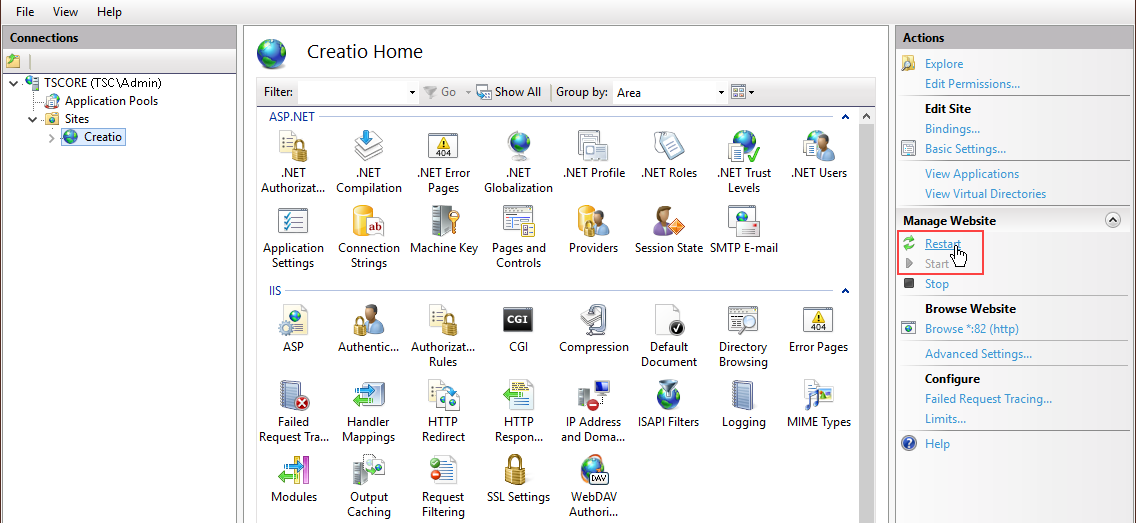
- Open the site by going to the address or using the Browse command (Fig. 9). Make sure that the Creatio login page is displayed.

To log in to a newly deployed application, use the default Supervisor user account. Login: Supervisor; Password: Supervisor. We highly recommend changing the Supervisor password immediately.
-
To enable additional UI language:
-
Go to the Languages section in the system designer.
-
Select the needed language and click Open. This opens a page.
-
Select the Active and Use by default checkboxes. Save the changes.
To enable a language, the user who has run the IIS application pool needs to have access permissions to read, edit and delete application files and content subordinate catalogs (catalog .\Terrasoft.WebApp\conf).
-
-
Click System settings in the System Designer and change the Order of first/last names system setting value to "Last name, First name Middle name." This is required to correctly display contact names in individual columns: Last name, First name, Middle name.
Set up application website in IIS
To create and set up a website:
-
Go to the IIS control window, right-click the Sites folder, and select the Add Website option from the context menu (Fig. 10).
Fig. 10 The Add website option 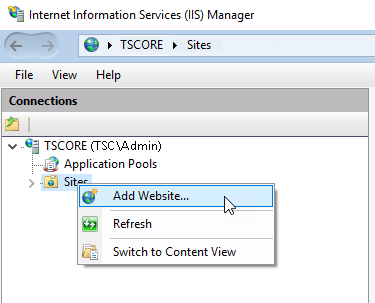
-
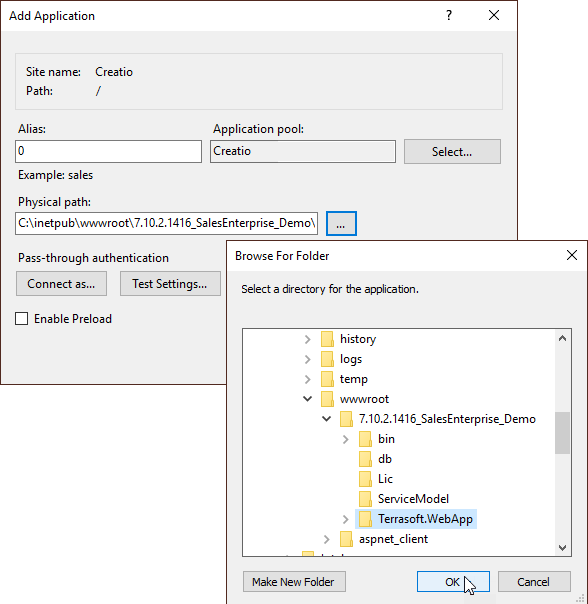
Specify the name of the website, the path to the root folder that contains Creatio files, IP address and website port (Fig. 11). The default website path is C:\INETpub\wwwroot. If needed, specify your own IP address.
Fig. 11 New website parameters window 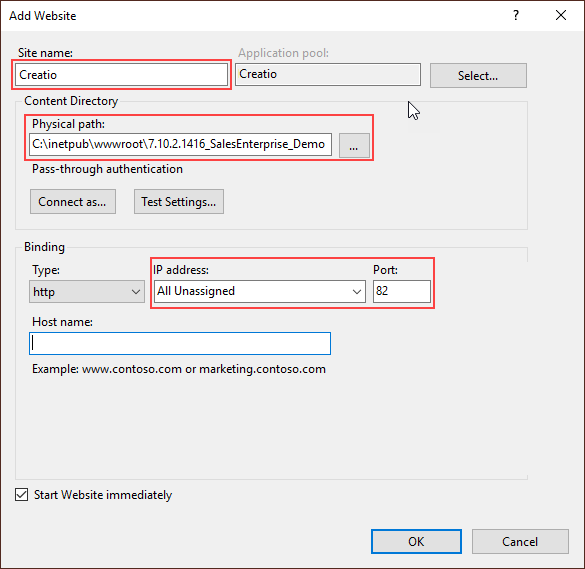
For .NET Framework only
-
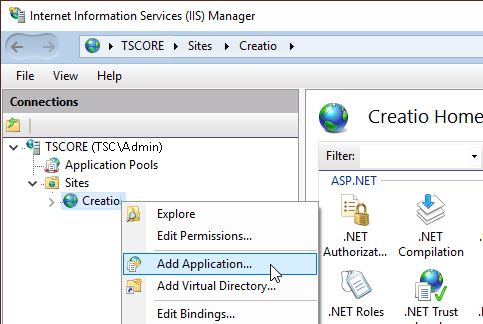
Enter the "0" application name in the Alias field. Specify the "Terrasoft.WEBApp" directory (Fig. 13).
Fig. 13 Application parameter selection window