Get started with Classic UI in the mobile app
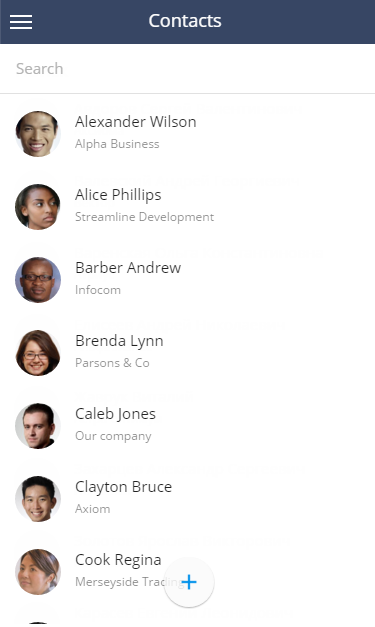
After synchronizing with the Creatio server you can start working with the mobile application (Fig. 1).
Tap  to access the main page (Fig. 2) and move between sections of the mobile application.
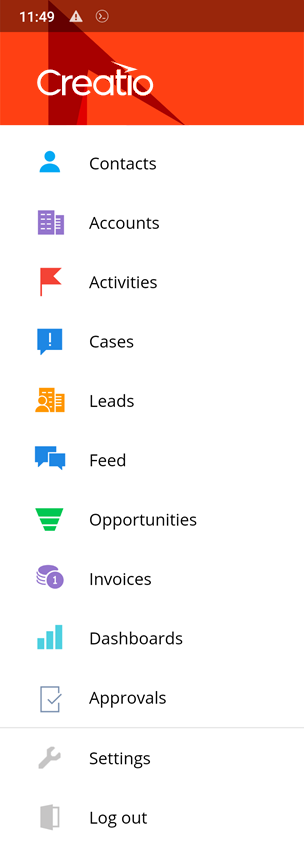
The main page of the mobile application contains a list of sections configured in the Mobile Application Wizard, as well as the Approvals section and the Settings menu.
The mobile application list (Fig. 3) contains a list of section records. The list and display method are configured in the main application
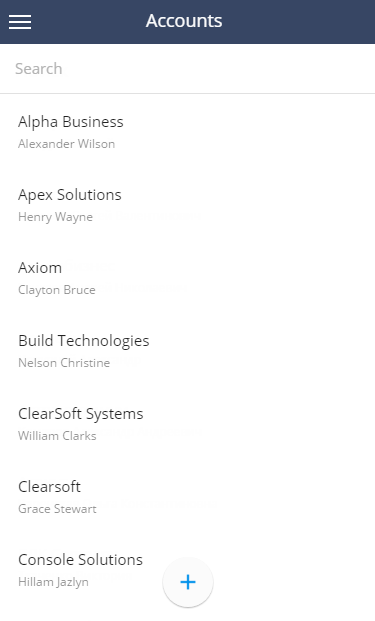
To open the record, tap it in the list.
Search records
To search for a record in a section, enter the search parameters (for example, a fragment of a company name) in the Search field (Fig. 4). The search is performed in the current section and by the primary displayed column (the first column configured in the mobile application wizard).
For example, enter a fragment of an account name in the Accounts section, and in a couple of seconds, the result corresponding to the search parameters will be displayed. A search by primary account won't return any search results.
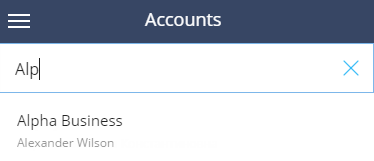
To display all the records of a section, clear the search field.
Add records
To create a new record, tap the  button in the section list. Fill in the page and save the changes.
Filter records
You can filter records in Creatio mobile app sections and details by the values specified in one or more columns. For example, using the filters you can quickly find an account by a name fragment or tasks by a specific customer.
To access the filter, tap the  button to the right of the search field (Fig. 5) of the section or detail list. The filter page will open (Fig. 6).

In the Activities section, the filter is available in the section list view only.
Tap a column that you want to filter records by and specify the filter value.
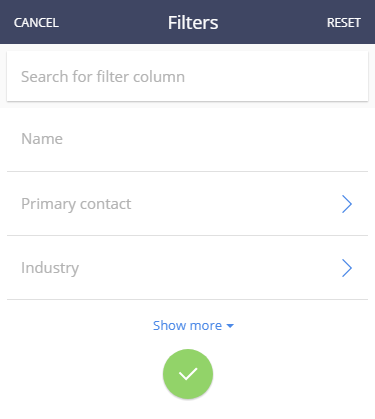
When opened, the filter page displays the same columns as the corresponding section page. If the application is in the online mode, tap Show more to display all section columns. In the offline mode, only preliminary configured columns will be displayed.
Use the Search field at the top of the filter page to quickly locate the needed columns.
The columns in the section record page can be configured in the Mobile application wizard in the System designer of the desktop application.
After selecting the filter values, tap  to apply the filter. Filtered records will be displayed in the section or detail list (Fig. 7).
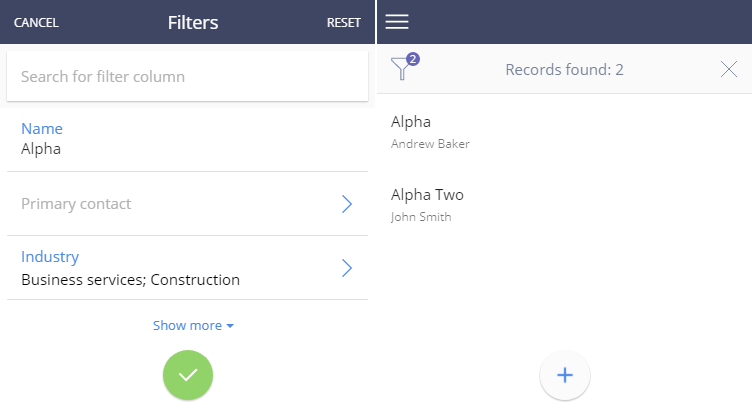
The number at the top right of the “funnel” icon represents the number of columns used in the currently applied filter.
If a filter uses several columns, then only the values that match all filter conditions will be displayed after applying the filter (similar to using the "AND" logical operator to group filter conditions in the desktop application).
To change the filter conditions, tap  .
.
Tap  to remove the filter.
The filter settings will persist after updating the page or switching sections. The filters will reset upon logout.
You can filter data by string, lookup, numeric, and date columns. For example, if you need to filter data by an account name, tap a text column on the filter page and enter the full or partial filter value using the keyboard (Fig. 8).
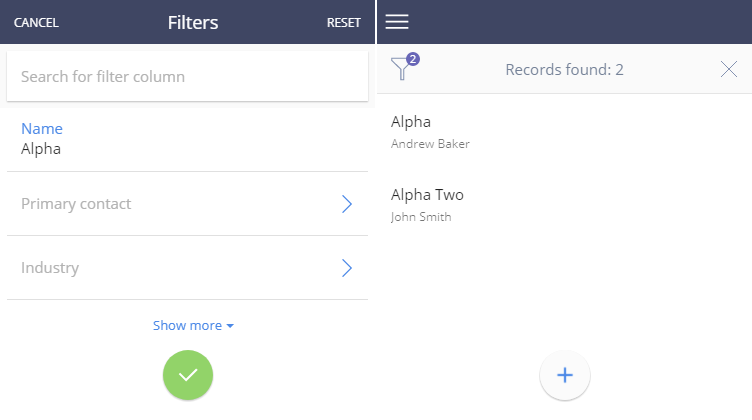
By default, all text column filters use the “starts with” condition. For example, if you enter the “Alpha” value in the Name column of the Account section and apply the filter, all companies with the name starting with “Alpha” will be displayed.
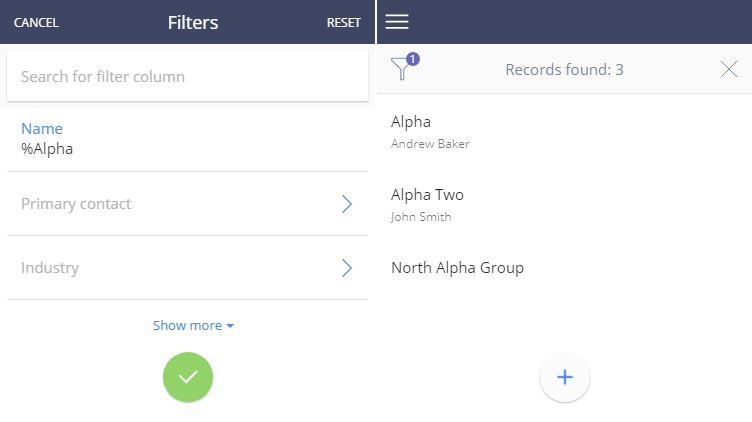
Use the “%” character to set “wildcard” filter values. For example, in the Accounts section, enter the "%Global" as the value of a Name column filter to display all companies that contain Global in their names (Fig. 9).
Edit records
You can edit data either in edit mode or in normal mode (when viewing data).
In view mode, you can make changes to the page's fields and embedded columns. You can also make changes to the page using the actions menu. In section page edit mode all columns are available for editing.
Quick edit
In normal mode (view mode), column values containing main information and communication options are available for editing.
For example, to change the name of the company where the contact works:
-
Open the Contacts section of the mobile application.
-
Tap and hold the Account column and drag it through the column to the left (Fig. 10).
Fig. 10 Editing a contact's Account column 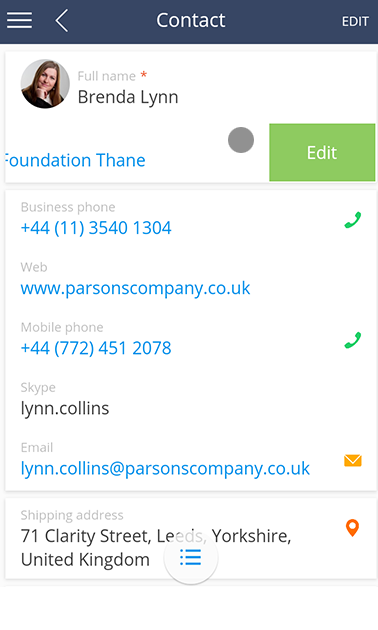
-
Tap the Change button.
-
Select a value from the lookup.
Communication options are edited in the same way in view mode.
noteTo change, for example, the name of a contact, tap on the column and enter the value.
Edit mode
In the edit mode, you can edit a record:
-
Tap the Edit button in the upper right corner of the mobile application (Fig. 11)
Fig. 11 Editing records in mobile application 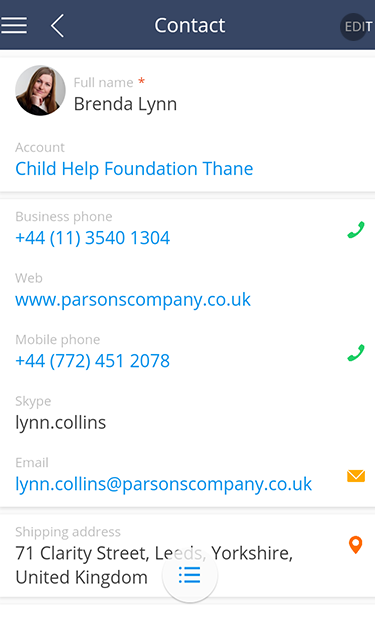
-
Enter the required values on the edit page (Fig. 12).
Fig. 12 Editing mobile application section page 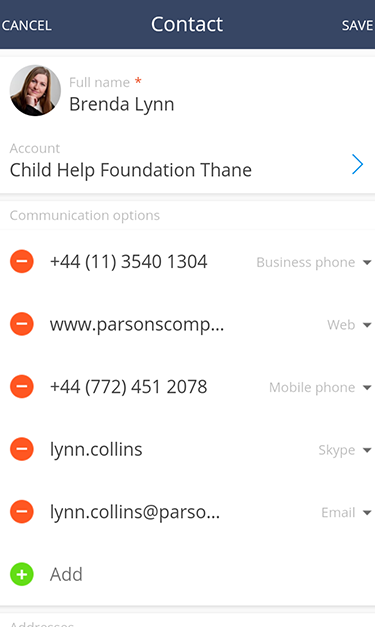
-
Tap Save.
Run actions
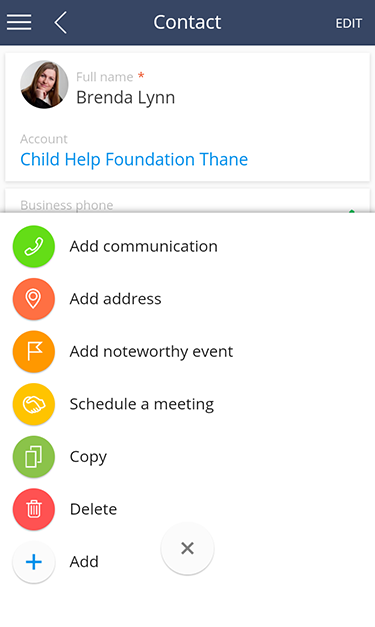
Tap  in the lower part of the record to access the section actions menu.
The list of actions available in the actions menu depends on the opened section (Fig. 13).
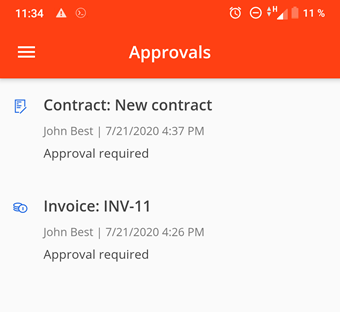
Approve records
The approval functionality of Creatio desktop applications is available in the mobile app as well. After a record is submitted for approval in the main Creatio application, the assignee can approve or reject the record in the mobile app. To do this, use the Approvals section.
The Approvals section lists all records submitted for approval, including records from sections normally unavailable in the mobile app (Fig. 14). For example, you can approve a contract and an order using your mobile app, even if the app is not configured to display the Contracts and Orders sections. Read more about setting up mobile app sections in the Mobile application wizard article.
Approvals require an active Internet connection.
To process an approval:
-
Open the Approvals section of the mobile application.
-
Swipe the record left to approve a record.
-
Swipe the record right to reject a record.
A few seconds after the swipe, you can cancel your approval or rejection using the cancel button in the notification at the bottom of the app.
As a result, the record will be approved or rejected. The app will display a notification about a successful approval processing to the approver. The approval status will be changed to “Positive” or “Negative”. The record will be no longer listed in the Approvals section.
noteInstead of swiping, you can tap a record in the Approvals section to open the approval page, then tap Approve or Reject. In that case, canceling the approval or rejection will not be available.