Set up web form for a custom object
Create a custom Creatio object via a landing page web form on a third party website. Learn more about landing pages in the Integrate with landing pages and web forms article (user documentation).
The general procedure of creating a custom object via a web form is as follows:
- Register a new landing page type.
- Add an edit page for the web form.
- Map the new landing page type to the created edit page.
- Update the scripts for the web form record page.
- Create and configure a landing page in the Landing pages and web forms section.
- Deploy and set up a landing page with a web form.
Tracking website events only works for leads and does not work for custom objects.
Case description
Create a custom Contact object using a landing page web form.
Source code
You can download the package with an implementation of the case using the following link.
Case implementation algorithm
1. Register a new landing page type
To do this:
- Open the System Designer by clicking
 . Go to the System setup block → click Lookups.
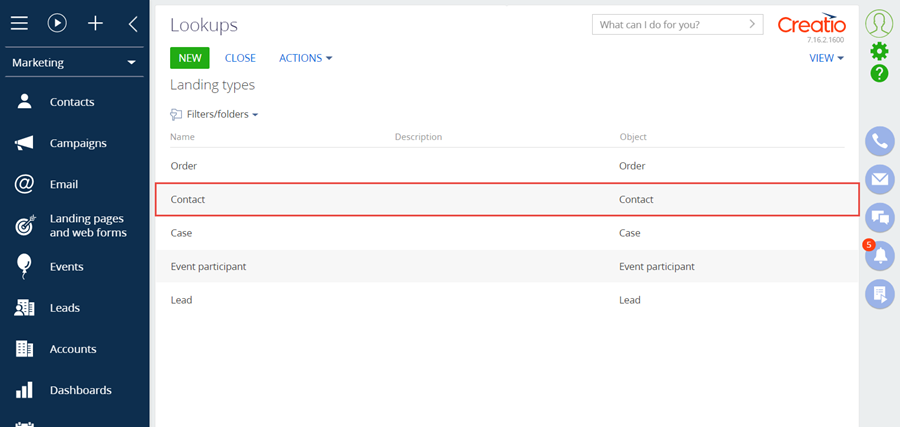
 - Select the Landing types lookup.
- Add a new record.
In the created record, specify (Fig.1):
- Name – "Contact"
- Object – "Contact."
2. Add an edit page for the web form
-
Run the Add → Schema of the Edit Page View Model menu command on the Schemas tab in the Configuration section of the user-made package (Fig. 2). The procedure for creating a view model schema of the edit page is covered in the Client module article.
Fig. 2. – Adding a view model schema of the edit page 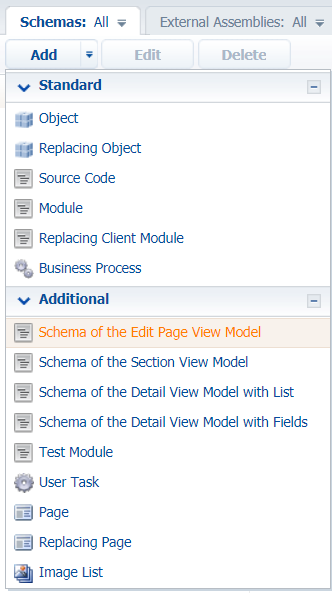
-
Specify the following parameters for the created schema of the edit page view model (Fig. 3):
- Title – "ContactGeneratedWebFormPage"
- Name – "UsrContactGeneratedWebFormPage"
- Parent object – "Edit page, landing."
Fig. 3. Setting up the mini-page view model schema 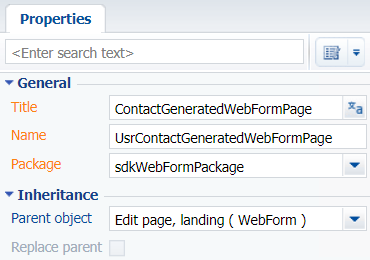 Complete source code of the module// UsrContactGeneratedWebFormPage – unique schema name.define("UsrContactGeneratedWebFormPage", ["UsrContactGeneratedWebFormPageResources"], function() {return {details: /**SCHEMA_DETAILS*/{}/**SCHEMA_DETAILS*/,methods: {/*** @inheritdoc BaseGeneratedWebFormPageV2#getScriptTemplateFromResources* @overriden*/getScriptTemplateFromResources: function() {var scriptTemplate;if (this.getIsFeatureEnabled("OutboundCampaign")) {// ContactScriptTemplate – localizable string name.scriptTemplate = this.get("Resources.Strings.ContactScriptTemplate");} else {scriptTemplate = this.get("Resources.Strings.ScriptTemplate");}return scriptTemplate;}},diff: /**SCHEMA_DIFF*/[]/**SCHEMA_DIFF*/};});
 -
Save the schema after making the changes.
-
Add the
ContactScriptTemplatelocalizable string. Specify<div>Test</div>as the string value (Fig. 4).Fig. 4. Setting up a localizable string 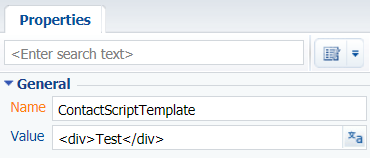
-
Save the schema after making the changes.
3. Map the new landing page type to the created edit page
-
Add the record to the dbo.SysModuleEdit DB table. Execute the following SQL query to add the record:
- MSSQL
- PostgreSQL
-- Parameters of new landing pageDECLARE @editPageName nvarchar(250) = N'UsrContactGeneratedWebFormPage'; -- declare the name of the created schemaDECLARE @landingTypeName NVARCHAR(250) = N'Contact'; -- the type name of the landingDECLARE @actionCaption NVARCHAR(250) = N'Contact form'; -- declare the type name for the landing in the section when creating a new record-- Set system parameters based on new landing pageDECLARE @generatedWebFormEntityUId uniqueidentifier = '41AE7D8D-BEC3-41DF-A6F0-2AB0D08B3967';DECLARE @cardSchemaUId uniqueidentifier = (select top 1 UId from SysSchema where Name = @editPageName);DECLARE @pageCaption nvarchar(250) = (select top 1 Caption from SysSchema where Name = @editPageName);DECLARE @sysModuleEntityId uniqueidentifier = (select top 1 Id from SysModuleEntity where SysEntitySchemaUId = @generatedWebFormEntityUId);DECLARE @landingTypeId uniqueidentifier = (SELECT TOP 1 Id FROM LandingType WHERE Name = @landingTypeName);-- Adding new Landing page variant to application interfaceINSERT INTO SysModuleEdit(Id, SysModuleEntityId, TypeColumnValue, UseModuleDetails, CardSchemaUId, ActionKindCaption, ActionKindName, PageCaption)VALUES(NEWID(), @sysModuleEntityId, @landingTypeId, 1, @cardSchemaUId, @actionCaption, @editPageName, @pageCaption)DO $$DECLAREv_editPageName VARCHAR(250) := N'ContactGeneratedWebFormPageV2';v_landingTypeName VARCHAR(250) := N'Contact';v_actionCaption VARCHAR(250) := N'Contact form';v_pageCaption varchar(250) := (select "Caption" from "SysSchema" where "Name" = v_editPageName);v_generatedWebFormEntityUId UUID := '41AE7D8D-BEC3-41DF-A6F0-2AB0D08B3967';v_cardSchemaUId UUID := (select "UId" from "SysSchema" where "Name" = v_editPageName);v_sysModuleEntityId UUID := (select "Id" from "SysModuleEntity" where "SysEntitySchemaUId" = v_generatedWebFormEntityUId);v_landingTypeId UUID := (SELECT "Id" FROM "LandingType" WHERE "Name" = v_landingTypeName);BEGININSERT INTO "SysModuleEdit"("SysModuleEntityId", "TypeColumnValue", "UseModuleDetails", "CardSchemaUId", "ActionKindCaption", "ActionKindName", "PageCaption")VALUES(v_sysModuleEntityId, v_landingTypeId, true, v_cardSchemaUId, v_actionCaption, v_editPageName, v_pageCaption);END;$$ LANGUAGE plpgsql;Important41AE7D8D-BEC3-41DF-A6F0-2AB0D08B3967– non-editable identifier of theGeneratedWebFormentity schema in the dbo.SysSchema DB table. The ID is relevant for any case featuring adding a landing page for a custom entity. -
Clear the browser cache after running the script. As a result, you will be able to add the new Contact form landing type in the Landing pages and web forms section. However, the script that must be added to the source code of the landing page will not be immediately available on the landing record page (Fig. 6).
Fig. 5. The record list of the [Landing pages and web forms] section ![Fig. 5. The record list of the [Landing pages and web forms] section](https://academy.creatio.com/sites/default/files/documentation/sdk/ru/BPMonlineWebSDK/Screenshots/WebFormCustomization/scr_ContactForm.png)
Fig. 6. Landing edit page 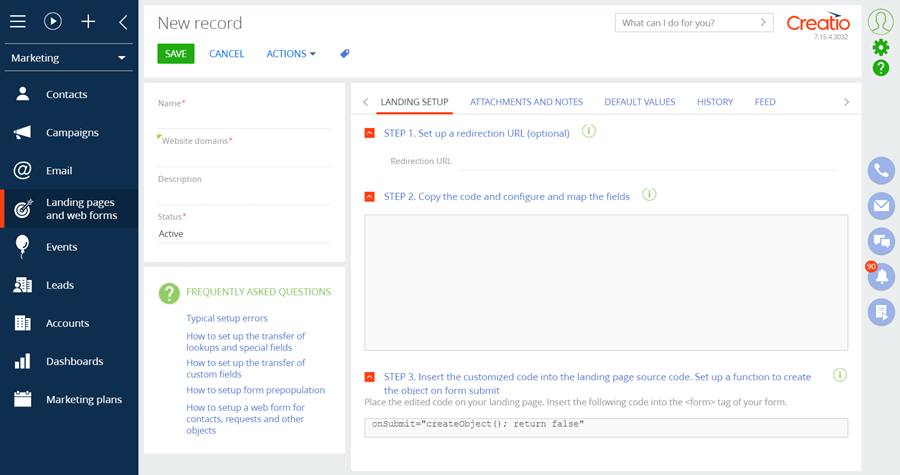
4. Update the scripts for the web form record page
-
The value of the variable contains an escaped HTML string with tags and other information for setting up web form field clusters – the columns for the created entity. This value must be localizable. To do so, execute the following SQL query:
-- Landing edit page schema nameDECLARE @editPageName nvarchar(250) = N'UsrContactGeneratedWebFormPage'; -- declare the name of the created schema-- region Scripts' structureDECLARE @sqriptPrefix nvarchar(max) = N'<div style="font-family: "Courier New", monospace; font-size: 10pt;"><script src="http://ajax.googleapis.com/ajax/libs/jquery/1.11.2/jquery.min.js"></script><br><script src="https://webtracking-v01.bpmonline.com/JS/track-cookies.js"></script><br><script src=##apiUrl##></script><br><script><br>/**<br>* Replace the "<span style="color: #0c0cec;">css-selector</span>" placeholders in the code below with the element selectors on your landing page.<br>* You can use #id or any other CSS selector that will define the input field explicitly.<br>* Example: "Email": "#MyEmailField".<br>* If you don"t have a field from the list below placed on your landing, leave the placeholder or remove the line.<br>*/<br>var config = {<br> fields: {<br> ';DECLARE @sqriptDelimiter nvarchar(max) = N'<br> ';DECLARE @sqriptSuffix nvarchar(max) = N'<br> },<br> landingId: ##landingId##,<br> serviceUrl: ##serviceUrl##,<br> redirectUrl: ##redirectUrl##<br>};<br>/**<br>* The function below creates a object from the submitted data.<br>* Bind this function call to the "onSubmit" event of the form or any other elements events.<br>* Example: <form class="mainForm" name="landingForm" onSubmit="createObject(); return false"><br>*/<br>function createObject() {<br> landing.createObjectFromLanding(config)<br>}<br>/**<br>* The function below inits landing page using URL parameters.<br>*/<br>function initLanding() {<br> landing.initLanding(config)<br>}<br>jQuery(document).ready(initLanding)<br></script></div>';-- endregion-- region Scripts' variablesDECLARE @sqriptNameColumn nvarchar(max); -- declare column variables to map to the landingDECLARE @sqriptEmailColumn nvarchar(max);DECLARE @scriptResult nvarchar(max);-- endregion-- Adding entity columns.SET @sqriptNameColumn = N'"Name": "css-selector", // Name of a contact';SET @sqriptEmailColumn = N'"Email": "css-selector", // Email';-- Concat result scripts.SET @scriptResult = @sqriptPrefix + @sqriptNameColumn + @sqriptDelimiter + @sqriptEmailColumn + @sqriptSuffix;-- Set new localizable scripts value for resource with name like '%ScriptTemplate'UPDATE SysLocalizableValueSET [Value] = @scriptResultWHERE SysSchemaId = (SELECT TOP 1 Id FROM SysSchema WHERE [Name] = @editPageName)and [Key] like '%ScriptTemplate.Value' -
In the Adding entity columns block, add the names of the entity columns to be filled with the values from the web form.
ImportantReplace the double quote (") and space ( ) characters with the
"and HTML character entity references.ImportantAdd the
@scriptVariableNameColumnvariable and concatenate it toscriptResultfor adding a field.If the values of other fields (except for Name and Email) are required after completing the setup, re-run the script from this paragraph after registering all of the required columns, including the existing ones, in the Adding entity columns block. When the script is re-run, the settings created earlier are updated.
-
After the script execution completes, open the schema created in the configuration and re-save it to re-save the resources as well. As a result, when selecting Contact form in the Landing pages and web forms section, Creatio will display the landing edit page (Fig. 6) combined with the script to copy to the landing page source code.
Fig. 7. Landing edit page 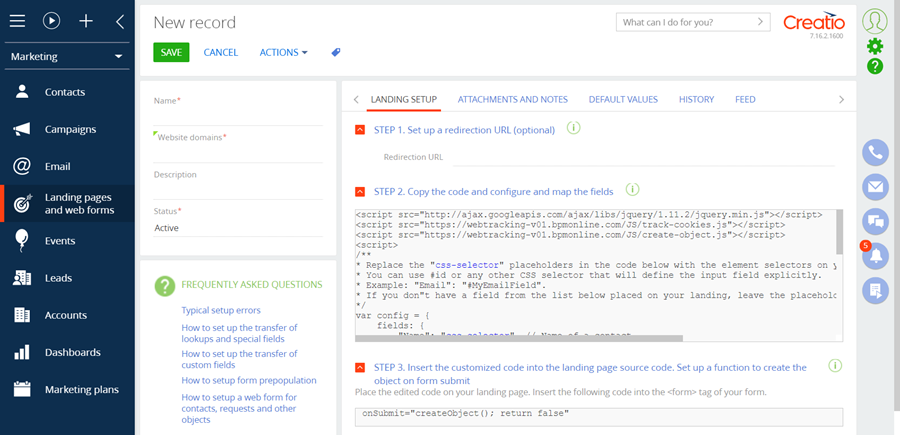
The script contains the
configconfiguration object, which has the following properties defined:fields– contains the Name and Email properties. Their values must match the selectors of theidattributes of the corresponding field of the web form.landingId– the landing page ID in the database.serviceUrl– the URL of the service to which the web form data will be sent.onSuccess– the handler function to process a successful contact creation. Optional property.onError– the handler function to process a contact creation error. Optional property.
Configuration to be formedvar config = {fields: {"Name": "css-selector", // Contact name"Email": "css-selector", // Email name},landingId: "b73790ab-acb1-4806-baea-4342a1f3b2a8",serviceUrl: "http://localhost:85/0/ServiceModel/GeneratedObjectWebFormService.svc/SaveWebFormObjectData",redirectUrl: ""};
5. Create and configure a landing page in the [Landing pages and web forms] section
-
Go the Landing pages and web forms section and click Contact form.
-
In the created record, specify (Fig. 8):
- Name – "Contact"
- Website domains – "http://localhost:85/Landing/LandingPage.aspx"
- Status – "Active".
Fig. 8. Landing edit page 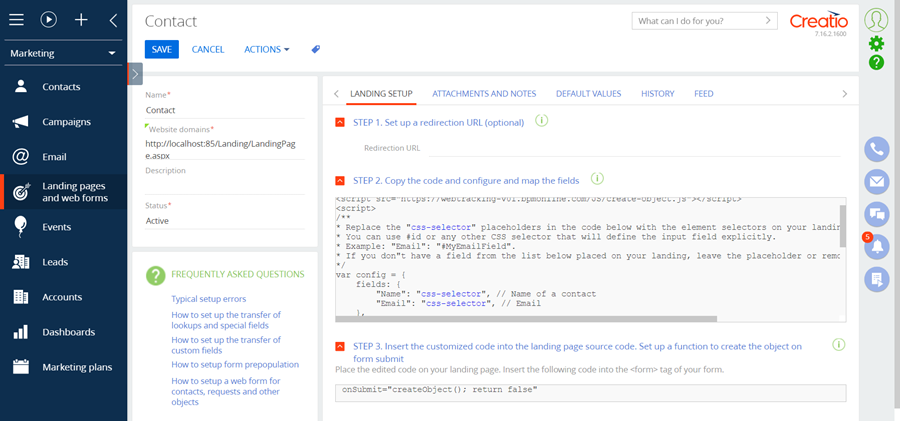
-
Save the page to apply the changes.
6. Deploy and set up a landing page with a web form
-
Create a landing page with a web form using HTML markup in any text editor. Learn more about creating a landing page and adding the landing script in the Connect your website landing page to Creatio article (user documentation).
-
To register contact data sent via the web form in Creatio, add the following fields ( HTML element) to the source code of the landing page:
- Contact name.
- Contact email.
Specify the
nameandidattributes for each field. -
To create a new
Contactobject when sending web form data to Creatio, add the JavaScript code to the landing page. Copy the source code from the STEP 2. Copy the code and configure and map the fields field on the landing record page (fig. 8).The
configobject is passed as an argument of thecreateObject()function, which is executed upon submitting the web form.Ensure that the
createObject()function is called upon submitting the web form. To do this, add theonSubmit="createObject(); return falseattribute to the<form></form>element. You can retrieve the required attribute value from the STEP 3. Insert the customized code into the landing page source code. Set up a function to create the object on form submit field on the landing edit page (Fig. 8).Complete source code of the landing page<!DOCTYPE html><html><head><meta charset="utf-8"><!--STEP 2--> <!--Copy this part from the STEP 2 field of the landing edit page--><script src="http://ajax.googleapis.com/ajax/libs/jquery/1.11.2/jquery.min.js"></script><script src="https://webtracking-v01.bpmonline.com/JS/track-cookies.js"></script><script src="https://webtracking-v01.bpmonline.com/JS/create-object.js"></script><script>/*** Replace the "css-selector" placeholders in the code below with the element selectors on your landing page.* You can use #id or any other CSS selector that will define the input field explicitly.* Example: "Email": "#MyEmailField".* If you don"t have a field from the list below placed on your landing, leave the placeholder or remove the line.*/var config = {fields: {"Name": "#name-field", // Name of a contact"Email": "#email-field", // Email},landingId: "b73790ab-acb1-4806-baea-4342a1f3b2a8",serviceUrl: "http://localhost:85/0/ServiceModel/GeneratedObjectWebFormService.svc/SaveWebFormObjectData",redirectUrl: "",onSuccess: function(response) {window.alert(response.resultMessage);},onError: function(response) {window.alert(response.resultMessage);}};/*** The function below creates a object from the submitted data.* Bind this function call to the "onSubmit" event of the form or any other elements events.* Example: <form class="mainForm" name="landingForm" onSubmit="createObject(); return false">*/function createObject() {landing.createObjectFromLanding(config)}/*** The function below inits landing page using URL parameters.*/function initLanding() {landing.initLanding(config)}jQuery(document).ready(initLanding)</script><!--STEP 2--></head><body><h1>Landing web-page</h1><div><h2>Contact form</h2><form method="POST" class="mainForm" name="landingForm" onSubmit="createObject(); return false">Name:<br><input type="text" name="Name" id="name-field"><br> Email:<br><input type="text" name="Email" id="email-field"><br><br><br><input type="submit" value="Submit"></form></div></body></html> -
Open the landing page.
-
Specify the values for the created contact (Fig. 9):
- Name – "New User"
- Email – "new_user@creatio.com".
Fig. 9. Landing page 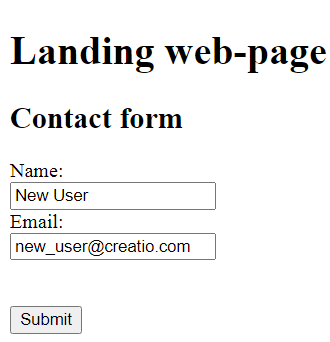
-
Click Submit to create the contact.
The contact from the landing page will only be added if the domain of the landing page is specified in the Website domains field on the landing record page.
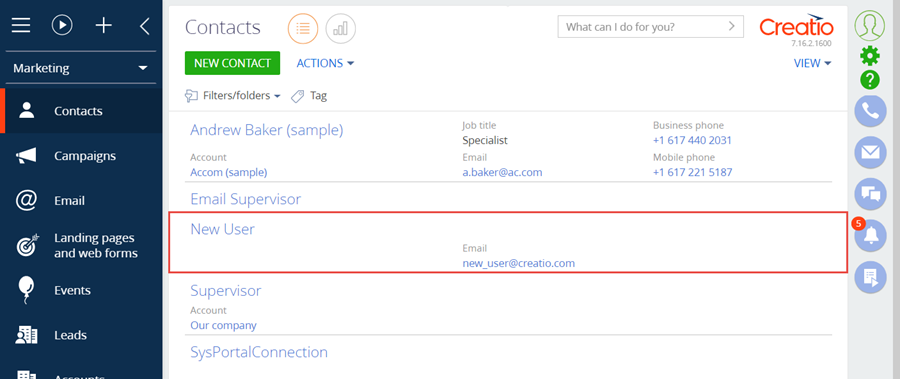
If you place the page on the local server available via the "localhost" reserved domain name (as specified in the landing page setup, Fig. 8), then the script for creating a contact from the landing page will work correctly (Fig. 10).
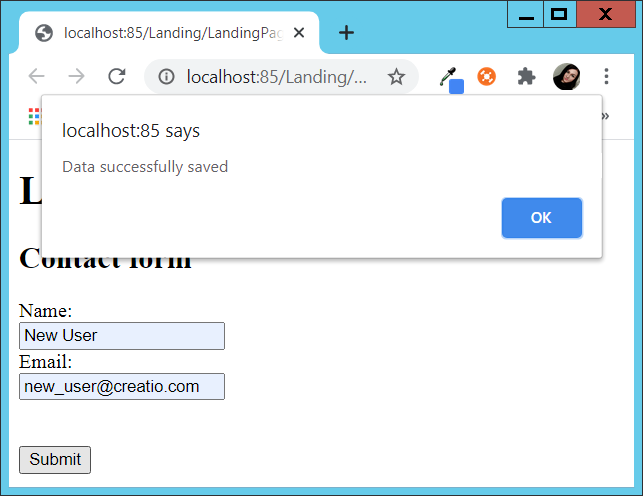
As a result, Creatio will create contact with the specified parameters (Fig. 11).