Handle system-level data using Creatio.ai in the business process
To implement the example:
- Develop AI Skill. Read more >>>
- Implement a business process that runs the AI Skill. Read more >>>
- Set up the page UI. Read more >>>
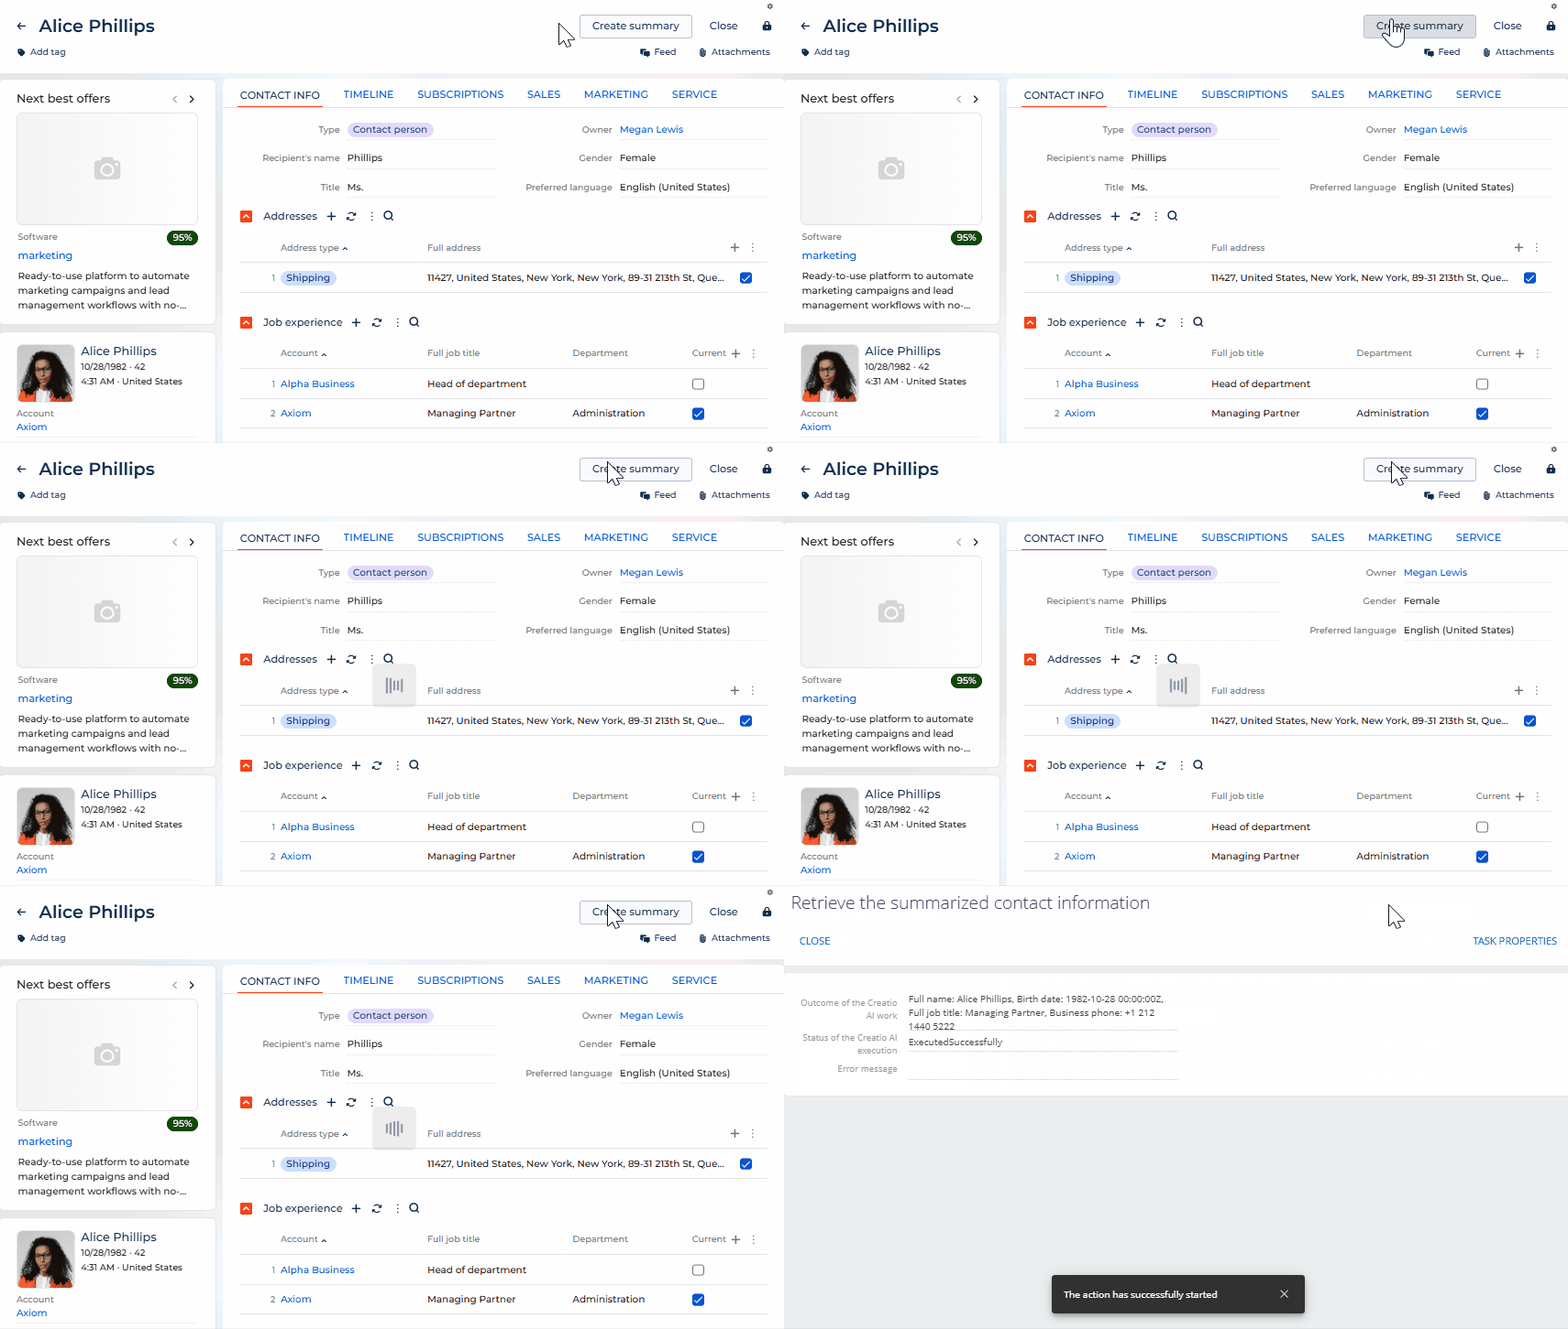
Display summarized information of a specific contact on a "Retrieve the summarized contact information" page. The "Summarize contact information" business process generates the "Retrieve the summarized contact information" page and handles the retrieved data using Creatio.ai. The page has the following parameters:
- Outcome of the Creatio.ai work that contains the Full name, Birth date, Full job title, Business phone of the contact. The data is handled by Creatio.ai.
- Status of the Creatio.ai execution
- Error message

1. Develop AI Skill
-
Open the Customer 360 app in the No-Code Designer.
-
Open the Advanced settings tab in the No-Code Designer. To do this, click
 in the top right → Application management → Application Hub → Customer 360 app → Advanced settings.
 -
Create a user-made package to develop AI Skill. To do this, click
 → Create new package → fill out the package properties → Save.
For this example, create the
sdkCreatioAIInBusinessProcessuser-made package. -
Change the current package. Instructions: Change the current package.
For this example, change the current package to
sdkCreatioAIInBusinessProcessuser-made package. -
Open the Creatio.ai setup section. To do this, click
 in the top right → System setup → Creatio.ai setup.
 -
Add an AI Skill. To do this, click New.
-
Fill out the properties of the AI Skill.
Property
Property value
Title*
Contact summary
Description*
AI Skill that summarizes contact information
Status*
Active
Usage mode*
API
-
Specify the user's goal when using the AI Skill.
Property
Property value
Prompt
Your task is to summarize the following contact information: Full name, Birth date, Full job title, Business phone.
-
Specify input parameters of AI Skill.
-
Go to the Input parameters block.
-
Click New.
-
Fill out the parameter properties.
Code
Name
Description
Data type
ContactName
Contact name
Parameter that contains contact name
Text (500 characters)
ContactInfo
Contact info
Parameter that contains detailed contact information
Unlimited length text
-
-
Specify output parameters of AI Skill.
-
Go to the Output parameters block.
-
Click New.
-
Fill out the parameter properties.
Code
Name
Description
Data type
CreatioAIResult
Outcome of the Creatio.ai work
Parameter that contains the outcome of the Creatio.ai work
Text (500 characters)
ExecutionStatus
Status of the Creatio.ai execution
Parameter that contains the status of the Creatio.ai execution
Text (500 characters)
-
-
Save the changes.
As a result, Creatio will add the "Contact summary" AI Skill to the Creatio.ai setup section.

2. Implement a business process that runs the AI Skill
1. Create a business process
-
Open the Customer 360 app in the No-Code Designer.
-
Open the Advanced settings tab in the No-Code Designer. To do this, click
 in the top right → Application management → Application Hub → Customer 360 app → Advanced settings.
 -
Select a user-made package to create a business process.
For this example, select the
sdkCreatioAIInBusinessProcessuser-made package. -
Create the business process schema. To do this, click Add → Business process.
-
Open the Settings tab.
-
Fill out the schema properties.
For this example, use the following schema properties.
Property
Property value
Title
Summarize contact information
Code
UsrSummarizeContactInformation
-
Save the changes.
As a result:
- The "Summarize contact information" business process will be created.
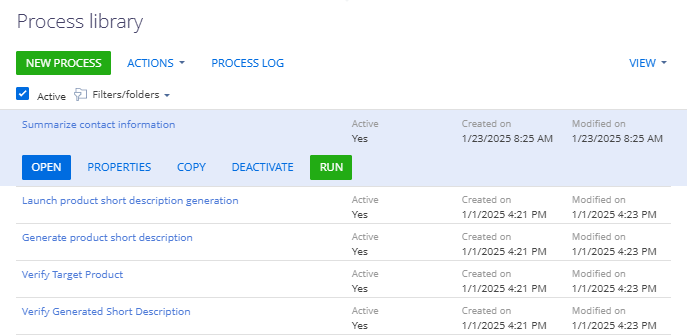
- Creatio will add the "Summarize contact information" business process to the Process library section.

2. Set up the business process parameters
-
Open the properties of the business process schema. To do this, click an arbitrary place in the working area of the Process Designer.
-
Open the Parameters tab.
-
Add the business process parameters.
For this example, add the parameter that contains the list of contacts. To do this:
-
Click Add parameter and select a parameter of the needed type.
-
Fill out the parameter properties.
Element
Element type
Property
Property value
Parameter that contains the list of contacts
Lookup
Title
Contact
Code
ContactList
Data type
Lookup
Lookup
Contact
Direction
Input
-
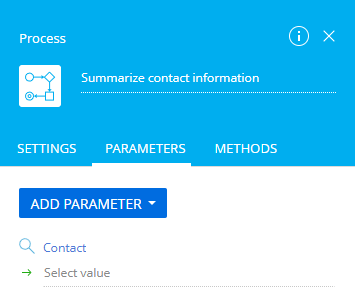
As a result, the Parameters tab of the "Summarize contact information" business process will be as follows.

3. Implement reading contact information
-
Add a Read data element. To do this, click
 → place the Read data element between the Simple and Terminate page elements in the working area of the Process Designer.
 -
Fill out the element properties.
Property
Property value
Title
Read contact information
Which object to read data from?
Contact
How to filter records?
- Click Add condition. This opens the Select column window.
- Select "Id" in the Column property.
- Click Select.
- Select Compare with Parameter. This opens the Select parameter window.
- Select the parameter. To do this, open the Process parameters tab → click Contact → Select.
Leave default values for other element properties.
-
Save the changes.
As a result:
-
The setup area of the "Read contact information" element will be as follows.

-
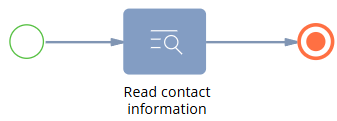
The diagram of the "Summarize contact information" business process will be as follows.

4. Implement running the AI Skill
-
Add a Call Creatio.ai element. To do this, click
 → place the Call Creatio.ai element between the Read data system action and Terminate page element in the working area of the Process Designer.
 -
Fill out the element properties.
Property
Property value
Title
Run the AI Skill
Which skill to call?
Contact summary
Contact info
-
Click
 → Formula. This opens the Formula window.
 -
Add the formula:
"Birth date: " + [#Read contact information.First item of resulting collection.Birth date#] + " Full job title: " + [#Read contact information.First item of resulting collection.Full job title#] + " Business phone: " + [#Read contact information.First item of resulting collection.Business phone#]
-
Save the changes.
Contact name
-
Click
 → Formula. This opens the Formula window.
 -
Add the formula:
"Full name: " + [#Read contact information.First item of resulting collection.Full name#]
-
Save the changes.
-
-
Save the changes.
As a result, the diagram of the "Summarize contact information" business process will be as follows.

5. Implement a separate page to display the outcome of the Creatio.ai work
-
Add an auto-generated page.
-
Click
 → place the Auto-generated page element between the Call Creatio.ai system action and Terminate page element in the working area of the Process Designer.
 -
Fill out the element properties.
Property
Property value
Title
Retrieve the summarized contact information
Page title
Retrieve the summarized contact information
Creatio populates the Contact property using the "[#System variable.Current user contact#]" value.
-
-
Add the parameters of the AI Skill.
For this example, add the following parameters:
- parameter that contains the outcome of the Creatio.ai work
- parameter that contains the status of the Creatio.ai execution
- parameter that contains the error message if error occurs during the AI Skill execution
To do this:
-
Go to the Page Items block.
-
Click
 and select a parameter of the needed type.
 -
Fill out the parameter properties.
Element
Element type
Property
Property value
Parameter that contains the outcome of the Creatio.ai work
Text field
Title
Outcome of the Creatio.ai work
Code
CreatioAIResult
Is multiline
Select the checkbox
Value
Click
 → Process parameter → Process elements tab → Run the AI Skill → Outcome of the Creatio.ai work → Select. This populates the property using the "[#Run the AI Skill.Outcome of the Creatio.ai work#]" value.
Parameter that contains the status of the Creatio.ai execution
Text field
Title
Status of the Creatio.ai execution
Code
ExecutionStatus
Value
Click
 → Process parameter → Process elements tab → Run the AI Skill → Status of the Creatio.ai execution → Select. This populates the property using the "[#Run the AI Skill.Status of the Creatio.ai execution#]" value.
Parameter that contains the error message if error occurs during the AI Skill execution
Text field
Title
Error message
Code
ErrorMessage
Is multiline
Select the checkbox
Value
Click
 → Process parameter → Process elements tab → Run the AI Skill → Error message → Select. This populates the property using the "[#Run the AI Skill.Error message#]" value.
As a result, the Page Items property block of the "Retrieve the summarized contact information" auto-generated page will be as follows.

As a result, the diagram of the "Summarize contact information" business process will be as follows.

3. Set up the page UI
-
Open the Customer 360 app in the No-Code Designer.
-
Open the Contacts form page.
-
Add a button.
For this example, add the button that calls the "Summarize contact information" business process.
To do this:
-
Add a Button type component to the toolbar of the Freedom UI Designer.
-
Click
 and fill out the button properties.
Element
Property
Property value
Button that calls the "Summarize contact information" business process
Title
Create summary
Style
Outline
Action
Run process
Which process to run?
Summarize contact information
How to run the process?
For the selected page
-
-
Save the changes.
View the result
- Open the Contacts section.
- Open a contact that has an arbitrary name. For example, "Alice Phillips."
- Click Create summary.
As a result, Creatio will display the "Retrieve the summarized contact information" page that include the summarized information of a specific contact. View the result >>>