Add a custom action menu item to the communication option that has a custom display format
To implement the example:
- Implement a custom template for display format. Read more >>>
- Implement a custom action menu. Read more >>>
1. Implement a custom template for display format
-
Implement a custom template for display format using a custom Freedom UI component. Instructions: Custom UI component implemented using remote module.
-
Change the display format.
-
Open the Lookups section. To do this, click
 in the top right → System setup → Lookups.
 -
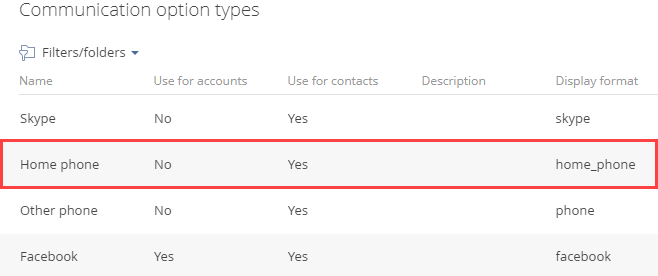
Open the Communication option types lookup.
-
Instructions: Change the display format (optional) (steps 1–3).
-
Change the Display format column of the Home phone communication option from "phone" to "home_phone."
-
-
Set up the custom display format.
-
Open the contact form page. To do this, click
in the top right → Application management → Application Hub → Customer 360 → Contacts form page. -
Add the source code of the Communication options component to the source code of the Contacts form page page. Instructions: Add a custom action menu item to all communication options (step 2).
-
Add a localizable string that stores the name of the custom action menu item.
-
Create a localizable string. Instructions: Add a localizable string.
-
Fill out the localizable string parameters.
Parameter
Parameter value
Code
ShowNotification_caption
Value
Show notification
-
Save the changes.
-
-
Set up the properties of the
home_phoneconfiguration object in the properties of thetemplatesconfiguration object.viewConfigDiff schema sectionviewConfigDiff: /**SCHEMA_VIEW_CONFIG_DIFF*/[{"operation": "merge",/* Code of the "Communication options" component. */"name": "ContactCommunicationOptions","values": {"templates": {/* Add a custom display format. */"home_phone": {/* Type of the custom display format. Enter existing type in the "type" property. Otherwise, an error occurs. */"type": "crt.PhoneInput","phoneAsLink": true,"displayAsPhone": true,"displayPhoneMask": true,...}}}},...]/**SCHEMA_VIEW_CONFIG_DIFF*/, -
Save the changes.
-
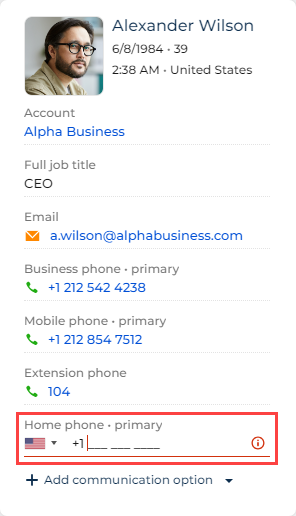
As a result, the Home phone communication option will have the home_phone display format.
2. Implement a custom action menu
-
Open the contact form page. To do this, click
in the top right → Application management → Application Hub → Customer 360 → Contacts form page. -
Set up the action menu properties in the
toolsarray of configuration objects. -
Set up the properties of the action menu item in the
menuItemsarray of configuration objects.viewConfigDiff schema sectionviewConfigDiff: /**SCHEMA_VIEW_CONFIG_DIFF*/[{"operation": "merge",/* Code of the "Communication options" component. */"name": "ContactCommunicationOptions","values": {"templates": {/* Add a custom display format. */"home_phone": {...,/* Action menu of the custom display format. */"tools": [{/* Type of the custom display format. Enter existing type in the "type" property. Otherwise, an error occurs. */"type": 'crt.Button',"icon": 'actions-button-icon',"iconPosition": 'only-icon',"color": 'default',"size": 'none',"clickMode": 'menu',"displayType": 'text',"classes": ['actions-btn'],"menuItems": [/* Action menu item. */{"type": 'crt.MenuItem',/* The name of the custom action menu item. */"caption": '#ResourceString(ShowNotification_caption)#',/* The icon of the custom action menu item. */"icon": 'message-warn-button-icon',/* Property that controls the visibility of the custom action menu item. */"visible": true,"clicked": {/* Bind the "crt.NotificationRequest" request to the "clicked" event of the custom action menu item. */"request": 'crt.NotificationRequest',/* Add custom request parameters. */"params": {"message": 'Notification message'},}}]}]}}}},...]/**SCHEMA_VIEW_CONFIG_DIFF*/, -
Save the changes.
-
Clear the cache.
-
Refresh the page that contains the modified custom action menu.
View the result
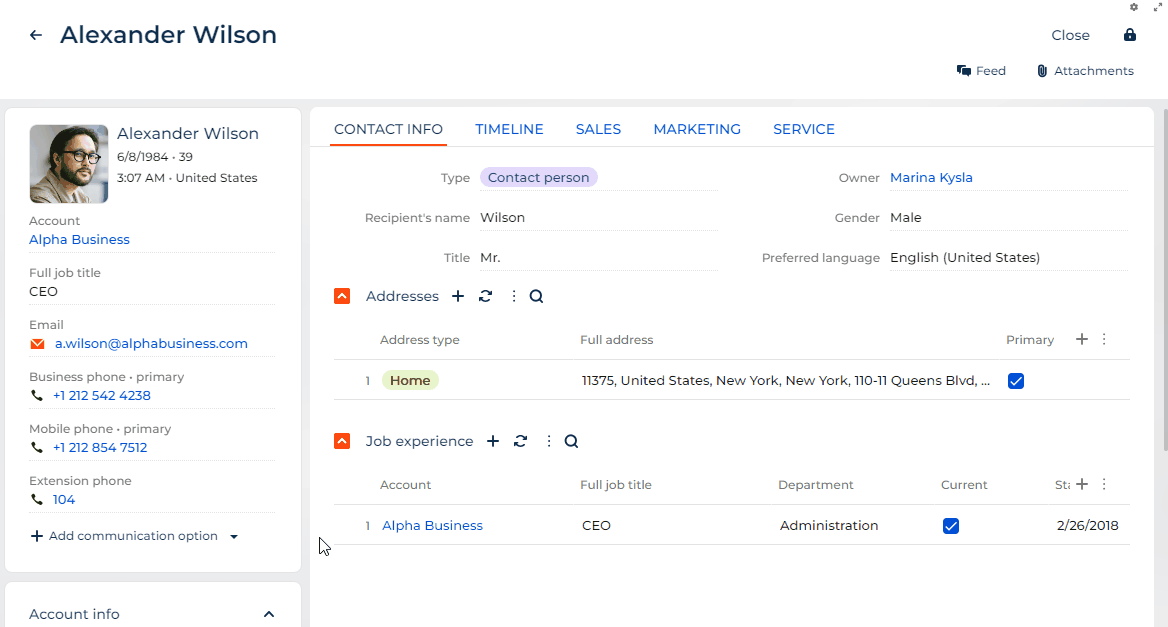
- Open a contact page. For example, Alexander Wilson.
- Make sure Creatio displays the Show notification item in the action menu of all communication options.
- Add the Home phone communication option. To do this, click Add communication option → Phone → Home phone.
- Click
 → Show notification for the Home phone communication option.
As a result, Creatio will display the Notification message message. View result >>>
Source code
define("Contacts_FormPage", /**SCHEMA_DEPS*/[]/**SCHEMA_DEPS*/, function/**SCHEMA_ARGS*/()/**SCHEMA_ARGS*/ {
    return {
        viewConfigDiff: /**SCHEMA_VIEW_CONFIG_DIFF*/[
            {
                "operation": "merge",
                /* Code of the "Communication options" component. */
                "name": "ContactCommunicationOptions",
                "values": {
                    "templates": {
                        /* Add a custom display format. */
                        "phone": {
                            /* Type of the custom display format. Enter existing type in the "type" property. Otherwise, an error occurs. */
                            "type": "crt.PhoneInput",
                            "phoneAsLink": true,
                            "displayAsPhone": true,
                            "displayPhoneMask": true,
                            /* Action menu of the custom display format. */
                            "tools": [{
                                "type": 'crt.Button',
                                "icon": 'actions-button-icon',
                                "iconPosition": 'only-icon',
                                "color": 'default',
                                "size": 'none',
                                "clickMode": 'menu',
                                "displayType": 'text',
                                "classes": ['actions-btn'],
                                "menuItems": [
                                    /* Action menu item. */
                                    {
                                        "type": 'crt.MenuItem',
                                        /* The name of the custom action menu item. */
                                        "caption": '#ResourceString(ShowNotification_caption)#',
                                        /* The icon of the custom action menu item. */
                                        "icon": 'message-warn-button-icon',
                                        /* Property that controls the visibility of the custom action menu item. */
                                        "visible": true,
                                        "clicked": {
                                            /* Bind the "crt.NotificationRequest" request to the "clicked" event of the custom action menu item. */
                                            "request": 'crt.NotificationRequest',
                                            /* Add custom request parameters. */
                                            "params": {
                                                "message": 'Notification message'
                                            },
                                        }
                                    }
                                ]
                            }]
                        }
                    }
                }
            }
        ]/**SCHEMA_VIEW_CONFIG_DIFF*/,
        viewModelConfigDiff: /**SCHEMA_VIEW_MODEL_CONFIG_DIFF*/[]/**SCHEMA_VIEW_MODEL_CONFIG_DIFF*/,
        modelConfigDiff: /**SCHEMA_MODEL_CONFIG_DIFF*/[]/**SCHEMA_MODEL_CONFIG_DIFF*/,
        handlers: /**SCHEMA_HANDLERS*/[]/**SCHEMA_HANDLERS*/,
        converters: /**SCHEMA_CONVERTERS*/{}/**SCHEMA_CONVERTERS*/,
        validators: /**SCHEMA_VALIDATORS*/{}/**SCHEMA_VALIDATORS*/
    };
});