Localize core localizable values of Creatio
This functionality requires CommonFeatures.UseCustomCoreLocalizations feature to be turned on. Learn more: Manage an existing additional feature.
You can translate core localizable values of Creatio, for example, buttons and confirmation messages, to required languages. Core localizable values are static and available out-of-the-box. Creatio users cannot add new core localizable values. The only case when new entries can be added is an update to a new Creatio version. The localization process involves the following steps:
- Prepare the core translation file. Read more >>>
- Install core translations. Read more >>>
- Save the translation file to Creatio for backup purposes (optional). Read more >>>
- Restore the translation file in Creatio for backup purposes (optional). Read more >>>
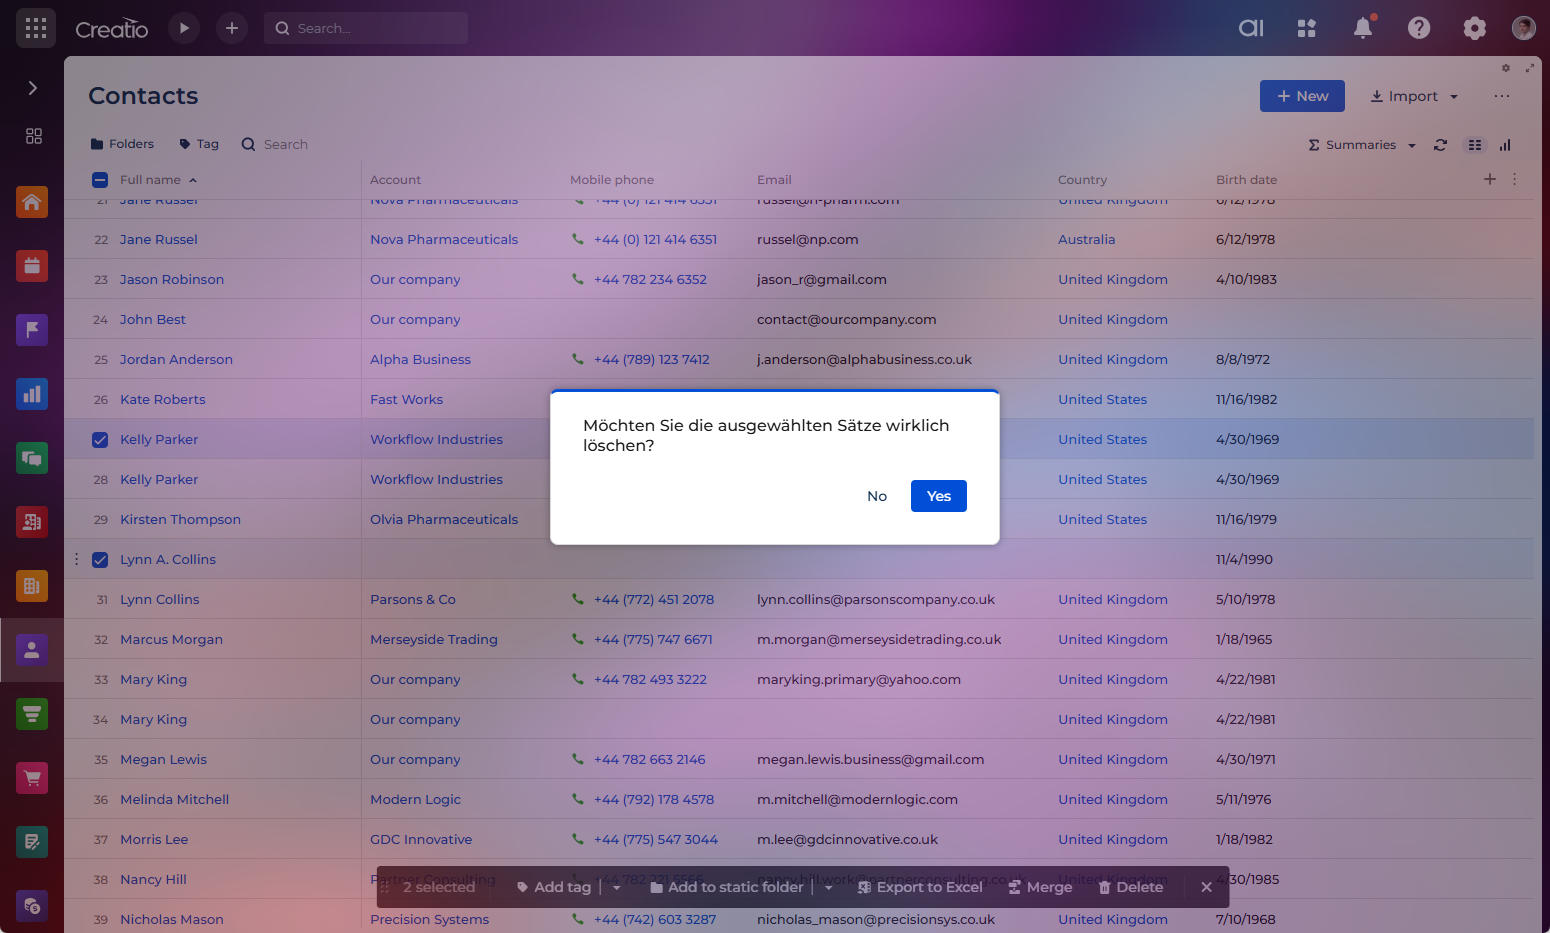
Translate the confirmation window for record deletion to German and back up the translation.
1. Prepare the core translation file
-
Click
 to open the System Designer.
 -
Go to the System setup block → Translation.
-
Click Actions → Download core translations. Creatio will download an
.xlsxfile that contains the following:- Resources sheet: captions available for translation.
- Culture names sheet: codes of supported cultures.
-
Open the downloaded file and go to the Resources sheet.
-
Find the required line by the value available for basic culture (English). For this example, this is the row whose key is "Monorepo::Application::ConfirmationDialog.DeleteRecordsConfirmation."
-
Update translations as needed:
- Edit values in columns that correspond to culture codes, for example, "de-DE."
- Add a new culture column only if the culture exists on the Culture names sheet.
- Remove rows for keys that you do not want to override.
- Remove unused culture columns if they are not required.
For this example, add "Möchten Sie die ausgewählten Sätze wirklich löschen?" to the "en-US" column.
-
Save the file.
2. Install core translations
For Creatio cloud
- Send the updated
.xlsxtranslation file to Creatio support with a request to install it: support@creatio.com. - Wait for confirmation that the translations are installed.
During installation, Creatio has to restart. Plan this activity for a maintenance window in production environments.
For Creatio on-site
-
Download ResKit utility: Download. ResKit requires .NET 8 runtime to be installed: Download.
-
Open the command prompt app, for example, Windows Command Prompt, and go to the directory that contains the ResKit utility.
-
Run the validation command at the command prompt:
ResKit.exe validate -i PathToFile\CoreTranslations.xlsxwhere
-i PathToFile\CoreTranslations.xlsxis the path to the Excel file that contains translations.If ResKit reports errors, for example, invalid culture codes or duplicate keys, fix them in the
.xlsxfile and repeat validation. -
Generate localization files from the validated
.xlsxfile.For Creatio on .NET Framework
ResKit.exe build -i PathToFile\CoreTranslations.xlsx -o PathToTranslationswhere:
-i PathToFile\CoreTranslations.xlsxis path to the Excel file that contains translations.-o PathToTranslationsis output directory where to create generated.resxor.jsonfiles.
For Creatio on .NET 8
ResKit.exe build -i PathToFile\CoreTranslations.xlsx -o PathToTranslations --isDotNetwhere:
-i PathToFile\CoreTranslations.xlsxis path to the Excel file that contains translations.-o PathToTranslationsis output directory where to create generated.resxor.jsonfiles.--isDotNetspecifies to generate files for .NET 8 application structure.
-
Verify that the output directory includes the "Creatio" directory that contains generated localization files.
-
Copy the contents of the generated "Creatio" directory to the root directory of the Creatio application.
-
Restart the Creatio website.
As a result, the updated core translations will become available after you restart Creatio.
3. Save the translation file to Creatio for backup purposes (optional)
You can save the translation file to Creatio. This helps restore translations after an update if the original file is lost.
-
Ensure the user or technical user on whose behalf to use the ResKit utility has sufficient permissions. Out of the box, Creatio includes "Creatio ResKit utility" technical user that has the required permissions preconfigured. Learn more: Manage technical users. If you want to use a different user, grant them the following permissions:
- "Access to OData" (
CanUseODataServicecode) system operation. Learn more: System operation permissions. - Read, create, and edit access to the "Uploaded file" (
SysFilecode) and "History of source files for core translations" (SysTranslationRepositorycode) objects. Learn more: Object operation permissions.
- "Access to OData" (
-
Upload the translation file using ResKit. We recommend using OAuth 2.0 authentication, but you can use cookie-based authentication if needed. Only OAuth 2.0 authentication is available for the "Creatio ResKit utility" technical user. Learn more about OAuth 2.0: OAuth 2.0 authorization types overview.
OAuth 2.0 authentication
ResKit.exe upload -i PathToFile\CoreTranslations.xlsx --url https://my.creatio.com \
  --identityTokenUrl https://my-is.creatio.com/connect/token \
  --clientId "my-client-id" \
  --clientSecret "my-client-secret"
where:
-i PathToFile\CoreTranslations.xlsxis path to the input file to upload.--url https://my.creatio.comis Creatio instance URL.--isDotNetis required when uploading to .NET 8 application, otherwise .NET Framework application is assumed.--identityTokenUrl https://my-is.creatio.com/connect/tokenis OAuth 2.0 identity token URL, for example,/connect/token.--clientId "my-client-id"is OAuth 2.0 client ID.--clientSecret "my-client-secret"is OAuth 2.0 client secret.
Cookie-based authentication
ResKit.exe upload -i PathToFile\CoreTranslations.xlsx --url https://my.creatio.com --user "admin" --password "secret"where:
-i PathToFile\CoreTranslations.xlsxis path to the input file to upload.--url https://my.creatio.comis Creatio instance URL.--user "admin"is user name for cookie-based authentication.--password "secret"is user password for cookie-based authentication.--isDotNetis required when uploading to .NET 8 application, otherwise .NET Framework application is assumed.
4. Restore the translation file from Creatio for backup purposes (optional)
-
Ensure the user or technical user on whose behalf to use the ResKit utility has sufficient permissions. Out of the box, Creatio includes "Creatio ResKit utility" technical user that has the required permissions preconfigured. Learn more: Manage technical users. If you want to use a different user, grant them the following permissions:
- "Access to OData" (
CanUseODataServicecode) system operation. Learn more: System operation permissions. - Read, create, and edit access to the "Uploaded file" (
SysFilecode) and "History of source files for core translations" (SysTranslationRepositorycode) objects. Learn more: Object operation permissions.
- "Access to OData" (
-
Download the latest saved translation file. We recommend using OAuth 2.0 authentication, but you can use cookie-based authentication if needed. Only OAuth 2.0 authentication is available for the "Creatio ResKit utility" technical user. Learn more about OAuth 2.0: OAuth 2.0 authorization types overview.
OAuth 2.0 authentication
ResKit.exe download -o PathToFile\CoreTranslations.xlsx --url https://my.creatio.com ^
  --identityTokenUrl https://my-is.creatio.com/connect/token ^
  --clientId "my-client-id" ^
  --clientSecret "my-client-secret"
where:
-o PathToFile\CoreTranslations.xlsxis path to the output file to download.--url https://my.creatio.comis Creatio instance URL.--isDotNetis required when uploading to .NET 8 application, otherwise .NET Framework application is assumed.--identityTokenUrl https://my-is.creatio.com/connect/tokenis OAuth 2.0 identity token URL, for example,/connect/token.--clientId "my-client-id"is OAuth 2.0 client ID.--clientSecret "my-client-secret"is OAuth 2.0 client secret.
Cookie-based authentication
ResKit.exe download -o PathToFile\CoreTranslations.xlsx --url https://my.creatio.com --user "admin" --password "secret"where:
-o PathToFile\CoreTranslations.xlsxis path to the output file to download.--url https://my.creatio.comis Creatio instance URL.--user "admin"is user name for cookie-based authentication.--password "secret"is user password for cookie-based authentication.--isDotNetis required when uploading to .NET 8 application, otherwise .NET Framework application is assumed.
-
Generate localization files again by following the steps described on Step 1.