Source code
You can download the package with an implementation of the case using the following link.
Case implementation algorithm
1. Create a new report
To do this:
- Open the System Designer by clicking
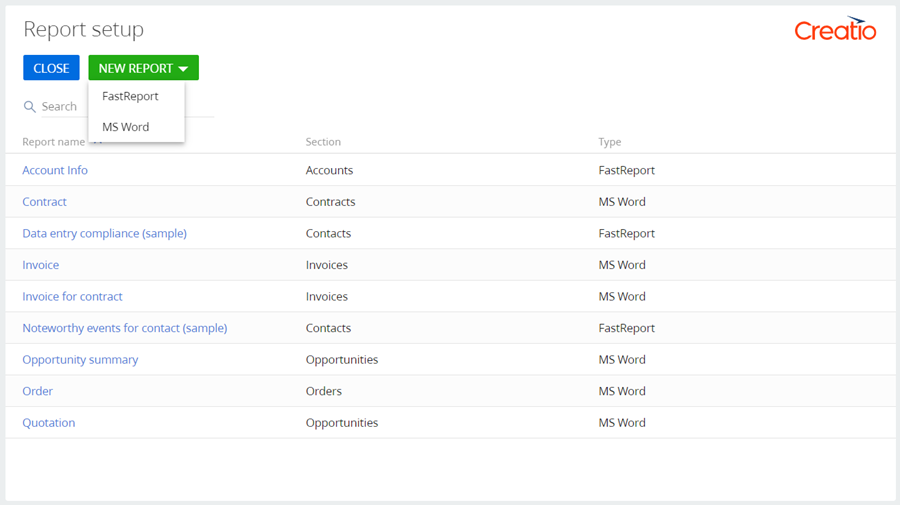
 . In the System setup block, click the Report setup link.
 - Click New report —>MS Word.
2. Set up the report display parameters
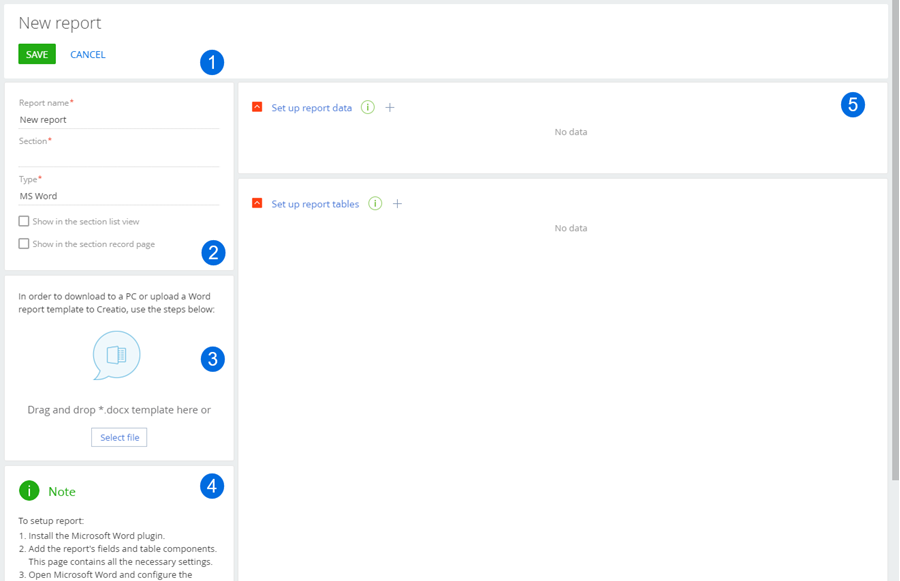
Set the following values in the parameter setup area (2):
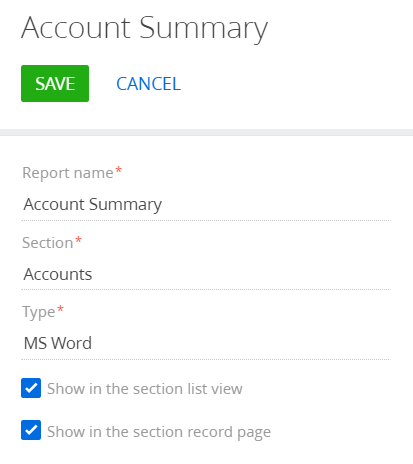
- Report title – "Account Summary".
- Section – "Accounts”.
- Show in the section list view.
- Show in the section record page.
3. Implement custom macros
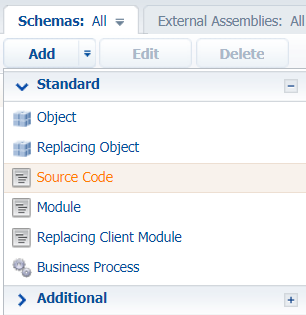
Go to the [Advanced settings] section –> Configuration –> Custom package –> the Schemas tab. Click Add —> Source Code. Learn more about creating a schema of the Source Code type in the Create the Source code schema" article.
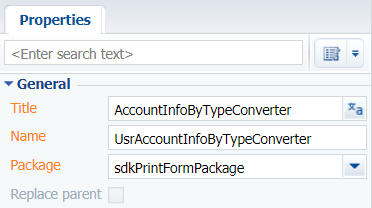
Specify the following parameters for the created object schema:
- Title – "AccountInfoByTypeConverter".
- Name – "UsrAccountInfoByTypeConverter".
Implement a macro class for receiving additional information depending on the account type. The complete source code of the module is available below:
Populate the localizable strings of the report with the following values:
| Name | English (United States) | Russian (Russia) |
|---|---|---|
| PartnerAdditional | Number of employees {0} persons | Number of employees {0} people |
| CustomerAdditional | Annual turnover {0} | Annual revenue {0} |
After making changes, save and publish the schema.
Go to the Advanced settings section –> Configuration –> Custom package –> the Schemas tab. Click Add —> Source Code.
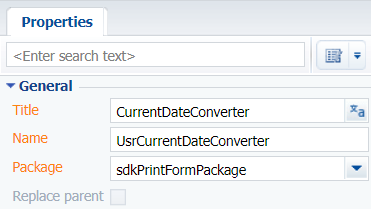
Specify the following parameters for the created object schema:
- Title – "CurrentDateConverter".
- Name – "UsrCurrentDateConverter".
Implement a macro class for retrieving the current date. The complete source code of the module is available below:
After making changes, save and publish the schema.
Go to the Advanced settings section –> Configuration –> Custom package –> the Schemas tab. Click Add —> Source Code.
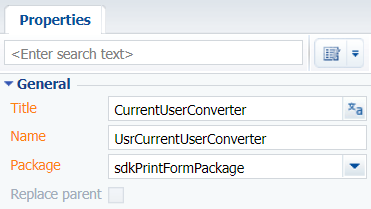
Specify the following parameters for the created object schema:
- Title – "CurrentUserConverter"
- Name – "UsrCurrentUserConverter".
Implement a macro class for retrieving the current user. The complete source code of the module is available below:
After making changes, save and publish the schema.
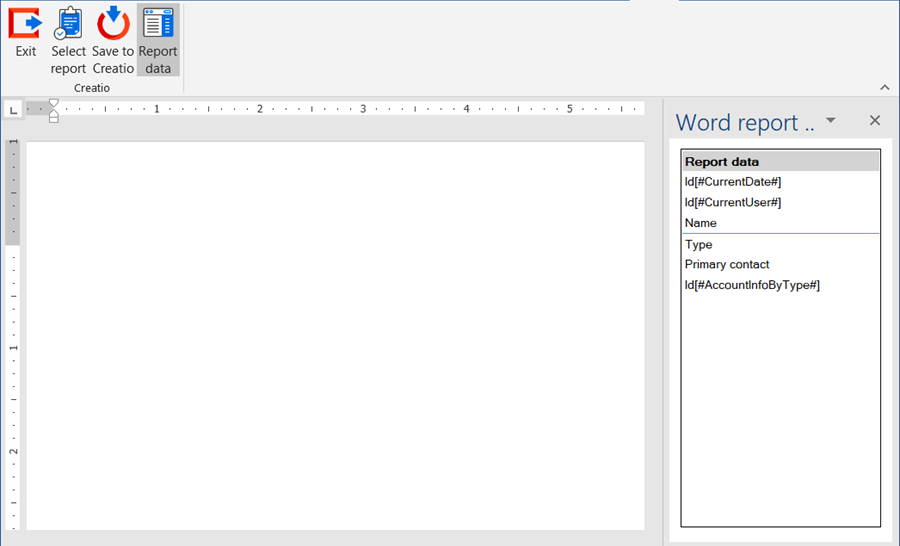
4. Set up the report fields
In the Set up report data block of the section working area (5), set up the fields to display in the report. To do this, click  and select the Id column in the drop-down Column list. The current Id column will later be used in the custom macro to retrieve the current date.
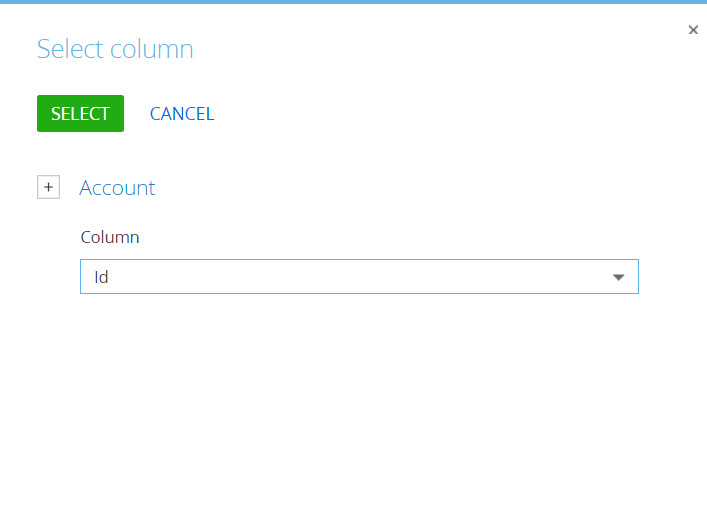
Click Select.
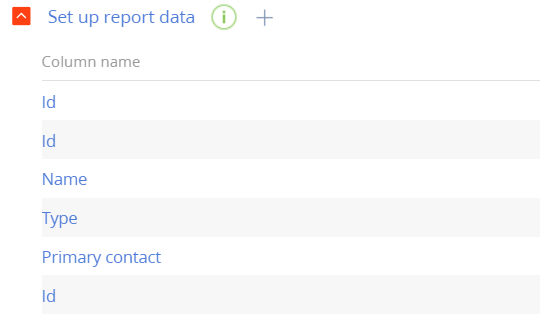
Use the same procedure to add Id (the column will later be used in the custom macro for retrieving the current user), Name, Type, Primary contact, and Id (the column will later be used in the custom macro for receiving additional information depending on the account type) to the column template.
The list of columns after this step is presented below.
5. Attach custom macro tags to the column names
Change the property of the Id column of an Account object. To do this, take the following steps:
- In the Set up report data block of the section working area (5), double-click the title of the Id column or click
 in the column title bar.
 - Change the [Id] value of the Title field to [Id[#CurrentDate#]]. [#CurrentDate#] is a the custom macro tag for retrieving the current date.
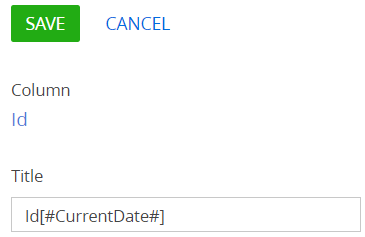
Click Save.
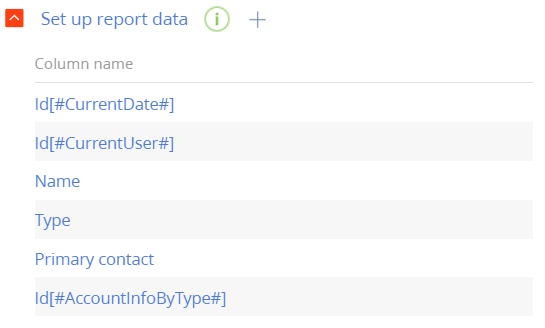
Use the same procedure to add more custom macro tags to the names of other Id columns.
-
[#CurrentUser]# – for receiving the current user.
- [#AccountInfoByType#] – for receiving additional information depending on the account type.
The list of columns after adding custom macro tags is presented below.
Click Save.
6. Set up the report template layout and upload the template to Creatio
To set up the template:
-
Open any MS Word file.
-
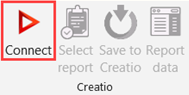
Click Connect on the Creatio plug-in toolbar.
-
Enter the username and password of the Creatio user. Click
 next to the Server field.
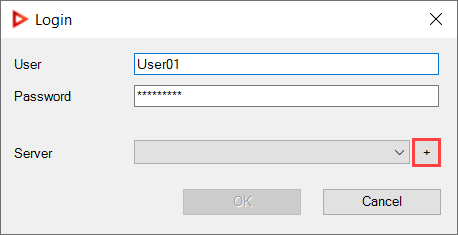
-
Click New. Enter the server parameters.
Click OK.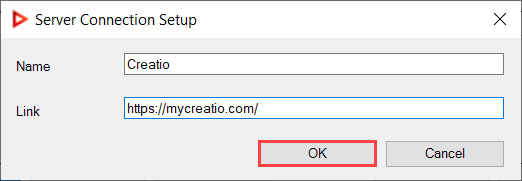
-
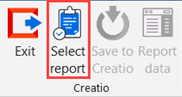
Click Select report on the Creatio plug-in toolbar.
-
Select the "Account summary" and click OK.
The report setup window looks as follows: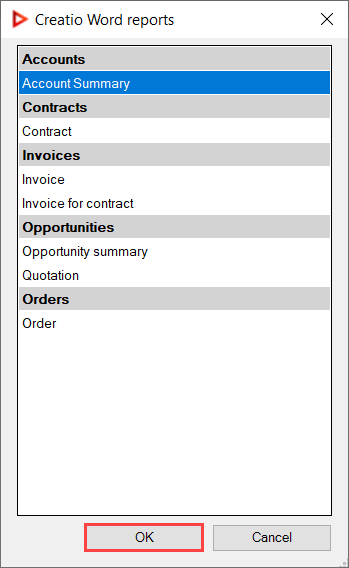
-
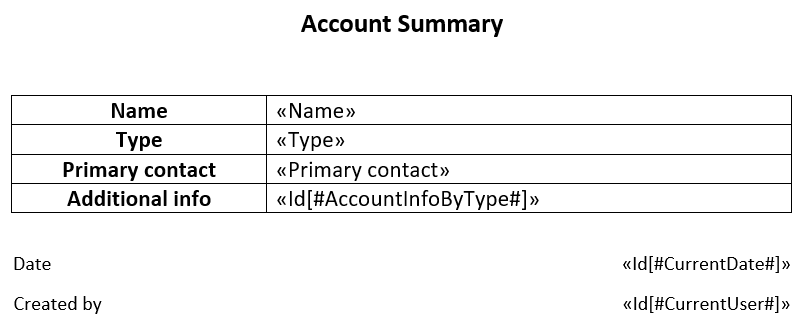
Set up the template layout. Learn more about setting up a report template in the "Design report layout via the Creatio MS Word plug-in" article.
After the setup, the report looks as follows:
-
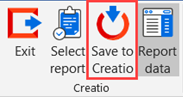
Click Save to Creatio to load the configured report template in Creatio.
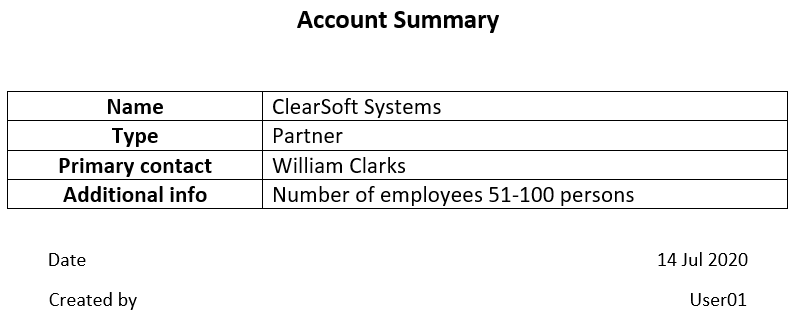
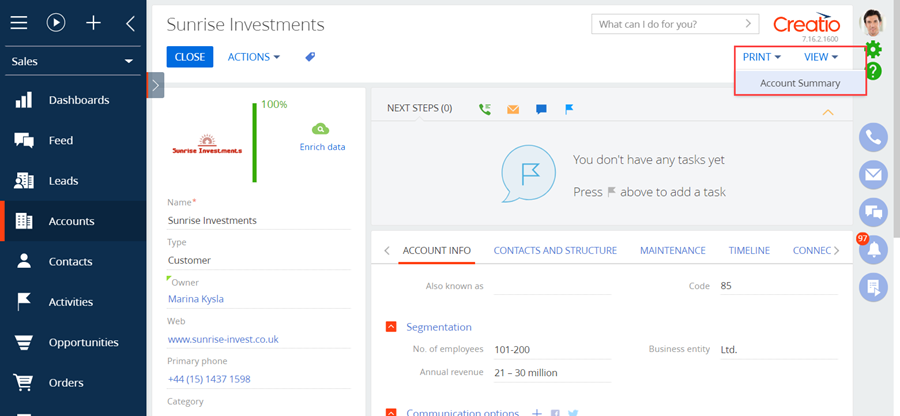
As a result, the "Account Summary" report will be available on the contact page under Print.
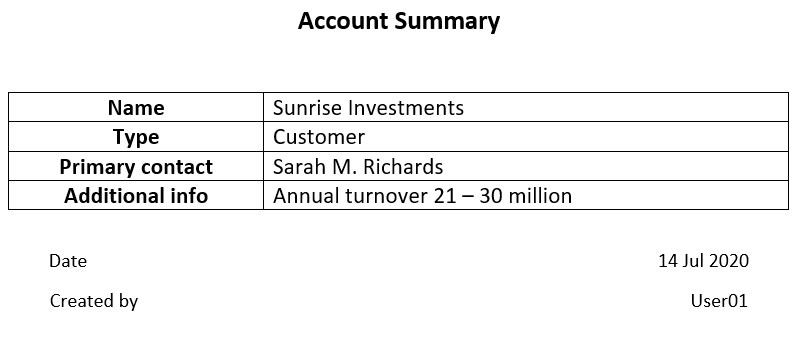
A report for accounts of the Customer type looks as follows.
A report for accounts of the Partner type looks as follows.