
Client Modules are separate functional blocks, downloaded and run on-demand by the AMD technology. System functions are implemented via client modules. All client modules in Creatio share description structures that correspond with the AMD module description format. Custom module types are described in the "Module types and their specificities” article.
The following client module types are available in Creatio:
- non-visual modules (module schema)
- visual modules (view module schema)
- expanding modules and replacing client modules (Replacing schema of the custom model).
The procedure for creating a custom schema differs for various types of schemas.
Creating a new schema of the non-visual module
Non-visual modules represent system functionality that is not associated with data binding or data display in the UI. Examples of non-visual modules in the system are business rule modules (BuisnessRuleModule) and utility modules that implement utility functions.
To create a non-visual module schema:
1. Go to the Configuration section and select custom package to add a new schema.
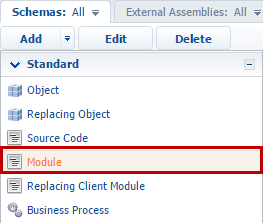
2. On the Schemas tab, select Add — Module.
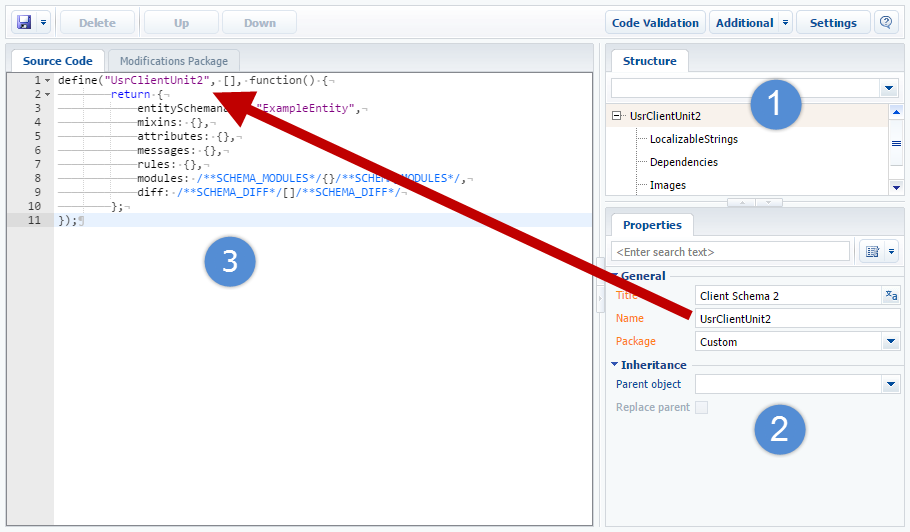
3. Select the root element of the structure in the custom module designer (1) and fill out the properties of the generated schema module (2):
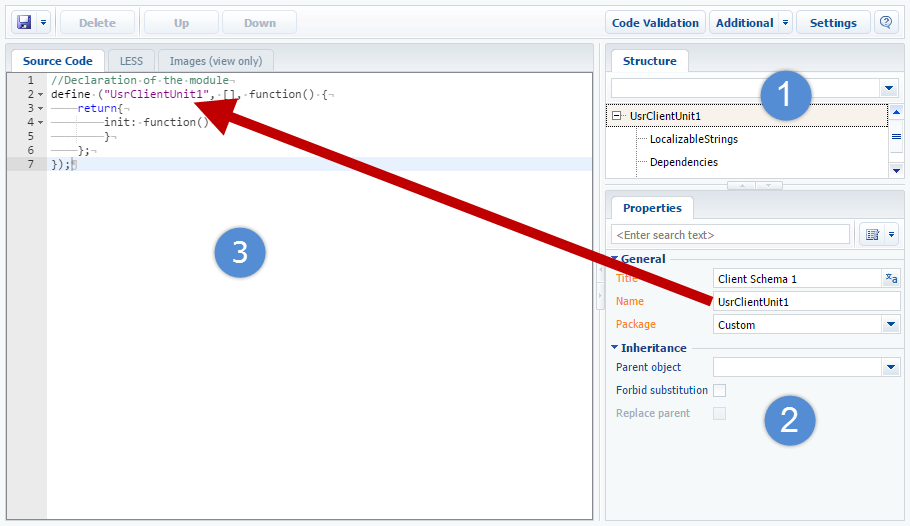
The main properties of the module schema are:
- [Name] – schema name. It may contain only Latin characters and numbers. Contains the prefix specified in the [Object name prefix] system setting (SchemaNamePrefix).
- [Title] – schema title. It can be localized.
- [Package] – custom package where the schema is generated.
4. Add the module source code to the Source code tab (3). You need to make sure that the module name in the define() function is the same as the module schema name.
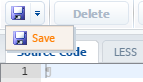
5. Save the module schema after making all the changes:
Creating a new view model schema.
Custom view model schema is a visual module schema. It is a configuration object for generating views and view models by the ViewGenerator and ViewModelGenerator generators. For more information about the schema structure, please see the “Client view model schemas” article.
To create a schema of the visual module:
1. Go to the Configuration section and select custom package to add a new schema.
2. Select one of the commands to add the schema from the “Additional” commands menu on the Schemas tab:
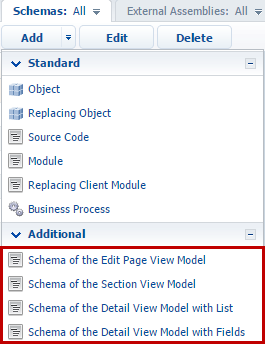
You can add the following types of visual module schemas:
- [Schema of the Edit Page View Model] – a schema of the edit page of section record.
- [Schema of the Section View Model] – a schema of the section page with the list and dashboards.
- [Schema of the Detail View Model with List] – a schema of the edit page of detail with a list.
- [Schema of the Detail View Model with Fields] – a schema of the edit page of detail with fields.
3. Select the root element of the structure in the designer of custom schema model (1) and fill the properties of the generated schema (2):
The view model schema's main properties match with the main properties of the non-visual module schema mentioned above.
4. Add the model schema source code to the Source code tab (3). You need to make sure that the visual module name in the define() function is the same as the view model schema name.
Save the module schema after making all the changes.
Creating a replacing schema
Replacing schemas are used to extend the functions of the already existing schemas. The existing schemas also maybe replacing and belong to different packages.
To create the replacing schema of the non-visual or visual modules:
1. Go to the Configuration section and select custom package to add a new module schema.
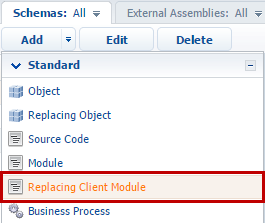
2. On the Schemas tab, select Add — Replacing client module.
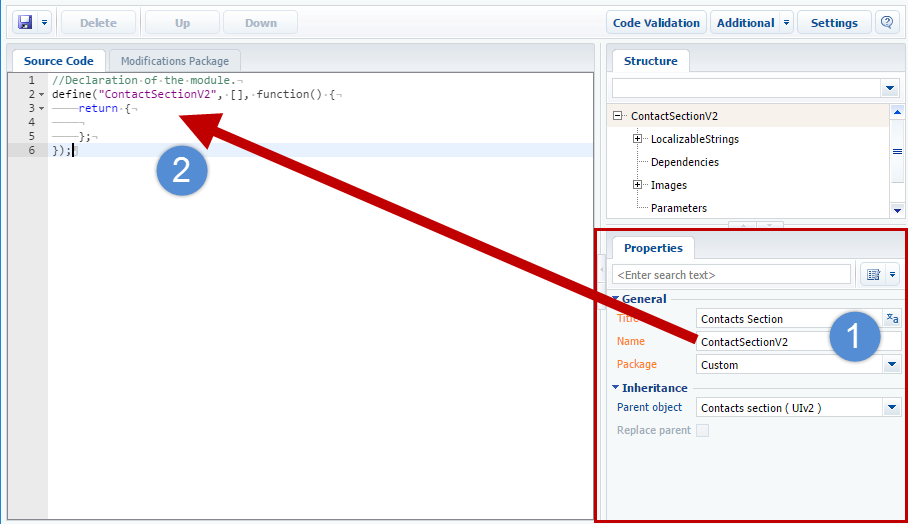
3. Select the root element of the structure in the custom module designer (1).
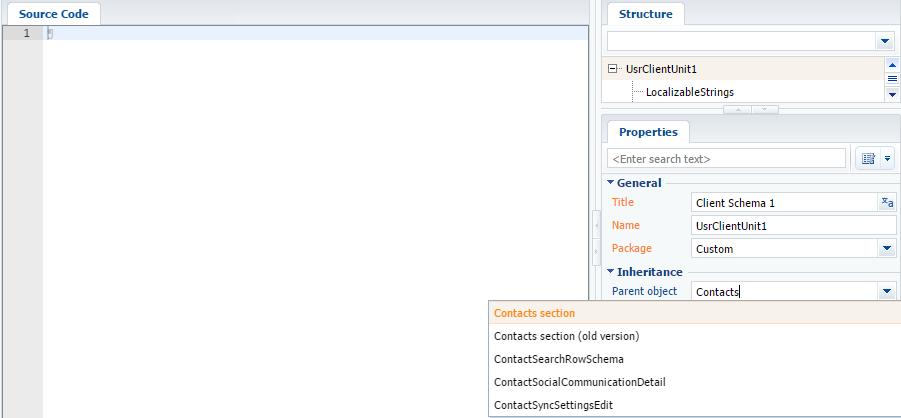
4. To make the replacing module for a specific section or page, specify the title of the base view model schema that you want to replace in the Parent object field of the schema properties. For example, to create a replacing schema for the Contacts section, you need to specify the ContactSectionV2 as a parent object. Start typing the “Contact Section” schema title in the Parent object field of the replacing schema properties and select the corresponding value from the drop-down list.
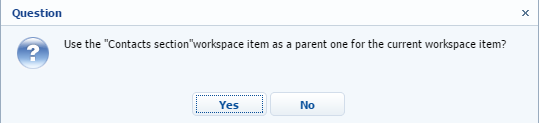
After confirmation of the selected parent object, the other property fields are filled out automatically.
5. Add the model schema source code to the Source code tab. You need to make sure that the replacing module name in the define() function is the same as the view model schema name.
6. Save the module schema after making all the changes.