The change log records changes to business data. You can use it for things like tracking product price or account balance changes.
The audit log records system events, system settings, and system data. Learn more in a separate article: Set up the audit log.
The change log is disabled by default. Follow the steps in this article to enable this feature.
To set up logging, you can use either the Change log section or any other Creatio section, lookup or detail.
Emails, mobile and work phones are available in the contact profile, so logging must be enabled in the Contacts section on the column level.
Method 1. Set up logging in the [Change log] section
-
Open the system designer. For example, click the
 button.
 -
Click “Change log” in the “Users and administration” block.
-
Find the needed section object, detail, or lookup in the object list. For example, set the “Sections” filter (Fig. 1).
Fig. 1 The object filter in the change log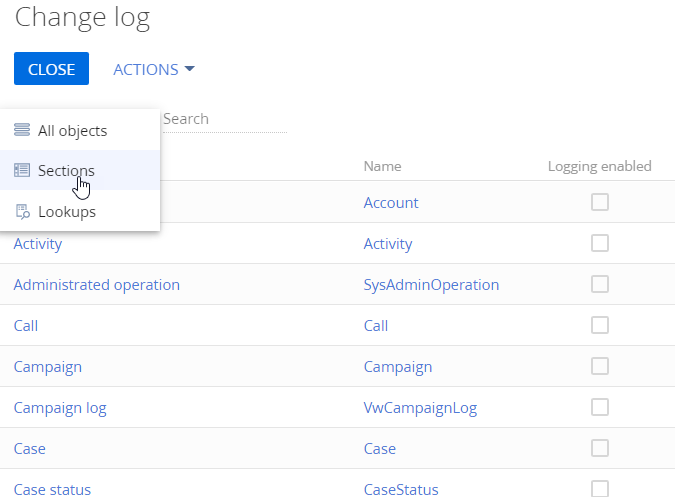
-
Select the section from the list or find it using the search bar (Fig. 2). Click the title of the needed object. For example, the “Contact” object. This will open a new page.
Fig. 2 The search bar in the change log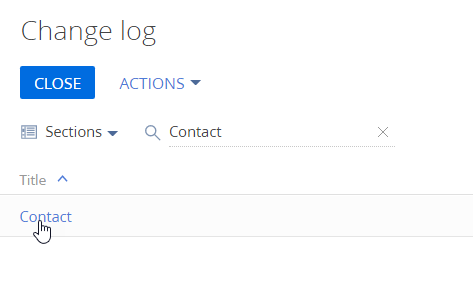
-
Enable logging on the page that opens via the corresponding switch.
-
Set up the list of columns for logging when a record is changed. For example, use the Email, Mobile phone, and Business phone columns (Fig. 3).
Click Add to add a new column. Hover over the column title and click
 to delete an added column.Fig. 3 The column logging setup
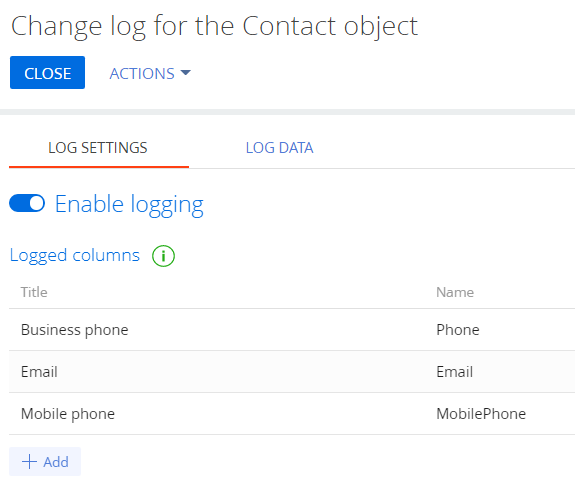
-
Click Apply to save the changes.
After you apply the settings, Creatio will start monitoring the changes and recording them to the change log.
Method 2. Set up logging in a section, lookup or detail
-
Open the needed section, lookup, or detail. For example, the Contacts section.
-
Click Actions → Change log setup (Fig. 4).
Fig. 4 Set up the change log in the Contacts section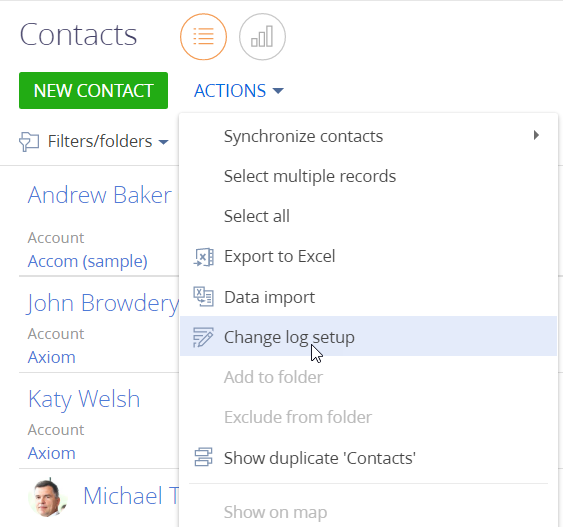
As a result, the change log setup page of the Contacts section will open. Follow steps 5 through 7 from the Method 1 to complete the setup.