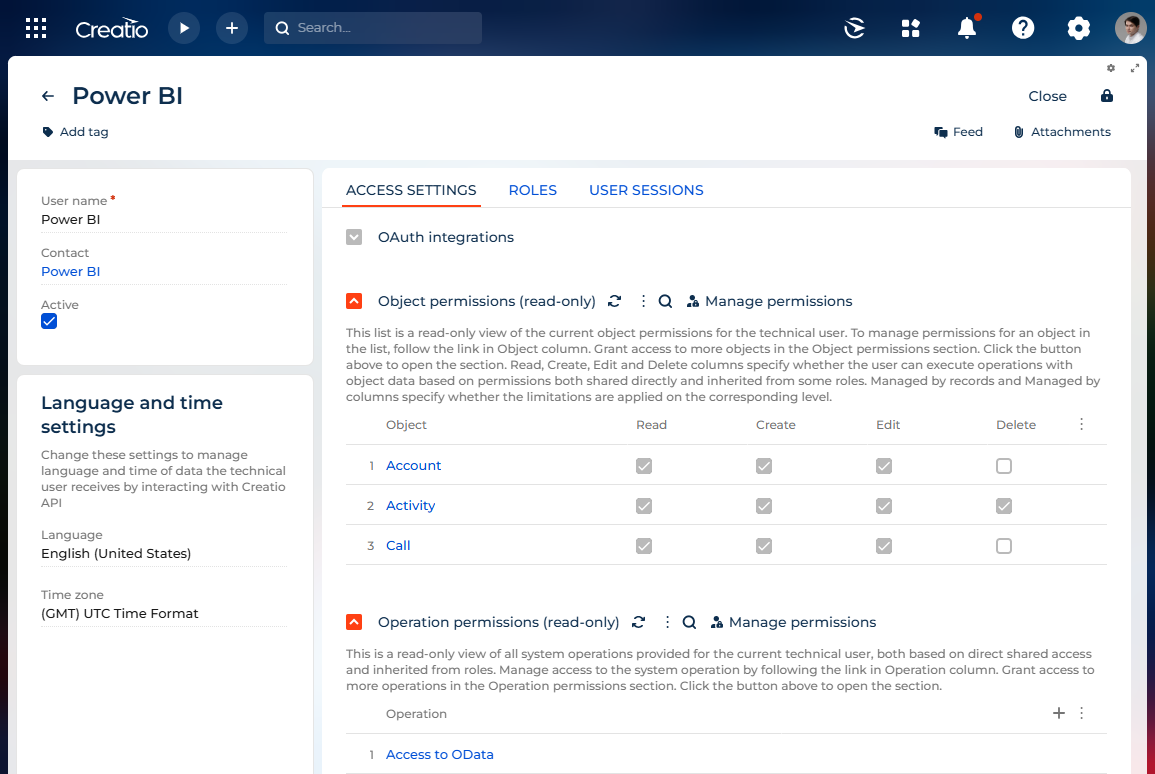
Manage technical users
Technical users are a special type of Creatio users designed for system integration purposes. They let you connect Creatio to external systems without consuming additional licenses and compromising your Creatio environment's security. However, technical users have certain limitations:
- Access restrictions. Technical users cannot log in to the Creatio web or mobile application using their credentials. They can only interact with Creatio via the API.
- Authentication method. Technical users can only authenticate in Creatio using OAuth authentication. Other authentication methods are not supported.
- Privilege management. Technical users have no access to Creatio objects or operations out of the box. You must grant them privileges explicitly to perform specific tasks. Technical users cannot inherit role permissions through the hierarchy. Users will receive privileges from direct roles only.
- Subscription limit. The number of technical users you can add is determined by your subscription plan.
To enhance security, we strongly recommend creating a unique technical user for each OAuth integration you add. Assign only the minimum necessary permissions to each user, ensuring they have access only to data and actions required for that specific integration.
Add a technical user
- Click
 → Users and administration → Technical users.
 - Click New. This opens the new technical user page.
- Fill out the Name field. When creating a name for a technical user, consider its purpose. Use a clear and descriptive name that indicates the specific external system or functionality it will interact with. This will help with organization and troubleshooting.
- Fill out Language and Time zone fields to manage language and time of data the technical user receives by interacting with Creatio API.
- Save the changes.
Newly created technical users in Creatio have no object and operation permissions. To utilize these users for OAuth integrations or other purposes, you must assign the necessary permissions. Learn more: Object operation permissions, System operation permissions. All permissions granted to the technical user are viewable in a read-only format on their page.

To streamline permission assignment, consider grouping technical users who need to access the same data into specific functional roles. Learn more: Assign a user role. Technical users have the following restrictions regarding role membership:
- Indirect membership. They can only be included in child roles within the "All employees" role, not directly in the root role.
- Initial rolelessness. New technical users are not automatically assigned to any roles.
- Limited inheritance. They cannot inherit permissions from parent roles in the hierarchy. Permissions are granted directly from the roles to which they belong. For instance, a technical user in the "Integrations" role, which is a child of "All employees," will only have the permissions explicitly assigned to "Integrations," not those of "All employees."
Assign a technical user to a functional role
You can assign a technical user to a functional role on the Roles tab of the technical user page. To do this:
- Click
 → Users and administration → Technical users.
 - Open the page of the relevant technical user.
- Open the Roles tab.
- Click
 in the Functional roles expanded list. This opens a window.
 - Select the relevant roles in the window → Select.
Specify the IP address or IP address range for connection
You can specify the IP address or IP address range from which the technical user can connect. To do this:
- Turn on the "Restrict user login by allowed IP range" ("UseRestrictedIP" code) system setting. Learn more: Manage system settings.
- Click
 → Users and administration → Technical users.
 - Open the page of the required technical user.
- Go to the Allowed IP addresses expanded list → click New at the bottom.
- Set the start IP address of the IP address range in the Start IP address field. The value must match the IPv4 structure.
- Set the end IP address of the IP address range in the End IP address field. If you want to set a single IP address, enter the same value as in the previous field. The value must match the IPv4 structure.
- Click Save all in the floating control panel.
Monitor the activity of the technical user
You can monitor the activity of the technical user on their page. The User sessions tab displays a dashboard showing the current technical user's session activity over the past 10 days. You can also view a detailed list of all sessions for any specific date by using the list view at the bottom of the page. Click  next to the session record → End session to end an active session immediately. You can also end all active sessions using the
  button next to the name of the User sessions list.
Disable a technical user
To temporarily disable a technical user's access to Creatio data through integrations, clear the Active checkbox on their user page. This will prevent them from interacting with the system. Deactivation is helpful when you need to block a user's activity or want to preserve existing integration settings while troubleshooting or making changes.