Single Sign-On via Google
You can integrate Creatio with Google to manage single sign-on for all Creatio users that work in the corporate network.
This example uses the https://site01.creatio.com/ Creatio URL. Replace this value with your website URL when you perform the actual setup.
The following steps are the general procedure required to set up Single Sign-On in Creatio:
- Perform the setup in Google. Read more >>>
- Perform the setup in Creatio. Read more >>>
Perform the setup in Google
-
Open the https://admin.google.com/ page.
-
Log in as a Workspace administrator.
-
Go to Menu → Apps → Web and mobile apps.
-
Click Add App → Add custom SAML app (Fig. 1).
Fig. 1 Add custom SAML app 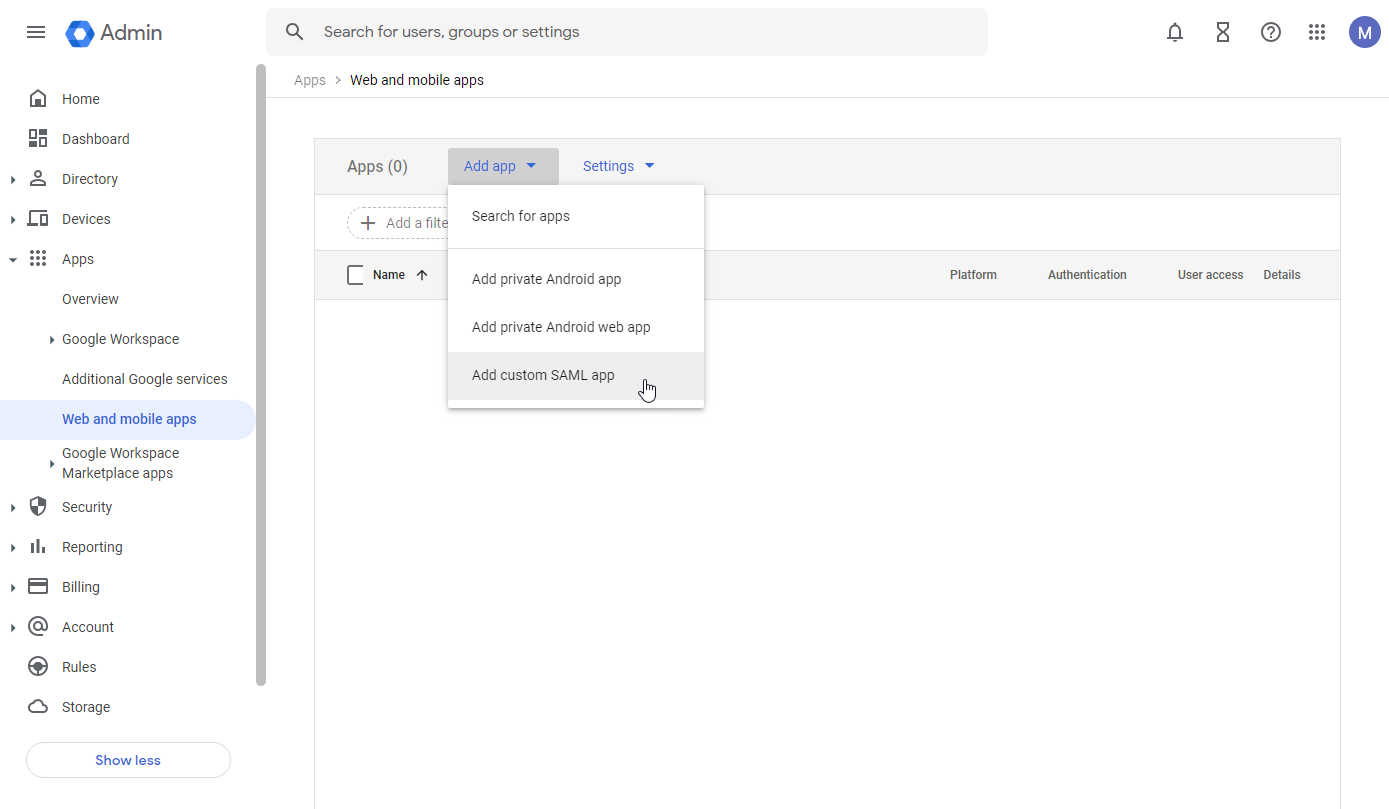
-
Enter the app name → Continue.
-
Copy the SSO URL and Entity ID for later (Fig. 2).
Fig. 2 SSO parameters 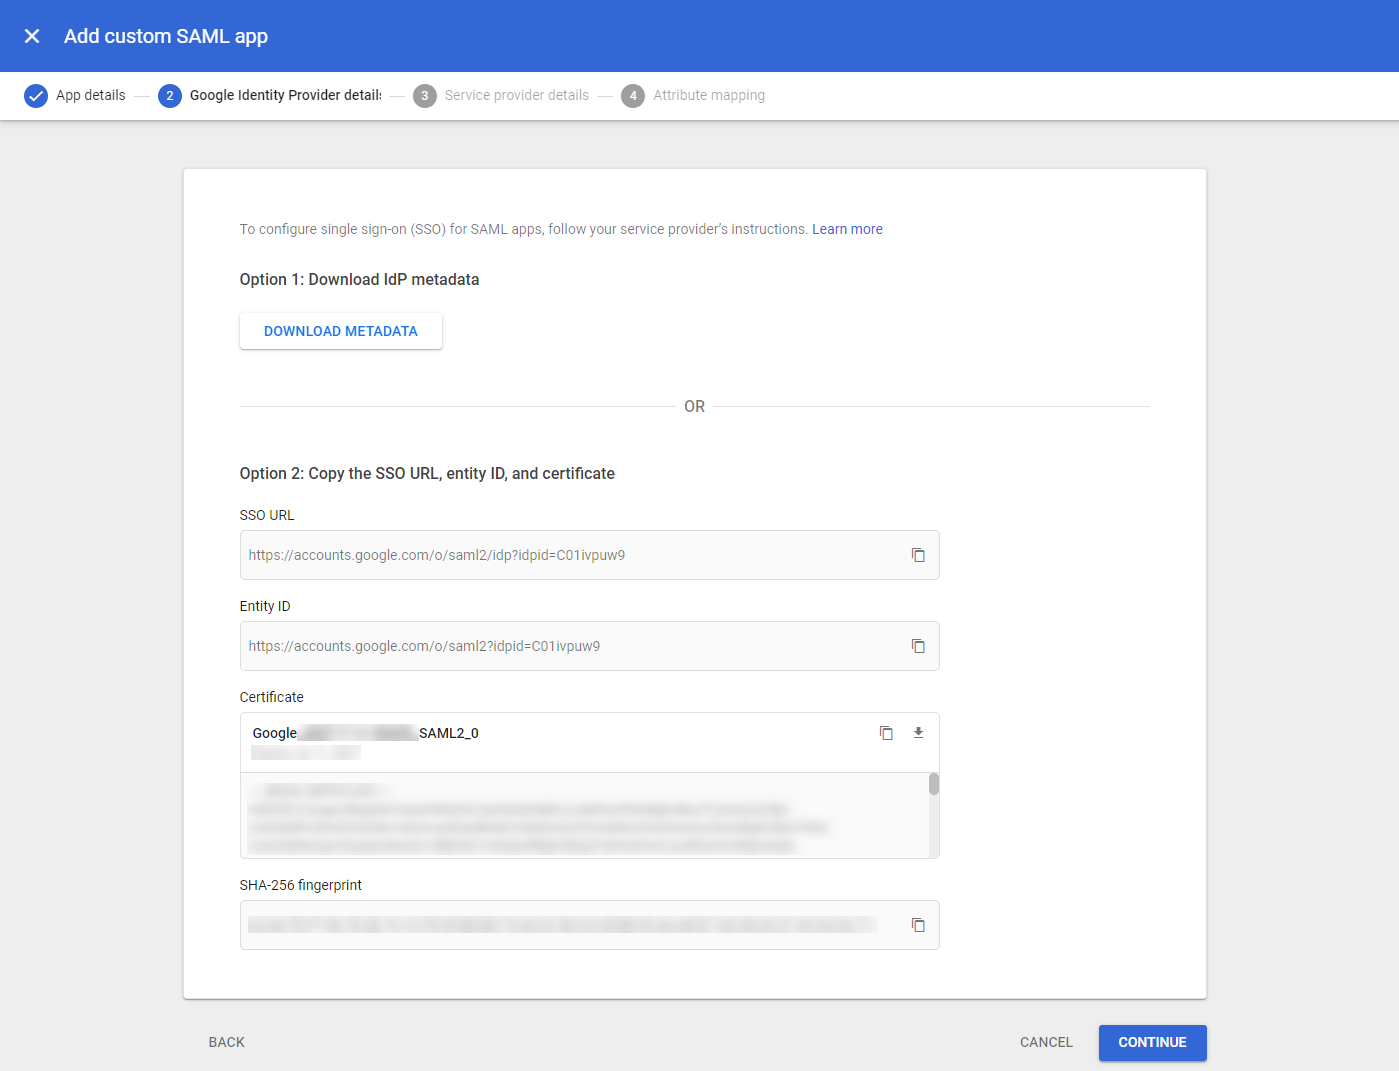
-
Download the certificate.
-
Click Continue. This opens a window.
-
Fill out the following parameters (Fig. 3):
Fig. 3 Provider details 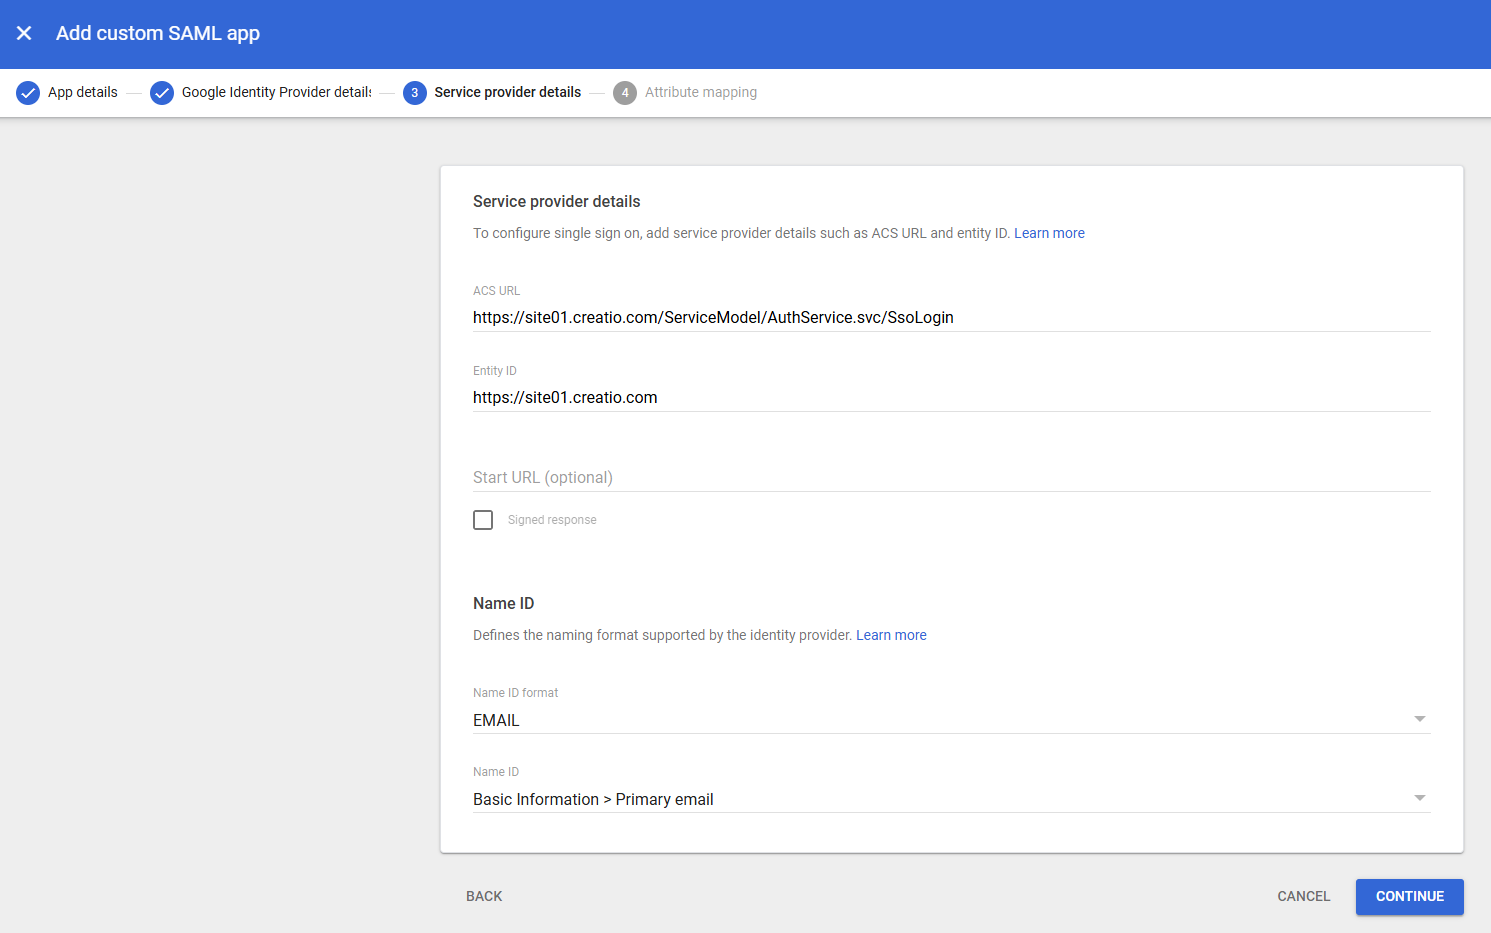
Parameter
Parameter value
ACS URL
Enter the full website path together with the /ServiceModel/AuthService.svc/SsoLogin address. For example,
https://site01.creatio.com/ServiceModel/AuthService.svc/SsoLoginEntity ID
Enter the full website path. For example,
https://site01.creatio.comSigned response
Indicates that your service provider requires the entire SAML authentication response to be signed. Select the checkbox for the production environment and clear it for the testing environment.
Name ID format
Select "Email."
Name ID
Select "Basic information - Primary Email".
-
Click Continue.
-
Click Add mapping to map user attributes.
-
Select "Basic information - Primary Email" in the Google Directory attributes field and enter "name" in the App attributes field (Fig. 4).
Fig. 4 Map attributes 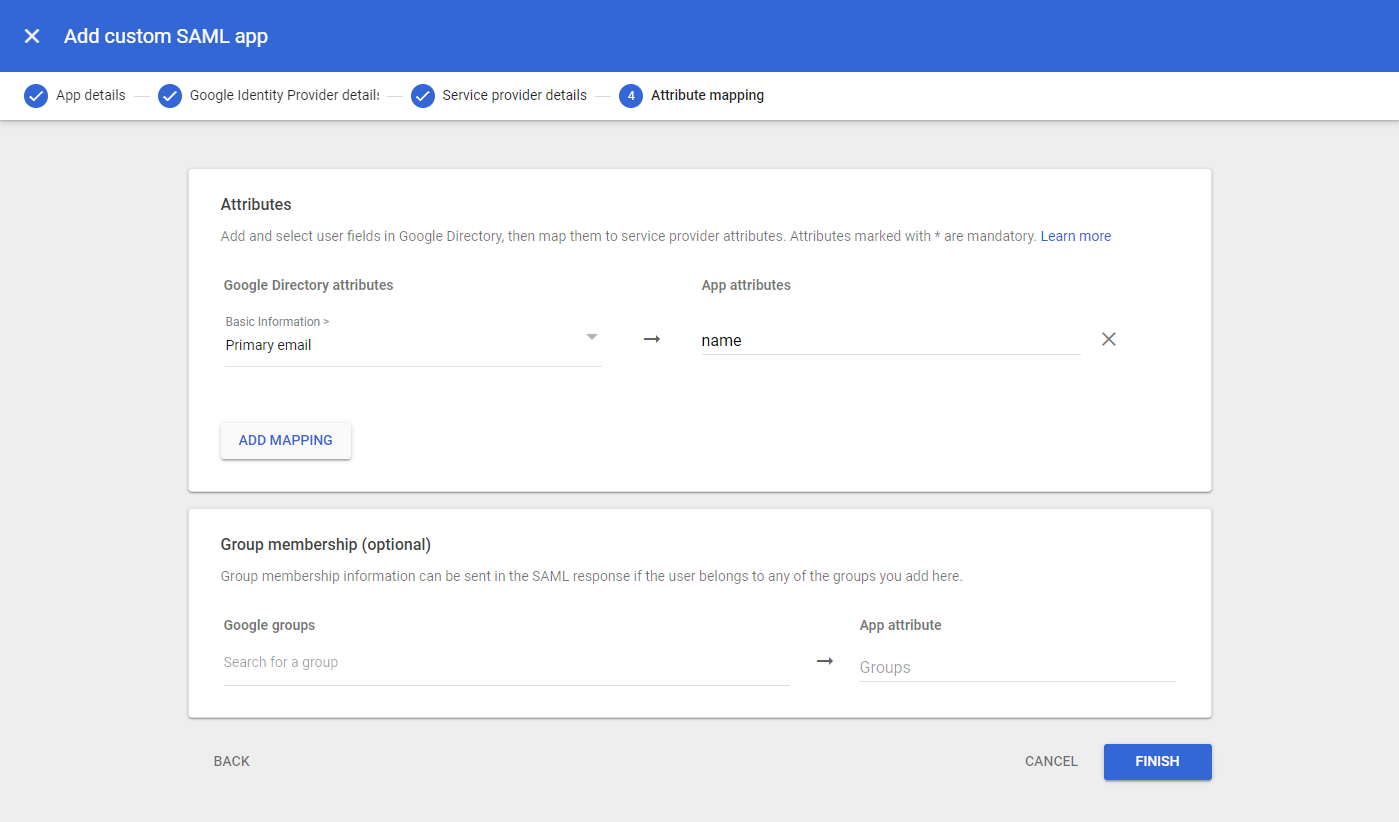
-
Click Finish.
Perform the setup in Creatio
Follow these steps to set up single sign-on in Creatio:
-
Click
 to open the System Designer.
 -
Go to the Users and administration group → Single Sign On configuration.
-
Click → "Custom SAML". This opens the setup page.
-
Click Upload metadata and select the metadata XML file you downloaded from Google Admin Console. Creatio automatically populates the Entity ID, Single Sign On URL, and any available certificates. Enter the provider name in the Display name field.
noteGoogle SSO metadata does not include a Single Logout URL. The Single Logout URL field will remain empty after import. Leave it blank.
-
Save the changes.
-
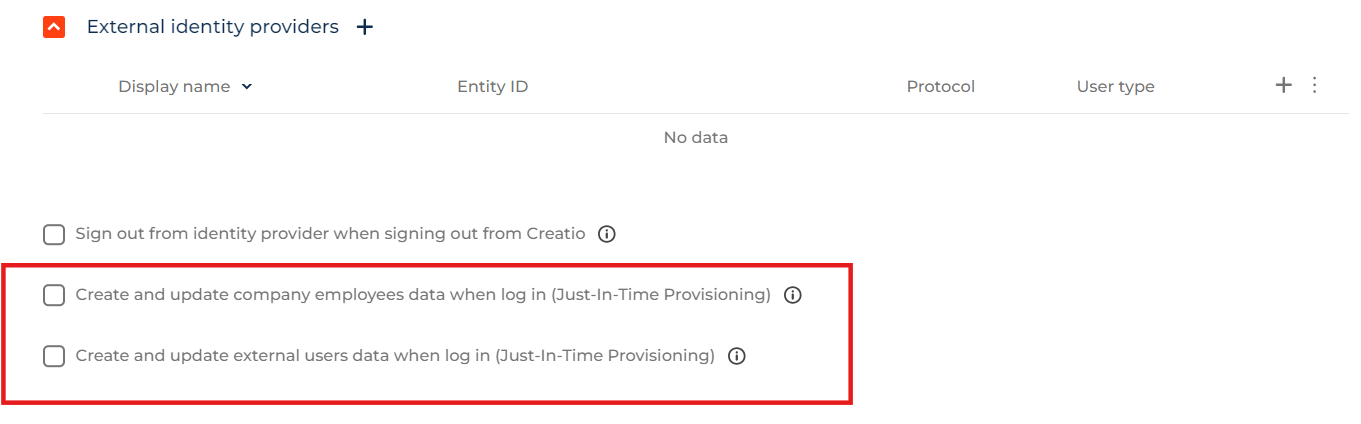
Turn on Just-In-Time Provisioning (optional). This mechanism automatically creates the corresponding Creatio user account with data from the identity provider, such as user group, employee name, contact information, etc. For company employees, select the Create and update company employees data when log in (Just-In-Time Provisioning) checkbox and map the fields. For external users, select the Create and update external users data when log in (Just-In-Time Provisioning) checkbox and map the fields (Fig. 5).
-
Select the Create and update users data when log in (Just-In-Time Provisioning) checkbox.
-
Map Google fields to Creatio.
- Define your provider. To do this, specify the provider in the "Default SSO provider" ("DefaultSsoProvider" code) system setting. Learn more: Manage system settings.
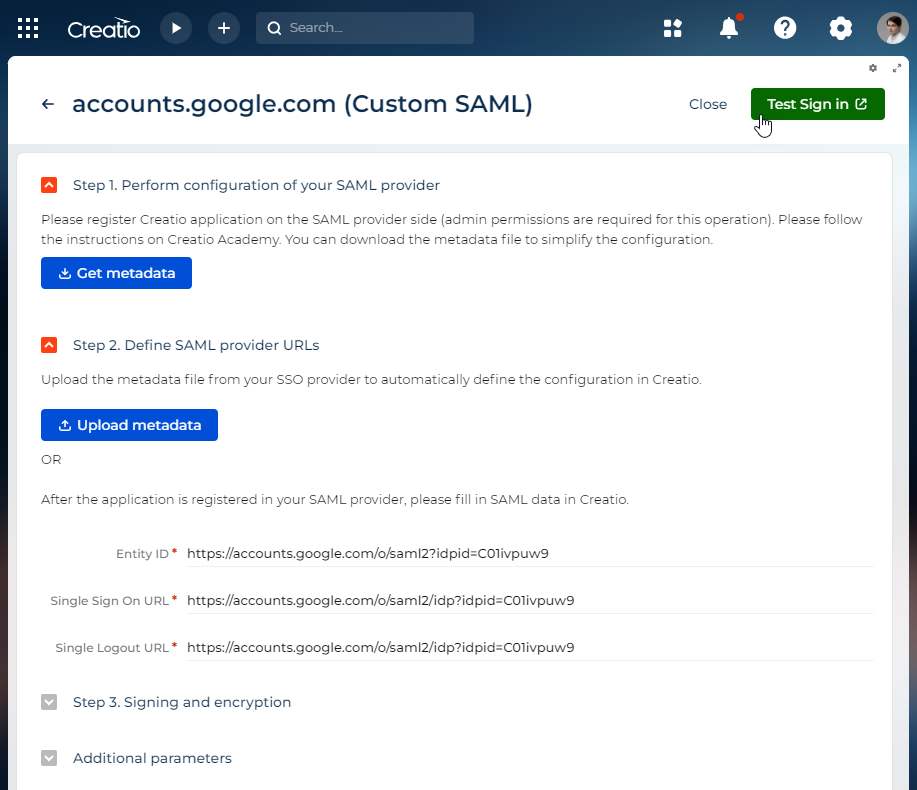
- Test whether the provider is working correctly (optional). To do this, open the provider page → Test sign in (Fig. 6).
Fig. 6 Test sign in