Single Sign-On via Cognito AWS
Creatio can be integrated with any identity provider that supports the Open ID protocol. You can use Cognito AWS portal as a single sign-on point for all your services, including Creatio. To do this, perform he setup both in Cognito AWS and Creatio.
The following steps are the general procedure required to set up Single Sign-On in Creatio:
- Sign up for Cognito AWS.
- Perform the setup in Cognito AWS. Read more >>>
- Perform the setup in Creatio. Read more >>>
Perform the setup in Cognito AWS
-
Sign in to Aws.Amazon as root user.
-
Click App client list → Create app client.
-
Enter "Creatio" in the App client list field.
-
Click Client secret → Generate a client secret.
-
Enter
[CreatioURL]/ServiceModel/AuthService.svc/OpenIdCallbackin Allowed callback URLs where [CreatioURL] is the URL of your Creatio instance. -
Enter
[CreatioURL]/ServiceModel/AuthService.svc/OpenIdLogoutCallbackin Allowed sign-out URLs where [CreatioURL] is the URL of your Creatio instance. -
Select Email, OpenId, Phone, Profile in the OpenID Connect scopes block.
Fig. 1 OpenID Connect scopes block 
-
Click Create app client.
-
Save the following data from Cognito AWS console to your machine:
Parameter | Parameter Value |
|---|---|
Client ID | The ID of the client. Consists of 26 letters and digits. To find this value, open the App integration section → App client list. |
Client Secret | The secret of the client. Consists of 52 letters and digits. To find this value, open the App integration section → App clients and analytics block → click the name of your application. |
User pool ID | The pool ID of the User. View the value in the settings of a specific user pool. |
Region | The region of the user. Matches the "Region" parameter in the "User pool ID" value. For example, |
Perform the setup in Creatio
To evaluate Open ID authorization enable the "EnableOpenIDAuth" additional feature. Instructions: Change the status of an additional feature for all users (developer documentation).
Follow these steps to configure single sign-on in Creatio:
- Click the
 button to open the System Designer.
 - Click Single Sign On configuration.
- Click
 . This opens a drop-down menu.
 - Select "Cognito AWS." This opens the setup page.
- Fill out the following parameters:
Parameter | Parameter Value |
|---|---|
Client ID | The ID of the client. Consists of 26 letters and digits. To find this value, retrieve it from Cognito AWS in the Client ID parameter. |
Client Secret | The secret of the client. Consists of 52 letters and digits. To find this value, retrieve it from CognitoAWS in the Client secret parameter. |
URL | The URL of your provider’s website. The URL template is as follows |
Discovery URL | The URL of the identity provider’s single sign-on. The URL template looks like |
End session endpoint | The URL of the identity provider’s single sign-off. The URL template is as follows |
-
Fill out the provider name to display on the Creatio login page in the Display name field.
-
Save the changes.
-
Turn on Just-In-Time Provisioning (optional). This mechanism automatically creates the corresponding Creatio user account with data from the identity provider, such as user group, employee name, contact information, etc., and updates the data on each login. For company employees, select the Create and update company employees data when log in (Just-In-Time Provisioning) checkbox and map the fields. For external users, select the Create and update external users data when log in (Just-In-Time Provisioning) checkbox and map the fields (Fig. 2). Clear the checkbox to prevent Creatio from updating user data from the identity provider during login.
Fig. 2 Set up Just-In-Time Provisioning 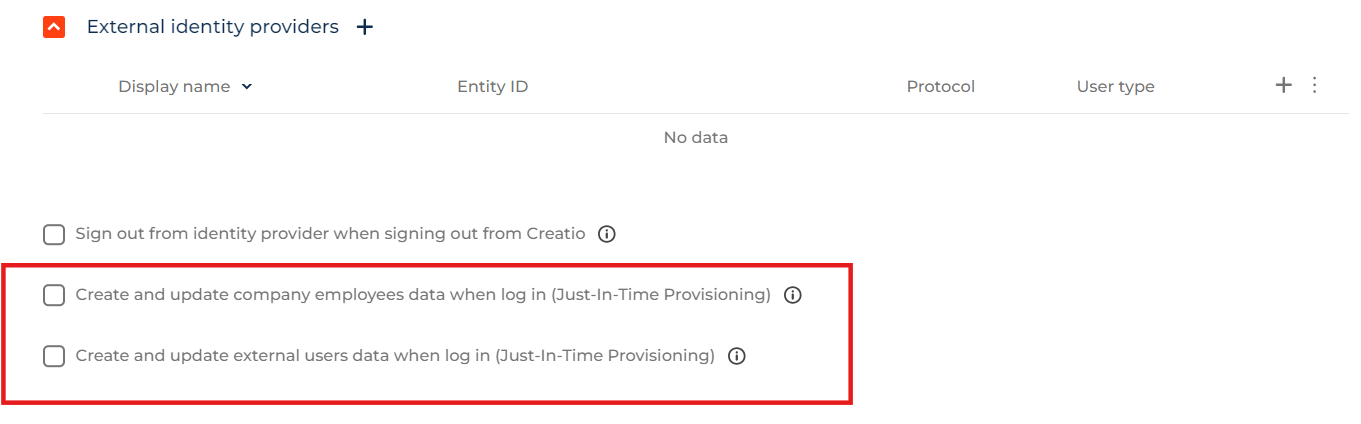
Set up SSO authentication for Mobile Creatio
Mobile Creatio lets you log in using the Single Sign-On technology. To set up SSO authentication for Mobile Creatio, turn on the "Use SSO in the mobile app" ("MobileUseSSO" code) system setting.
If the SSO authentication for Mobile Creatio is turned on, the app displays an identity provider page that includes the login and password fields.