Set up the change log
The change log records changes to business data. You can use it for things like tracking product price or account balance changes.
The audit log records system events, system settings, and system data. Learn more in a separate article: Set up the audit log.
The change log is disabled by default. Follow the steps in this article to enable this feature.
To set up logging, you can use either the Change log section or a Classic UI Creatio section, lookup, or detail.
Set up logging of changes in contact phone numbers and emails.
Emails, mobile and work phones are available in the contact profile, so you need to enable logging in the Contacts section on the column level.
If you use a load balancer to ensure fault tolerance of your Creatio application, perform the setup on one Creatio instance, then transfer settings to other instances. The setup process applies to Marketplace apps, custom packages, and other settings that require compilation. Learn more in a separate article: Compile an app on a web farm.
Method 1. Set up logging in the [Change log] section
We recommend setting up logging only for columns whose values you need to track. With large databases, logging a significant number of objects and columns might reduce Creatio’s performance.
You must have permission to the “Access to "Change log" section” (the “CanManageChangeLog” code) system operation to manage the Change Log section. Learn more: System operation permissions.
-
Click
 to open the System Designer.
 -
Go to the Users and administration block → Change log.
-
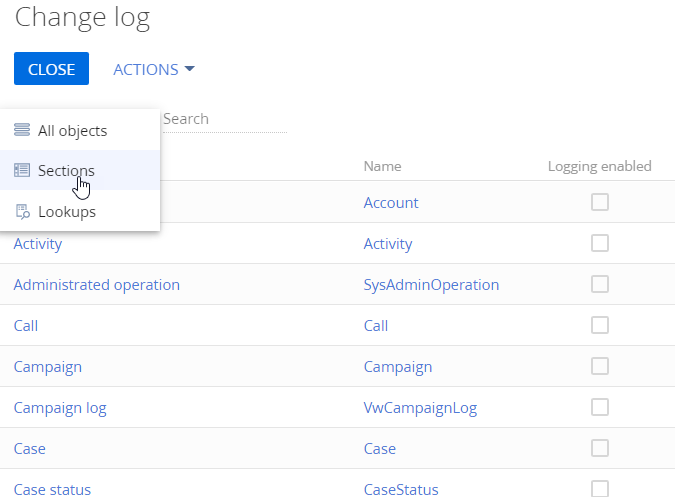
Find the needed section object, detail, or lookup in the object list. For example, set the “Sections” filter (Fig. 1).
Fig. 1 Object filter in the change log 
-
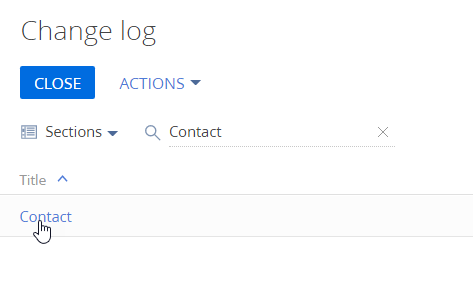
Select the section from the list or find it using the search bar (Fig. 2). Click the title of the needed object. For example, the “Contact” object. This opens a page.
Fig. 2 Search bar in the change log 
-
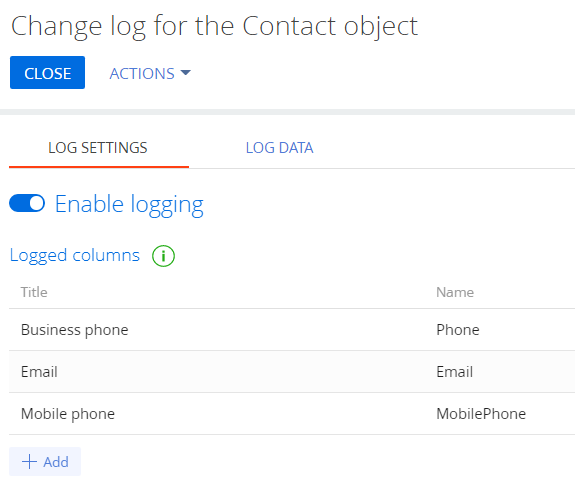
Toggle on the Enable logging switch to enable logging on the object level. If you save the changes on this step, Creatio will log only the delete operations.
-
Set up the list of columns to log. For example, use the Email, Mobile phone, and Business phone columns (Fig. 3).
Click Add to add a new column. Hold the pointer over the column title and click
 to delete an added column.
Fig. 3 Column logging setup 
-
Click Apply to save the changes.
As a result, Creatio will start monitoring the record create, update, and delete events and recording them to the change log.
Method 2. Set up logging in a Classic UI section, lookup or detail
-
Open the needed Classic UI section, lookup, or detail. For example, the Contacts section.
-
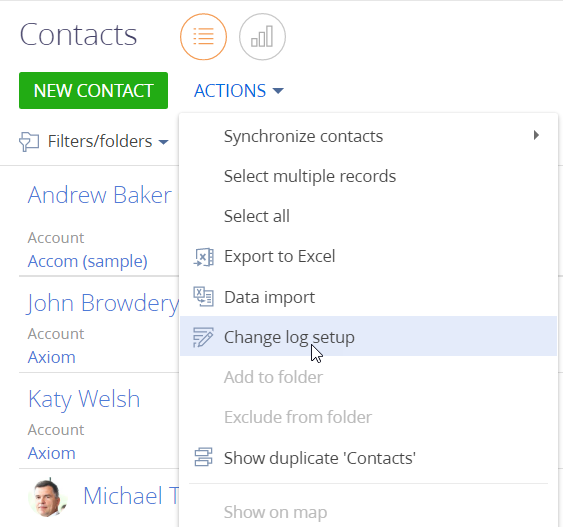
Click Actions → Change log setup (Fig. 4).
Fig. 4 Set up the change log in the Contacts section 
If you cannot see Change log setup in the action list, make sure you have permission to the “Access to "Change log" section” (the “CanManageChangeLog” code) system operation. Learn more in a separate article: System operation permissions.
As a result, the change log setup page of the Contacts section will open. Follow steps 5 through 7 from the Method 1 to complete the setup.