7.16.0 release notes
Our team at Creatio is constantly working to deliver advanced capabilities to automate your sales, service, and marketing processes. Here are the new features included in Creatio version 7.16.0.
The update guide is available in a separate article.
Creatio Marketing
Content Designer
-
You can now edit the HTML content of an email template directly in the Content Designer. The new HTML element features custom code variables (text, font color or images) and custom substitution macros.
Editing HTML content in the Content Designer 
-
Email templates can now use custom fonts. To add a new font, specify its URL in the Content builder custom fonts lookup and update the font family in the Content builder font set lookup.
-
You can use the "Esc" key to move up the template structure, close modal and popup boxes or prompt boxes.
Creatio Sales
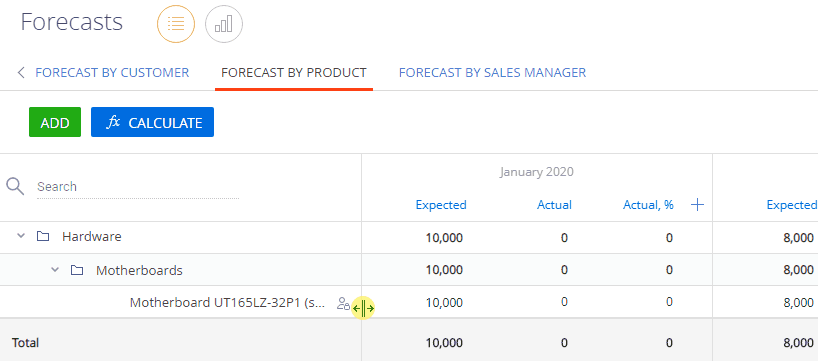
Forecasts
- You can now change the order of the Expected, Actual and Actual, % columns. Columns can now be moved by using the mouse.
- You can now adjust the width of the data hierarchy area in a forecast.
Creatio Marketplace
- We have rolled out a new "Field module" application for staff who works in the field, such as sales reps. The solution enables manual and automatic scheduling of field visits in the main Creatio application and in the mobile app. The following activities and milestones are available during a field visit: "Check-in," "Presentation," "Check-out." Users can create custom sets of rules and activities for field visits. Citizen developers can use the platform’s low-code customization tools to customize the Field module for various industries. The add-on is compatible with all Creatio products.
Core functions
- The Communication panel now updates immediately, whenever an email account is added or deleted. Previously, updating the list of email accounts on the Communication panel required refreshing the page.
- Upon successful registration of a profile account in Creatio, the Domains of mail providers lookup is now automatically populated with the settings of the new mail provider. As a result, Creatio will recognize the provider by its domain name and populate its settings automatically, whenever the users add mail accounts of that provider.
- We have optimized the mail synchronization process for IMAP mail accounts. Now, a dedicated microservice obtains new emails from the server, preventing the scheduler queue from cluttering and ensuring more stable performance. The improvements are based on the MailKit library and the UID strategy.
- Fixed an issue that would prompt the user to populate a required field after the field was made optional by a business rule.
Predictive data analysis
-
Users can now create predictive recommendation models. Based on the interaction between various business objects (e.g., between "customers" and "products" via the purchase history), Creatio will create AI-based recommendations (e.g., recommend the best products to offer to each customer).
Adding a recommendation machine learning model 
-
Predictive data is now available immediately after the user populates the required fields, even before saving the model.
Analytics
-
You can now configure vertical and horizontal "stacked" histogram charts. Each bar in a histogram represents a sum of subordinate columns. Such charts are useful for comparing summary indicators. For example, a chart can simultaneously display:
- opportunity amount on each funnel stage grouped by employees
- total opportunity amount by employee
- the share of each stage in the total opportunity amount.
To configure a stacked histogram, select the "Column" or "Bar" chart and select the With stacked checkbox.
Phone integration and managing communications
- You can now specify the preferable protocol (SIP or PJSIP) in the Asterisk phone integration.
- We have added an option for unconditional (blind) call forwarding for Avaya, Webitel, Oktell, Finesse, TAPI, Infinity, and Asterisk phone integrations. This makes handling calls easier for agents.
- We have enhanced the basic phone integration for Avaya. Detailed call statistics are now available through a unique call identifier (GloballyUniqueCallLinkageId) in the Calls section.
Business processes
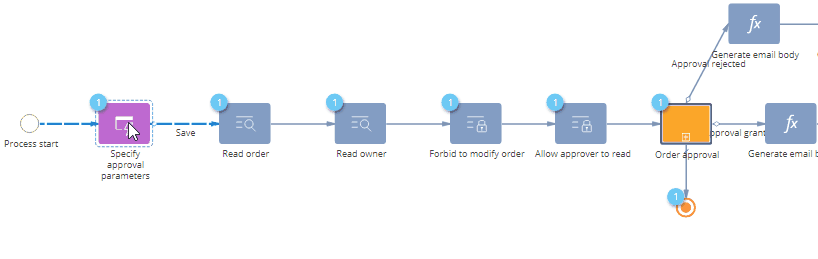
- You can now convert Studio Free business process diagrams to executable processes in Studio Enterprise and other Creatio products. After modeling and approving a business process in Studio Free, export it as a *.bpmn file and then import it in a Creatio product for fine-tuning and automating. To import a process, drag&drop the process file into the working area of the Process Designer. You can also drag&drop business processes from any platforms that support exporting *.bpmn files.
- You can now stop a business process that has no interrupting elements, such as intermediate processing events. Previously, a process that comprised exclusively of system actions (such as Add data and Modify data) could not be stopped before all elements were completed.
- When you select an element on a process execution diagram in the Process log section, its incoming and outgoing flows become highlighted.
Process designer
- It is now easier to navigate complex processes with multiple elements. We have introduced a special navigation panel that displays a "mini-map" of the process diagram, as well as other navigation and scaling controls. The navigation panel is available on the business process execution diagram in the process log, on the package dependency diagram in the Advanced settings section and in the Campaign Designer.
- You can now adjust the position of element labels on the business process diagram by dragging them with the mouse.
- Non-interrupting start events in event subprocesses are now highlighted with a dashed border in compliance with BPMN notation standards.
User customization tools
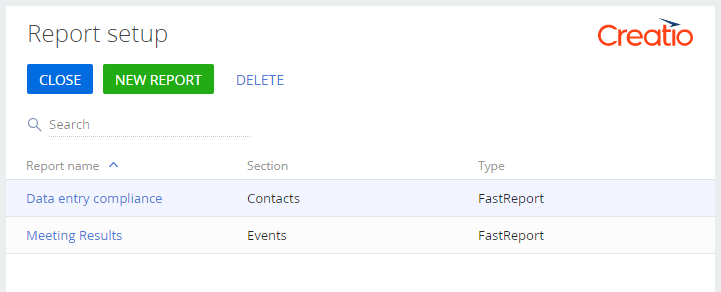
- We have improved the UX for adding report data in the Report setup section. When generating a report, you can use prompts to populate the fields and details, as well as the Setting up MS Word printables article on the Creatio Academy.
The new MS Word setup UI is currently in beta. You can request early access by contacting Creatio support. We appreciate your feedback! The updated functionality will be available in the upcoming Creatio releases. All reports created in previous versions will remain available for accessing and editing. During the beta period, you can only access the new UI from the Report setup section of the System Designer. However, you can still open the reports in the old UI from the Printables lookup.
Administration
-
Added a chart that displays the total number of available and distributed licenses.
License number summary 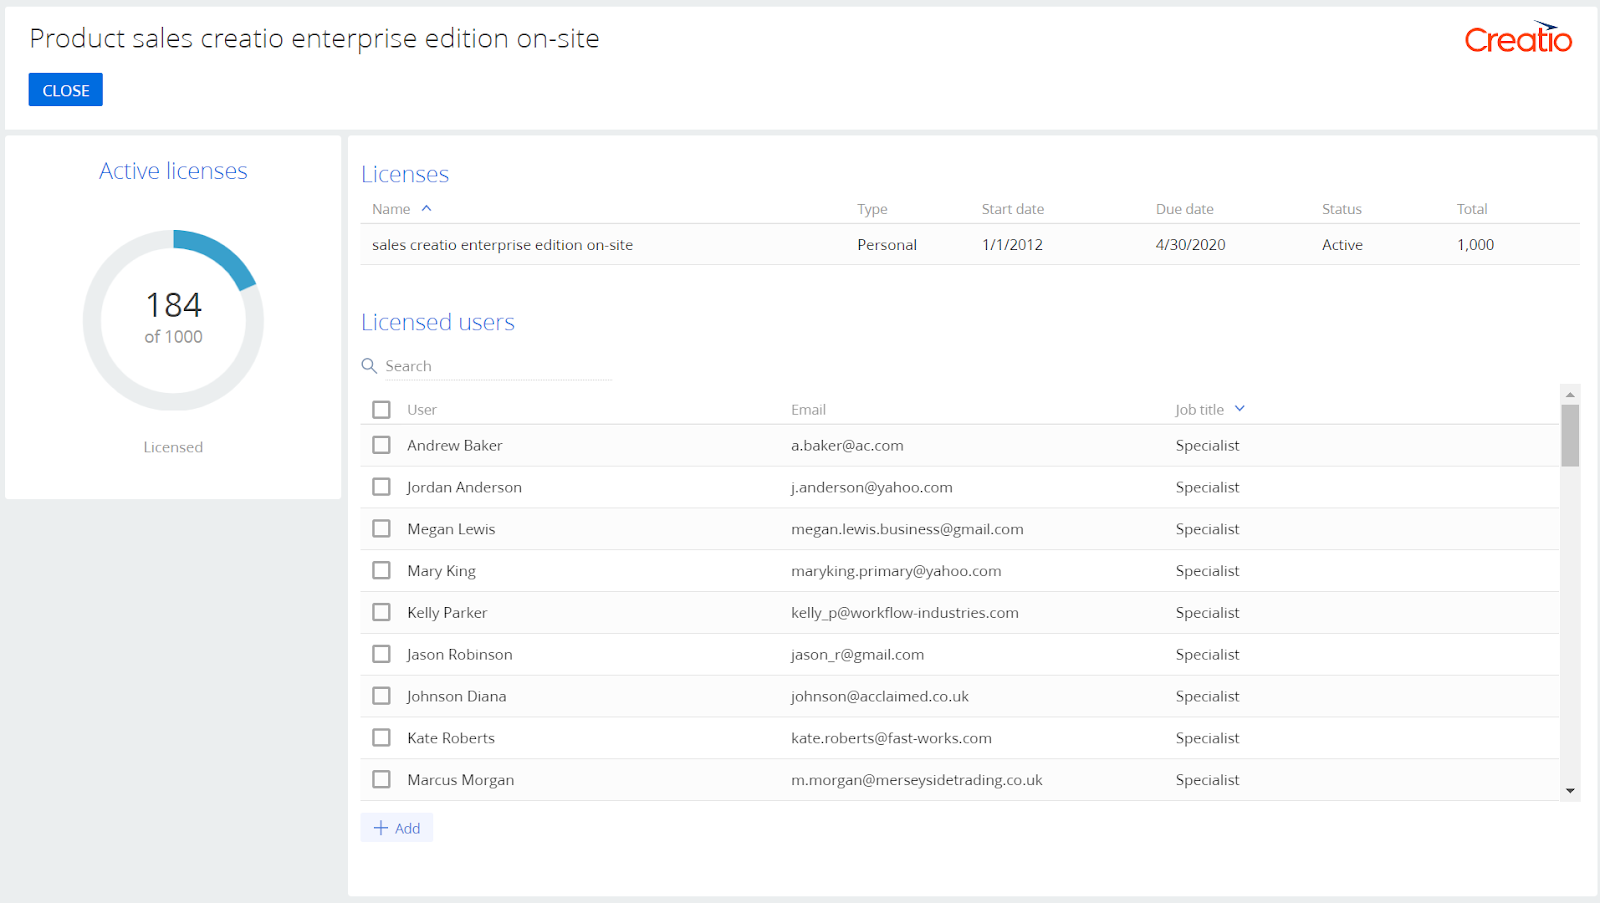
-
Users now receive license expiry notifications immediately upon login. Upon receiving the notification, the users are redirected to the license distribution page.
The new license manager UI offers streamlined UX for the following license management functions:
- generating a license request
- uploading new licenses
- selecting the license and distributing them between the users.
You can also go to the license manager from the "Users and administration" section of the System Designer.
-
Implemented .NET Core support in Creatio Service, Creatio Sales, and Studio Creatio - Enterprise editions only. See the Creatio on the .NET Core platform article for additional information on the current .NET Core support and development plans.
Development tools
- We have implemented the "upsert" mode for updating data with DataService UpdateQuery. If the "upsert" mode is active, and the record being updated does not exist, UpdateQuery will add the corresponding record. This will reduce the number of requests when synchronizing object records.
- To enable the "upsert" mode, specify the optional request parameter isUpsert and set it to "true." UpdateQuery in the "upsert" mode should contain a collection of values for all required columns. Use this mode only when updating a single record.
- You can now send an email via SMTP with constant connection parameters without adding a mailbox in the UI.
- You can now work with the stream data type for transferring images, files and binary data using the OData 4 protocol.
- You can now create new application modules using the Angular framework.
- We have enabled highlighting the package dependency relationships in the package dependency diagram in the Advanced settings section.