Set up the app mini pages
Mini pages are functionally identical to full Freedom UI pages but have smaller canvas size and are displayed as pop-up windows in the list page. This makes them useful for adding or editing records quickly.
Set up the "Mini page for employee benefits" mini page in the "Financial benefits" app you created earlier. Add a minimum required set of fields to the mini page. Connect the page to the "Financial benefits" object.
-
Click
 to open the System Designer.
 -
Go to the Application management block → Application Hub.
-
Click the Financial benefits app tile.
-
Click New page → select the mini page template.
-
Click
 → enter "Payroll mini page for employees" in the Page title field.
 -
Click Add data source in the top left → Existing data source → select the "Financial benefits" data source.
-
Set up the mini page layout. You can attach any Freedom UI component to the mini page, but you cannot resize the canvas.
The template already includes a base set of components that enable users to navigate the page. Add and set up the following essential fields to the mini page:
- Employee (dropdown) connected to the "Employees" lookup
- Owner (dropdown) connected to the "Contact" lookup
- Payroll period (dropdown) connected to the "Payroll period" lookup
- Benefits paid (checkbox)
Fig. 1 Set up the app mini page 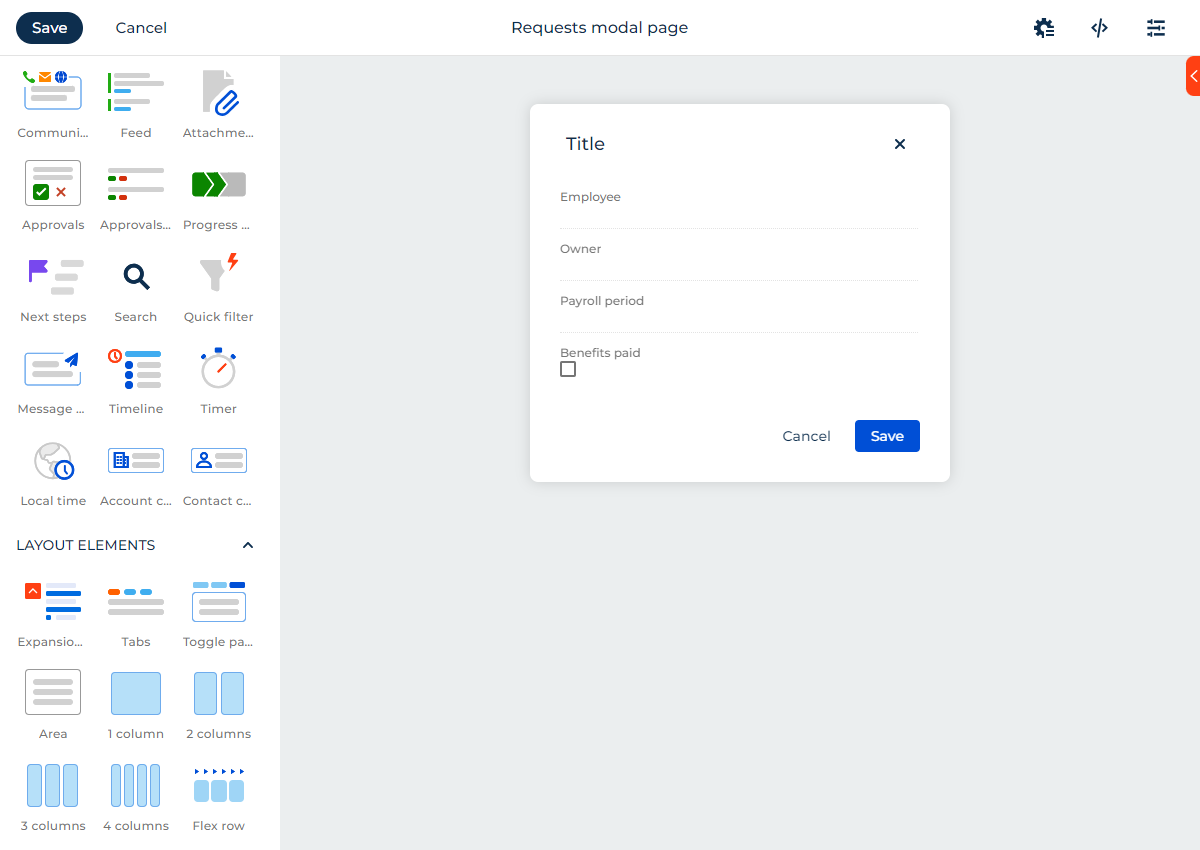
-
Click Save in the top left.
-
Go to the Data model block in the Application Designer → the data model of the current app → Pages tab.
-
Select the mini page in the Page for adding records field (Fig. 2).
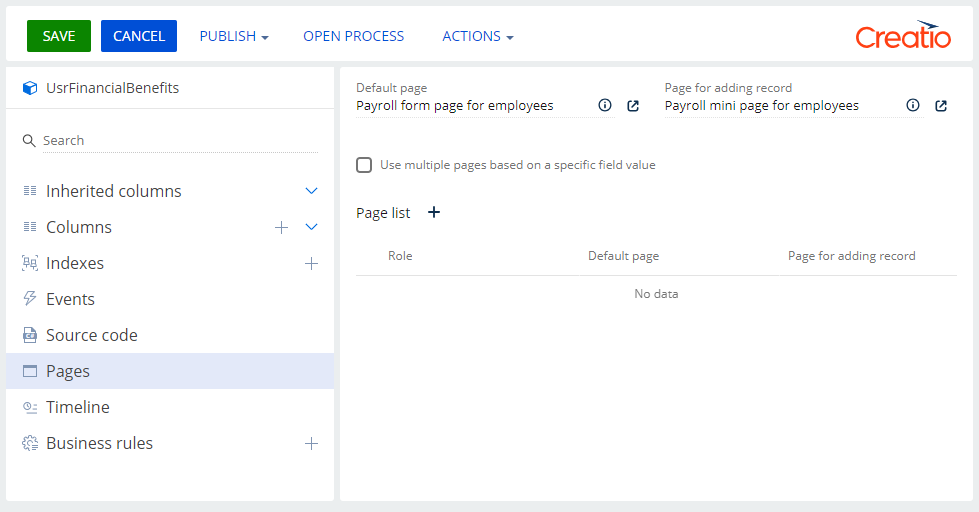
- Save the changes.
You can set up mini page for contractors as well as mini pages for the other app section in a similar way.