Set up the app form pages
Form pages are pages that display record data in its entirety. You can customize any form page easily using Freedom UI Designer. For this example, set up a payroll form page for employees.
Set up the "Financial benefits form page" page that displays financial benefits of an employee in the "Financial benefits" app you created earlier. Rename the page to "Payroll form page for employees." Add fields, expansion panels, tabs, buttons, labels, and dashboards to the page.
-
Click
 to open the System Designer.
 -
Go to the Application management block → Application Hub.
-
Click the Financial benefits app tile.
-
Open the "Financial benefits form page" page.
-
Click
 → enter "Payroll form page for employees" in the Page title field.
 -
Set up the page layout. The page UI already includes the set of components taken from the template. For example, Toggle panel component that has Feed and Attachments components, an area that has a flex container and buttons, as well as Tabs component (Fig. 1).
Fig. 1 Minimum set of form page components 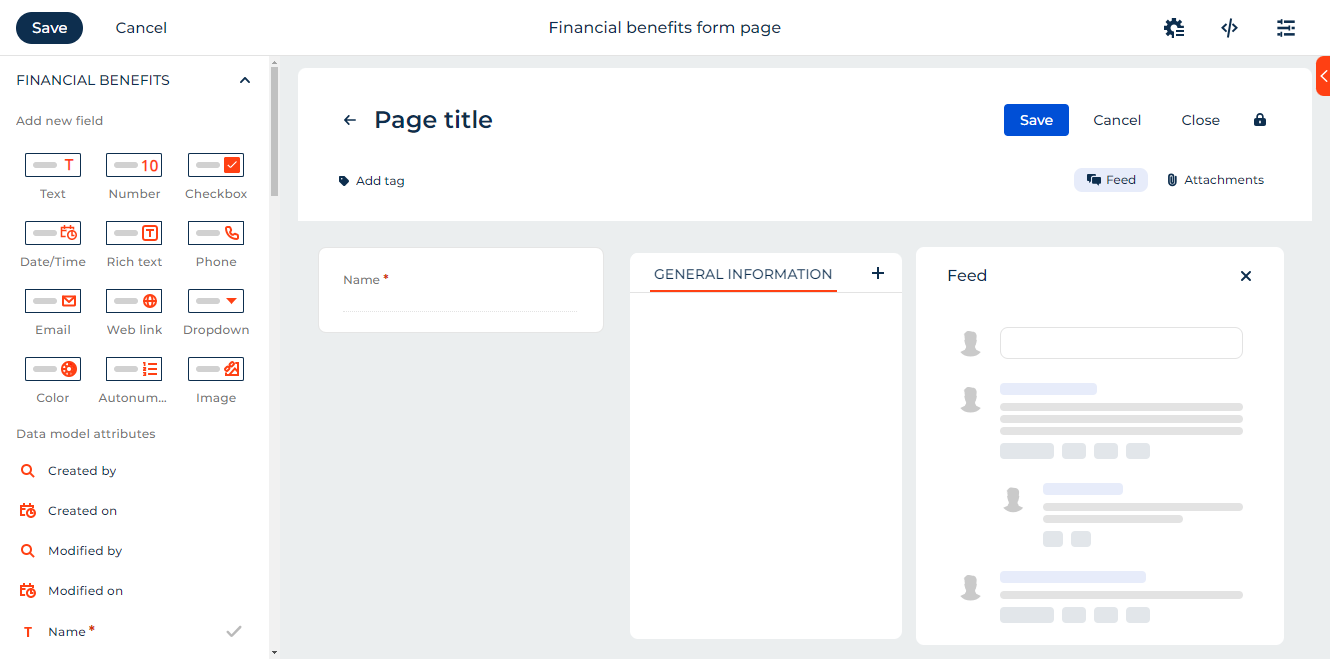
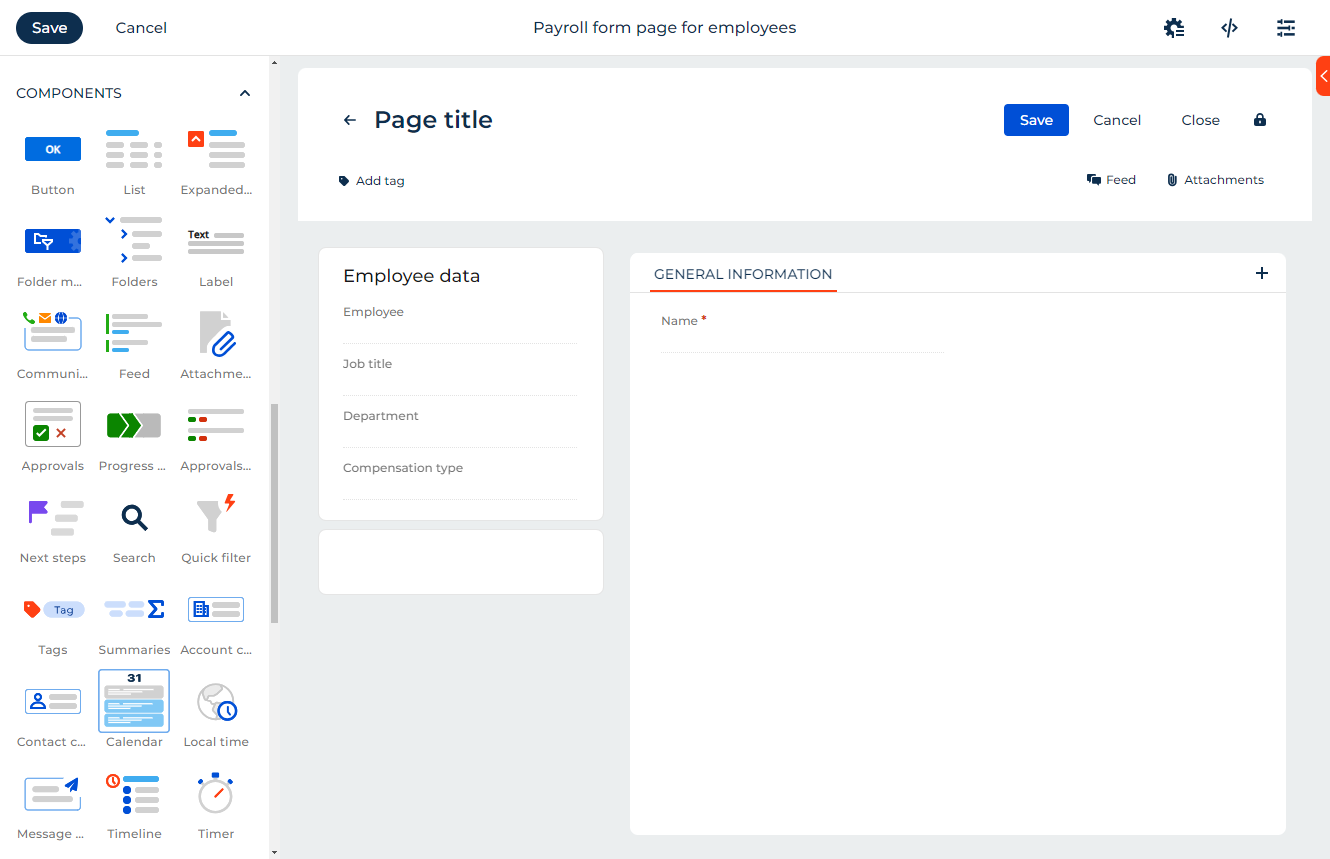
Add an area to the left of the page below the area that contains the Name field by dragging the area from the component library. The area must house other elements that let you divide the content structurally and visually.
noteIf you need to add multiple elements of the same type to the page, you can add only the first element to the canvas, then copy the element the needed amount of times by holding the pointer over it and clicking
 . After that, edit the settings of each added element.
 -
Set up the employee profile:
-
Add a Label element. For example, set its text to "Employee data."
-
Drag the Name field to the General information tab.
-
Attach the following fields to the area and set them up:
-
Configure the input fields for the payroll period data in the bottom left area similarly.
- Payroll period (dropdown) connected to the new "Payroll period" lookup
- Work days in period (number)
- Owner (dropdown) connected to the "Contact" lookup
- Benefits paid (checkbox)
-
-
Add the following tabs to the Tabs component: Payroll, gross, Deductions, Bonuses, Docking, Analytics. Add expansion panels and fields that display the relevant data to the tabs.
The Bonuses tab must contain a list. To do this, drag the Expanded list component to the tab (Fig. 3).
Fig. 3 Set up tabs 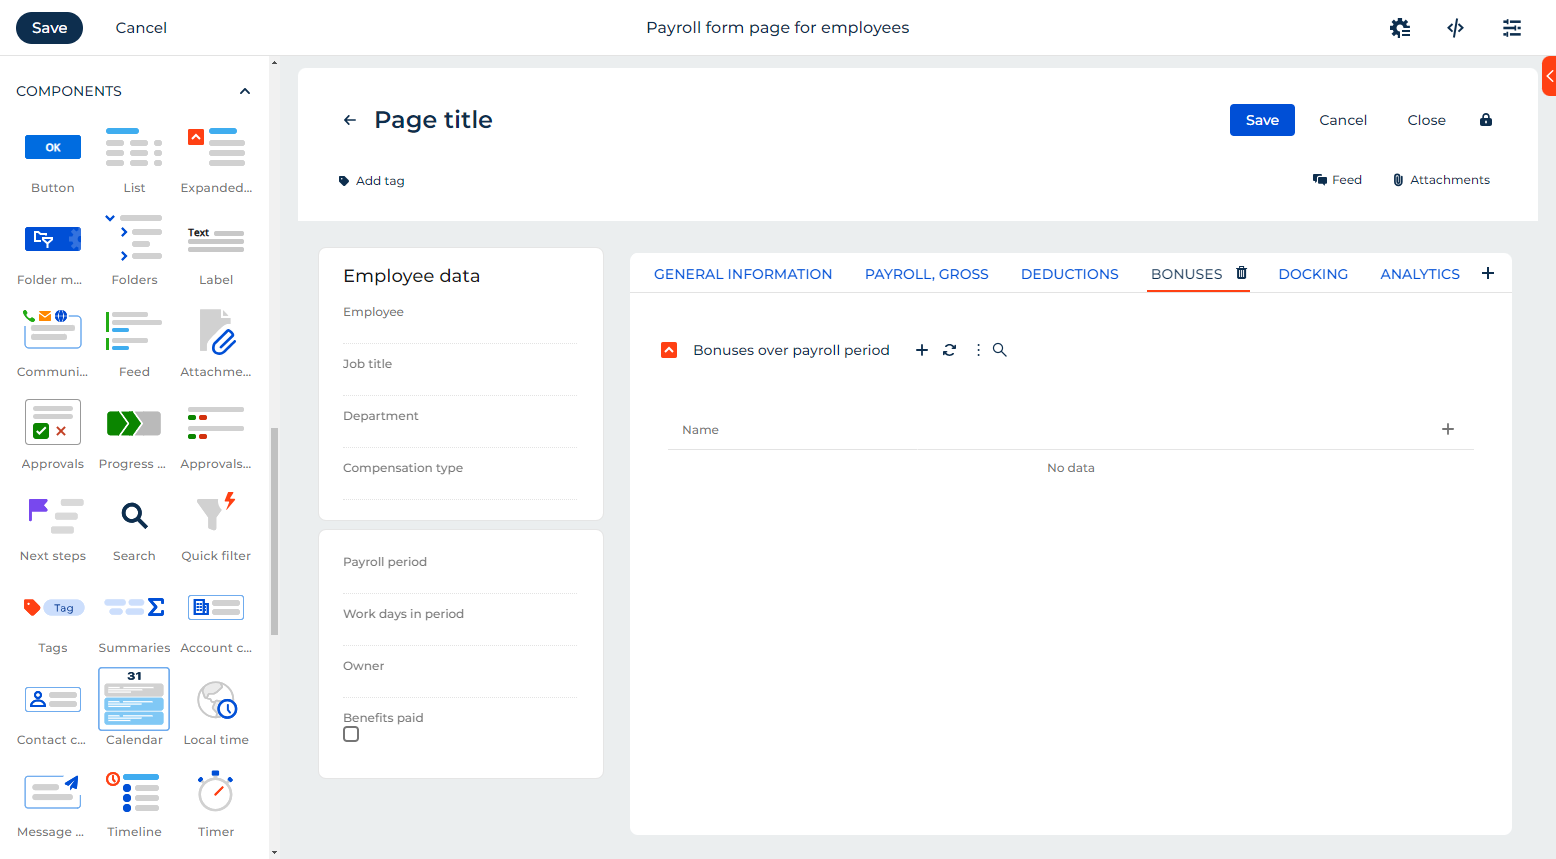
-
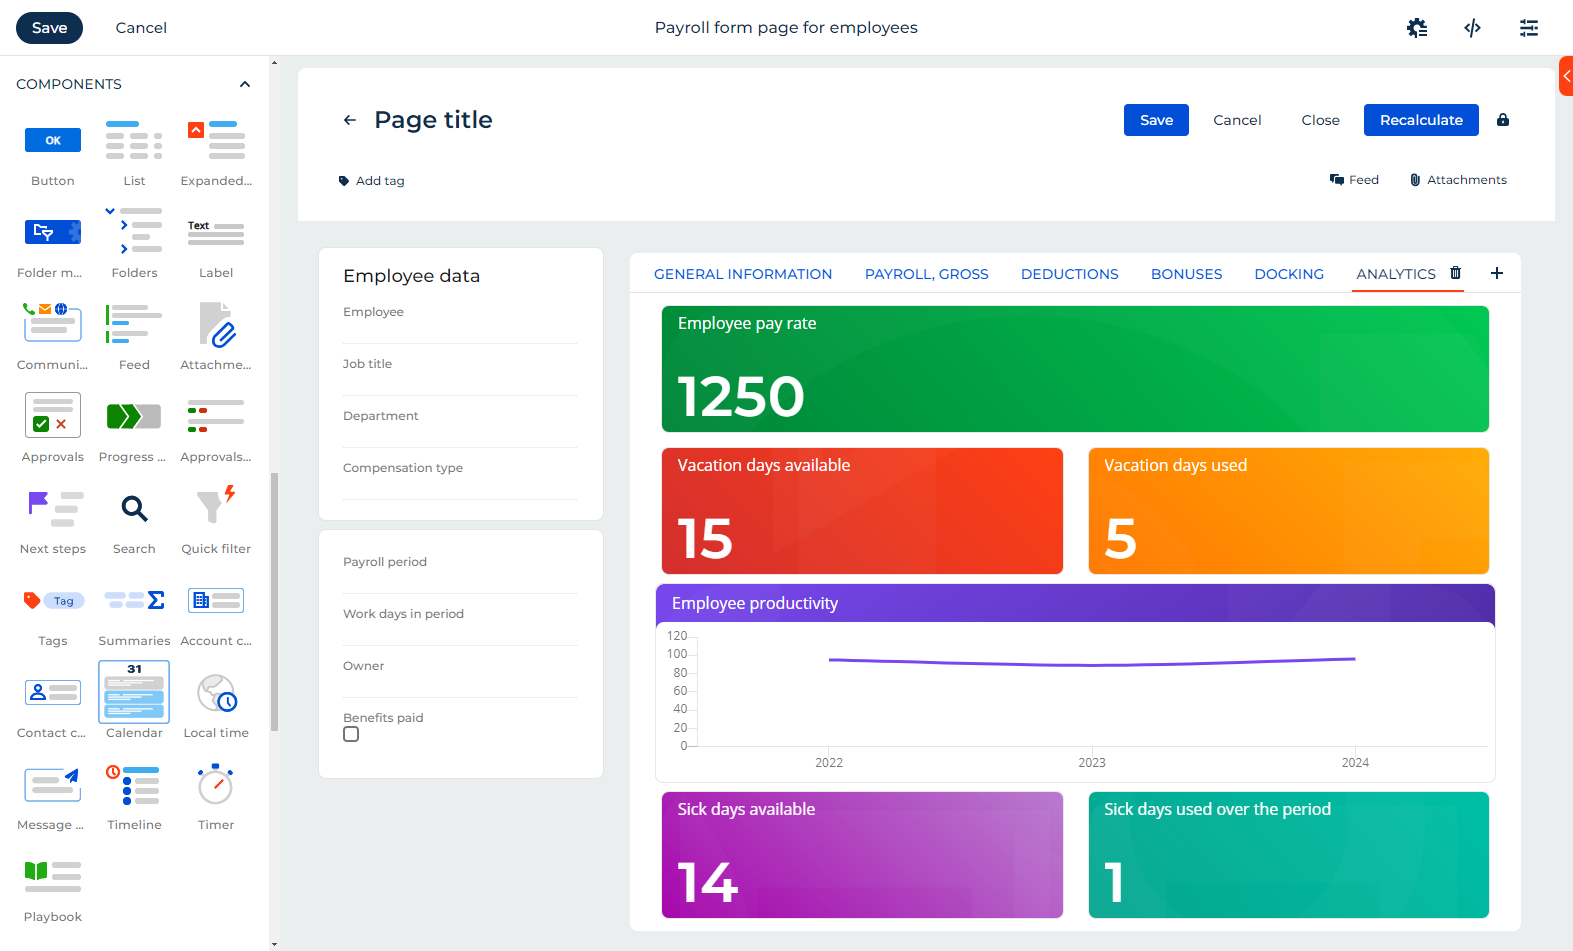
Add dashboards from the Charts group to the Analytics tab:
- Employee pay rate ("Metric"). Must display the pay rate of the employee.
- Vacation days available ("Metric"). Must display the number of vacation days available for the employee over the selected period.
- Vacation days used ("Metric"). Must display the number of vacation days the employee used over the selected period.
- Employee productivity ("Spline"). Must display the employee productivity broken down by the year comparative to the previous year.
- Sick days available ("Metric"). Must display the number of sick days available for the employee over the selected period.
- Sick days used over the period ("Metric"). Must display the number of sick days the employee used over the selected period.
-
Add the "Recalculate" button to the top area. The button must launch the existing business process that updates data (Fig. 4).
- Save the changes.
The app will use this page as a default form page for the object
You can set up form page for contractors as well as form pages for other app section in a similar way.
Freedom UI Designer also lets you set up business rules for page or object that let you customize the page and component behavior further. Learn more: Set up business rules.