Set up Timeline component
Use Timeline components to display chronological records and activities related to a specific object or record. The Timeline provides quick access to information about tasks, communications, additional materials, and other linked Creatio objects in a single stream.
Set up a timeline component
Set up the Timeline component on a record page. Configure which object types appear in the timeline, set up filtering options, and control visibility settings.
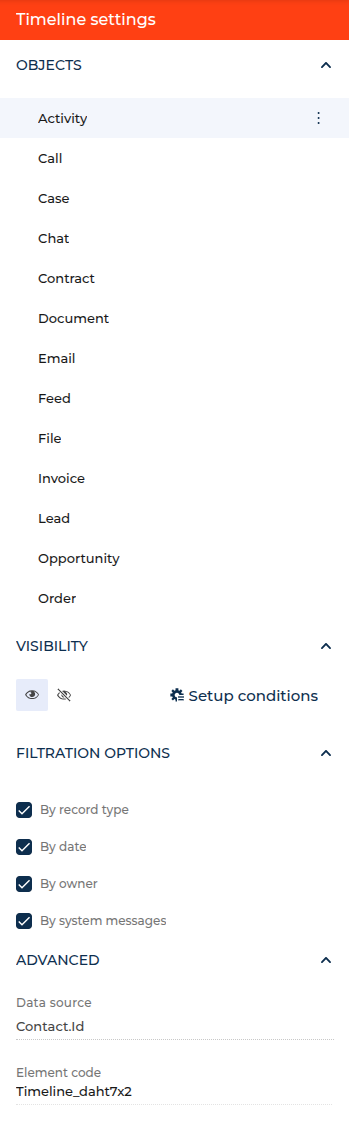
- Drag the Timeline component to the canvas and open the component setup area (Fig. 1).
- Configure the Objects group to select which record types appear in the timeline. The available objects depend on the current page type and may include activities, communications, documents, and other related records.
- Set up the Visibility group:
- Configure Setup conditions to control when the Timeline component is visible on the page based on specific criteria.
- Configure Filtration options to enable user filtering capabilities:
- By record type - Allows users to filter timeline entries by object type.
- By date - Enables filtering by time periods.
- By owner - Allows filtering by record owner.
- By system messages - Provides option to hide/show system-generated messages.
- Review the Advanced group:
- Data source - Shows the data source connection for the timeline.
- Element code - Displays the unique identifier for the component.
- Save the component configuration.
As a result, Creatio will add the Timeline component that displays chronological records based on your configuration. Users will be able to filter timeline entries and view a comprehensive history of record interactions.
Enable automatic timeline updates
Out of the box, some objects show automatic updates made by the current user for the corresponding timeline tiles. You can make other components synchronized with new feed messages and attachments without reloading the page:
- Open the Object Designer.
- Select the object that feeds the component (for example, Case, Lead, or Contact).
- Select the Enable live data update checkbox.
- Save and publish the updated object.
As a result, the Timeline component immediately shows newly added feed messages and files in the workspace. Enabling this has no significant effect on system performance or scalability, but we recommend enabling it only when users expect to see real-time updates for timeline tiles, such as Feed and Files (enabled by default).
Timeline components automatically refresh once live updates are enabled, ensuring users always see the latest activity stream.