Set up the report in the Microsoft Word plug-in and upload it in Creatio
After you install the Microsoft Word plug-in and create a report in Creatio, you can start setting up the report layout. You can customize the layout by editing the standard Microsoft Word template.
Setup of Microsoft Word report template includes the following general steps:
-
Download and edit the template in the Creatio Microsoft Word plug-in. Read more >>>
-
Modify the ready template in the Creatio Microsoft Word plug-in if needed. Read more >>>
-
Upload the updated template file to Creatio. Read more >>>
You can also use macros to set up reports. Learn more: Customize Microsoft Word reports.
Download and edit the template in the Creatio Microsoft Word plug-in
-
Open an empty Microsoft Word document on your computer.
-
Click Connect on the Creatio plug-in toolbar.
-
Log in to Creatio using your credentials (Fig. 1).
Fig. 1 Connect the plug-in and log in 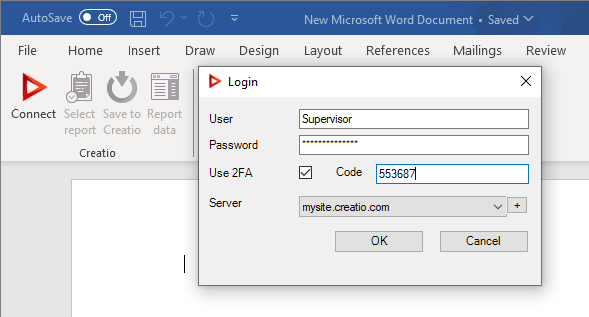
-
Select the needed report from the list by clicking Select report.
As a result, a list of columns for the selected report will be displayed on the right of the Microsoft Word window.
Add fields to the template
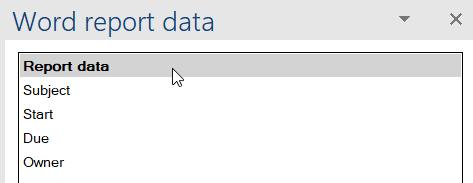
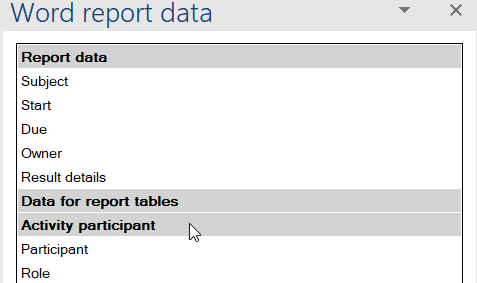
In the template, the report fields are represented as the Microsoft Word fields. When the report is generated, the field will contain data from the corresponding Creatio record. The list of available fields is displayed in the Word report data window (Fig. 2).
Add all fields to the template
To add all the fields configured in the Report Designer to a template, drag a group of fields to the template page (Fig. 2).
As a result, all fields and names of the corresponding Creatio columns will be added to the template (Fig. 3).
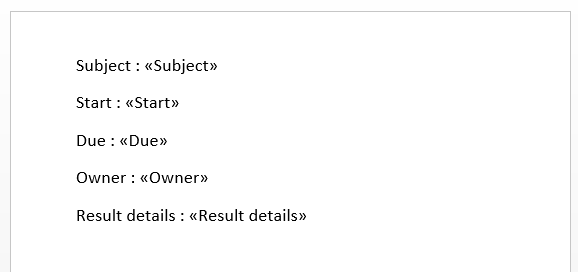
You can use standard Microsoft Word tools to customize the added fields.
Add separate fields to the template
-
Drag the corresponding field to the page to add data to the template (Fig. 4). When the report is generated, the field will contain data from the corresponding Creatio record.
Fig. 4 Add a field to the report template 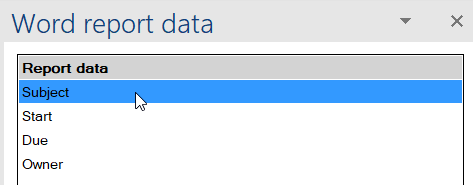
-
Add all other necessary fields as well as the text to the report (Fig. 5).
Fig. 5 Report that has the added fields and static text 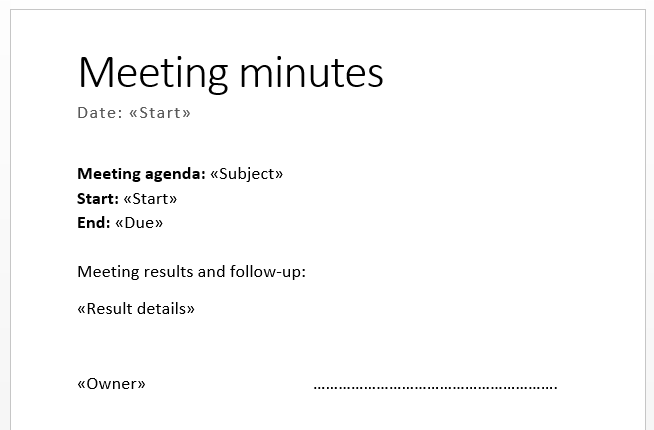
-
Save the report template.
Add table data to a template
Add all table columns to the template
To add all the table columns configured in the Report Designer to a template, drag a group of fields to the template page (Fig. 6).
As a result, the template will contain the table that has all columns from the selected group. Titles of table columns will correspond to the titles of columns in Creatio.
You can use standard Microsoft Word tools to customize the added table. The text in titles of the table columns can be edited. Fields placed in table cells determine data that will be displayed in the column.
Add separate columns
-
Add a simple table that contains the required number of columns to the template page. Each column must comprise a title and one row (Fig. 7).
Fig. 7 Add a table to the template manually 
-
Enter the text of the column titles (Fig. 8).
Fig. 8 Table that has static titles of columns 
-
Drag a column title to an empty cell of the table that must display data from this column (Fig. 9).
Fig. 9 Table that has fields added 
-
Set up the template visual appearance by placing the table in the right part of the file (Fig. 10).
Fig. 10 Set up a template visual appearance 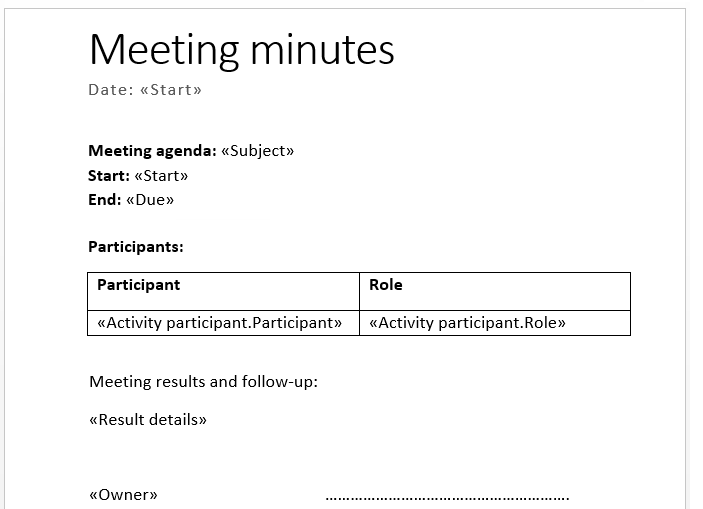
-
Save the report template.
As a result, the fields of the table will contain data from Creatio in the generated report. The number of rows in the table will correspond to the number of records.
Edit the existing template in the Creatio Microsoft Word plug-in
You can modify the layout of any Microsoft Word report in Creatio at any time.
-
Open an empty Microsoft Word document on your computer.
-
Click Connect on the Creatio plug-in toolbar.
-
Log in to Creatio using your credentials.
-
Click Select report on the Creatio tab of the Microsoft Word ribbon.
This opens the list of available Microsoft Word reports.
-
Select a report to configure and click OK. This opens the current report template.
-
Click OK in the pop-up window. This opens the previously configured template file.
-
Make the necessary changes to the template layout.
-
Click Save to Creatio on the Creatio tab of the Microsoft Word ribbon.
As a result, the plug-in will upload your report template to Creatio.
Upload the updated template to Creatio
To add the edited template in Creatio:
- Open an empty Microsoft Word document on your computer.
- Click Connect on the Creatio plug-in toolbar.
- Log in to Creatio using your credentials.
- Click Save in Creatio.
- Click Save.
As a result, a new template will be used the next time this report is generated.
You can also upload the report in the Report Designer directly by clicking Upload template.