Implement Word report using basic macros
To implement the example:
- Create a report. Read more >>>
- Set up the report columns. Read more >>>
- Set up the report template. Read more >>>
- Upload the file of report template to Creatio. Read more >>>
- Set up how to display the report. Read more >>>
1. Create a report
-
Open the Customer 360 app in the No-Code Designer.
-
Open the Advanced settings tab in the No-Code Designer. To do this, click
 in the top right → "Application management" → "Application Hub" → Customer 360 app → "Advanced settings."
 -
Create a user-made package to add the report. To do this, click
 → Create new package → fill out the package properties → Save.
For this example, create the
sdkMsWordReportBasicMacrosuser-made package. -
Change the current package. Instructions: Change the current package.
For this example, change the current package to
sdkMsWordReportBasicMacrosuser-made package. -
Open the Report setup section. To do this, click
 in the top right → System setup → Report setup.
 -
Click New report.
-
Fill out the report properties.
Property
Property value
Report name
Account data
Object
Account
Show in the list view
Select the checkbox
Show in the record page
Select the checkbox
-
Apply the changes.
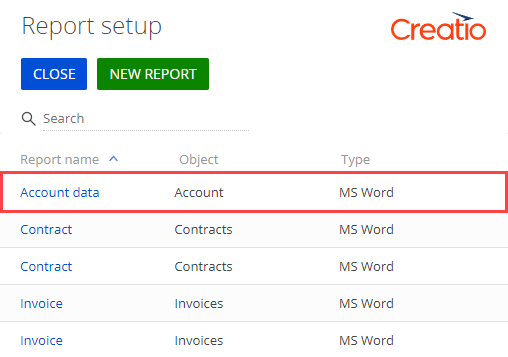
As a result, Creatio will add the "Account data" report to the Report setup section.

2. Set up the report columns
-
Add the report columns.
- Go to the Set up report data block.
- Add the column of account name. To do this, click
 → open the Column field → select the Name → click Select.
 - Add the Type and Primary contact columns similarly.
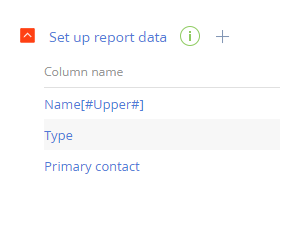
As a result, the "Account data" report data will be as follows.

-
Add the macro tag to the column.
For this example, add the macro tag to the Name column. To do this:
- Open the setting page of the Name column. To do this, go to the Set up report data block and double-click the column or click
 in the column row.
 - Go to the Title property.
- Add the
[#Upper#]macro tag to the Name column. The[#Upper#]macro converts the value of a string to uppercase. - Save the changes.
- Open the setting page of the Name column. To do this, go to the Set up report data block and double-click the column or click
-
Apply the changes.
As a result, the "Account data" report data will be as follows.

3. Set up the report template
-
Install the Creatio plug-in for Microsoft Word. Instructions: Install Creatio plug-in for Microsoft Word (user documentation). This is a one-time procedure.
-
Run the Microsoft Word app.
-
Connect to the Creatio instance that includes the created report.
-
Open the Creatio tab.
-
Click Connect. This opens the Login window.
-
Enter the Creatio user credentials.
-
Click
 . This opens the Available Servers window.
 -
Click New. This opens the Server Connection Setup window.
-
Fill out the server properties.
Property
Property value
Name
An arbitrary server name. For example, "Creatio."
Link
URL of the Creatio instance that includes the created report. For example,
https://mycreatio.com/. -
Click OK. This closes the Server Connection Setup window.
-
Click OK. This closes the Available Servers window and adds the server name to the Server field of the Login window.
-
Click OK. This closes the Login window and connects to the Creatio instance.
-
-
Select the report to set up the template.
- Open the Creatio tab.
- Click Select report. This opens the Creatio Word reports window.
- Select "Account data" report.
- Click OK. This closes the Creatio Word reports window and opens the Word report data panel that includes the "Account data" report data set up in the Creatio instance.
-
Set up the template layout based on your business goals.
As a result, the template of the "Account data" report will look as follows.

4. Upload the file of report template to Creatio
- Open the Creatio tab.
- Click Save to Creatio.
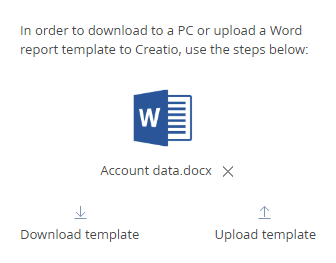
As a result, the template file of the "Account data" report will be uploaded to the report page in Creatio.

5. Set up how to display the report
-
Add the report to the Accounts section page.
-
Open the Accounts list page. To do this, click
 in the top right → Application management → Application Hub → Customer 360 → Accounts list page.
 -
Add a button that opens the "Account data" report.
-
Add a Button type component to the toolbar of the Freedom UI Designer.
-
Click
 and fill out the button properties.
Element
Property
Property value
Button that opens the "Account data" report
Title
Print report
Action
Print report
Which data to print?
List Account | DataTable
-
-
Save the changes.
-
-
Add the report to the account page.
-
Open the Accounts form page. To do this, click
 in the top right → Application management → Application Hub → Customer 360 → Accounts form page.
 -
Add a button that opens the "Account data" report.
-
Add a Button type component to the toolbar of the Freedom UI Designer.
-
Click
 and fill out the button properties.
Element
Property
Property value
Button that opens the "Account data" report
Title
Print report
Action
Print report
Print settings
Print report for the current record
-
-
Save the changes.
-
As a result:
-
Creatio will add the Print report button that lets you open the "Account data" report from the Accounts section page.

-
Creatio will add the Print report button that lets you open the "Account data" report from the account page.

View the result
To view the result of the example that generates the "Account data" report from the Accounts section:
- Open the Accounts section.
- Select an arbitrary account. For example, "Alpha Business."
- Generate the report. To do this, click Print report → Account data.
- Save the report file to your device.
- Open the report file.
As a result, Creatio will generate the "Account data" report from the Accounts section. View the result >>>
To view the result of the example that generates the "Account data" report from the account page:
- Open the Accounts section.
- Open the page of an arbitrary account. For example, "Alpha Business."
- Generate the report. To do this, click Print report → Account data.
- Save the report file to your device.
- Open the report file.
As a result, Creatio will generate the "Account data" report from the account page. View the result >>>
