Brand and publish mobile apps
You can use your logos and names to brand a mobile app built on Mobile Creatio using the SDKConsole utility.
General procedure to set up the SDKConsole utility:
- Perform the preliminary setup. Read more >>>
- Install and set up the SDKConsole utility. Read more >>>
- Run the SDKConsole utility. Read more >>>
1. Perform the preliminary setup
-
Ensure you can publish the app.
- For iOS app, you must be enrolled into Apple Developer program. Learn more: Apple Developer Program.
- For Android app, you must have a Google Play developer account. Learn more: Google Play Console.
-
Enable Firebase Cloud Messaging to send push notifications.
-
Sign in to Firebase website.
-
Click Go to console.
-
Create a project in the console.
- For iOS app: Create a Firebase project (official vendor documentation).
- For Android app: Create a Firebase project (official vendor documentation).
-
Register your iOS and/or Android app in the project.
- For iOS app: Register your app with Firebase (official vendor documentation).
- For Android app: Register your app with Firebase (official vendor documentation).
-
Download the config files for the app and save them to your local machine.
- For iOS app: Get config file for your iOS app (official vendor documentation).
- For Android app: Get config file for your Android app (official vendor documentation).
-
Specify additional settings to receive Firebase push notifications (on-site only).
- For iOS app: If your Apple devices aren't getting Apple push notifications (official vendor documentation).
- For Android app: Android Enterprise Network Requirements (official vendor documentation).
-
Retrieve the service account key. To do this, open the Firebase project → click
 → Project settings → Cloud Messaging tab → Firebase Cloud Messaging API (V1) → Manage Service Accounts.
 -
Create a service account if needed. Learn more: Firebase Service Accounts Overview (official vendor documentation).
-
Create a new service account key. To do this, select a service account → Keys tab → Add key → Create new key → JSON → Create → save the generated JSON file to your local machine.
-
Open the uploaded file and copy the content.
View an example of the file content below.
Example of the file content{
"type": "service_account",
"project_id": "your-project-id",
"private_key_id": "your-private-key-id",
"private_key": "-----BEGIN PRIVATE KEY-----\nyour-service-account-key\n-----END PRIVATE KEY-----\n",
"client_email": "your-client-email",
"client_id": "your-client-Id",
"auth_uri": "https://accounts.google.com/o/oauth2/auth",
"token_uri": "https://oauth2.googleapis.com/token",
"auth_provider_x509_cert_url": "https://www.googleapis.com/oauth2/v1/certs",
"client_x509_cert_url": "https://www.googleapis.com/robot/v1/metadata/x509/test1-806%40your-project-id.iam.gserviceaccount.com",
"universe_domain": "googleapis.com"
}Where
your-project-id,your-private-key-id,your-service-account-key,your-client-email,your-client-Idare parameter values generated by Firebase Cloud Messaging. -
Open the System settings section in Creatio. To do this, click
 in the top right → System setup → System settings.
 -
Save the copied content to the "FirebaseAccountService" (
FirebaseAccountServicecode) system setting.
-
-
Install Java development kit.
- For iOS app, install Java development kit version 8. Download the file.
- For Android app, install Java development kit version 17. Download the file.
-
Register your app with App Store Connect (iOS app only). Instructions: App Store Connect workflow (official vendor documentation).
-
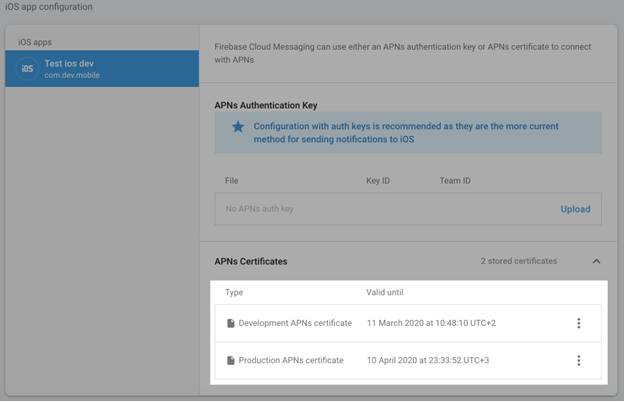
Install the APNs certificates into Firebase (iOS app only).
- Open the Certificates page.
- Add and install development and production
Apple Push Notification service SSLcertificates into your Mac. - Generate, download and install provisioning profiles.
- Upload the *.p12 files exported from Keychain Access in the Firebase settings on the Cloud Messaging tab.
-
Install J2ObjC (iOS app only). The native functionality of the Mobile Creatio app is partly written in Java. The J2ObjC utility for Java code to Objective-C translation is required for shared use on iOS. Learn more: J2ObjC overview (official vendor documentation). To install J2ObjC:
- Download the J2ObjC release version archive (2.0.5) to a Mac. Download the file (GitHub).
- Unpack the archive into your user home directory (
MacintoshHD/Users/MyUser/). The unpacked archive must contain thedistdirectory. - Rename the unpacked archive directory to
j2objc.
2. Install and set up the SDKConsole utility
-
Send the email address that is or will be associated with your GitLab account to Creatio support (
support@creatio.com). -
Sign up for the SDKConsole project using the link received from the Creatio support. This accesses the SDKConsole project.
-
Sign up for GitLab using the link received from the Creatio support and follow the instructions.
If you sign in using a third-party service, make sure that you have a password set up for your GitLab account. To do this, click the profile icon in the top right → Edit profile → Password.
-
Install the SDKConsole utility.
Install the SDKConsole utility on Mac
The utility supports iOS and Android on Mac. You will be requested to enter an administrator password on your Mac during the installation. If you do not know or remember the password, ask your system administrator or the owner of the Mac.
-
Install XCode. Download the file.
-
Install Git. Download the file.
-
Download the current version of the SDKConsole utility to a directory to which you have all permissions. To download the utility, run the following Git command.
git clone https://gitlab.com/bpmonlinemobileteam/sdkconsole.git SDKConsole -
Open terminal and go to the directory where the SDKConsole utility is located.
-
Install brew. To do this, run the following command at the terminal.
ruby -e "$(curl -fsSL https://raw.githubusercontent.com/Homebrew/install/master/install) -
Run the
./installcommand at the terminal. -
If the command was successful, install fastlane utility plugins. To do this, run the
./install_pluginscommand at the terminal. When asked whether fastlane should modify the Gemfile, entery.
Install the SDKConsole utility on Windows
The utility supports only Android on Windows.
-
Install or update Node.js® and npm package manager if needed. Download the file.
-
Install Git. Download the file.
-
Install Android Studio. Download the file.
-
Download the current version of the SDKConsole utility to any directory. To do this, run the following Git command.
git clone https://gitlab.com/bpmonlinemobileteam/sdkconsole.git SDKConsole -
Open the command prompt and go to the directory where the SDKConsole utility is located.
-
Run the
npm installcommand at the command prompt.
-
-
Update the SDKConsole utility if needed.
- Back up the
SDK.configfile that contains the user settings. That way you will not have to reconfigure the utility. - Download the current version of the SDKConsole utility from the Git repository.
- Unpack the archive into the directory where the SDKConsole utility is located.
- Move the
SDK.configbackup to the utility directory.
- Back up the
-
Configure the SDKConsole utility. To do this, configure the settings in the
SDK.configfile. Learn more: SDKConsole utility settings. Make sure that you do not use a single backslash (\) in your file paths.View an example of the
SDK.configfile below.Example of the SDK.config file{
"name": "Creatio beta",
"web_resources_path": "res/web",
"tasks": ["prepare", "build", "deploy"],
"use_extended_logging": true,
"server_url": "https://mysite.creatio.com/",
"iOS": {
"repository_path": "https://gitlab.com/bpmonlinemobileteam/ios.git",
"source_path": "",
"google_service_info_file": "",
"launch_storyboard_image_path": "res//LaunchStoryboard.png",
"app_identifier": "com.myapp.mobile",
"app_icon_path": "../res/AppIcon.png",
"version_number": "7.13.9",
"build_number": "2",
"app_store_login": "some@gmail.com",
"certificate_path": "/Users/your_user_dir/ios_distribution.cer",
"certificate_password": "private_key_password_of_certificate",
"apple_2FA_specific_password": "apple_specific_password",
"testflight_changelog": "My what's new"
},
"Android": {
"build_type": "debug",
"repository_path": "https://gitlab.com/bpmonlinemobileteam/android.git",
"source_path": "",
"google_service_info_file": "",
"package_name": "com.myapp.mobile",
"version_number": "1.1.1",
"build_number": 2,
"native_resources_path": "res/android/res",
"key_file": "C:/hybrid/platforms/android/androidappkey",
"store_password": "android_app_distribution_password",
"key_alias": "some_key_alias",
"key_password": "key_password"
}
}
3. Run the SDKConsole utility
Run the SDKConsole utility on Mac
- Open Terminal in the directory where the SDKConsole utility is located.
- Run the
./buildcommand.
As a result, depending on the tasks parameter value specified in the SDK.config file, the SDKConsole utility can execute different actions listed in the table below.
| Result of the SDKConsole utility execution |
|---|---|
prepare | Brands your iOS and/or Android project. You get a ready project, but you need to build and publish the app manually in AppStore and/or Google Play. |
build | Builds the project and saves an assembled *.ipa iOS app file and/or *.apk Android app file to the utility directory. |
deploy | iOS only. Immediately publishes the app to TestFlight using the authentication parameters specified in the |
If something goes wrong while the SDKConsole utility is running on Mac, you will receive one of the errors listed below.
Error. The Unable to determine Android SDK directory error on Mac.
Solution.
-
Open Terminal.
-
Run the following commands at the terminal.
echo "export ANDROID_HOME=~/Library/Android/sdk;export PATH=${PATH}:$ANDROID_HOME/tools:$ANDROID_HOME/platform-tools:$ANDROID_HOME/build-tools:$ANDROID_HOME/platforms;" >> ~/.bash_profile source ~/.bash_profile
Error. The Couldn't find the specified scheme 'bpm'online'. Please make sure that the scheme is shared... error when running the build for an iOS project on Mac.
Solution. Re-build the app. If this does not help, take the following steps:
- Open the iOS project (
BPMonlineMobile.xcworkspace) in XCode. - Select the current build scheme. If the
[bpm'online]scheme is not selected, select it in the list. - Click the current scheme once more and select Edit scheme... in the list.
- Select the Shared checkbox.
- Close XCode.
- Run the
./buildcommand at the Terminal.
Error. Remove the permission denied message for my build in the Mac Terminal.
Solution. Run the following command at the Terminal.
chmod -R +x build
Error. The Tool 'agvtool' requires Xcode, but active developer directory '/Library/Developer/CommandLineTools' is a command line tools instance error on Mac.
Solution. Run the following command at the Terminal.
sudo xcode-select -s /Applications/Xcode.app/Contents/Developer
Error. The function fs.copyFileSync is undefined error during the build on Mac.
Solution. Run the following commands at the Terminal.
brew link --overwrite node
brew postinstall node
Run the SDKConsole utility on Windows
- Open the command line.
- Go to the directory where the SDKConsole utility is located.
- Run the
node SDKConsole.jscommand.
As a result, depending on the tasks parameter value specified in the SDK.config file, the SDKConsole utility can execute different actions listed in the table below.
| Result of the SDKConsole utility execution |
|---|---|
prepare | Brands your Android project. You get a ready project, but you need to build and publish the app manually in Google Play. |
build | Builds the project and saves an assembled *.apk Android app file to the utility directory. |
If something goes wrong while the SDKConsole utility is running on Windows, you will receive the error listed below.
Error. The Unable to determine Android SDK directory error on Windows.
Solution. Specify the ANDROID_HOME environment variable where you need to provide the path to the Android SDK specified during the installation of Android Studio.
Resources
Apple Developer Program (official Apple documentation)
Google Play Console (official Google documentation)
Official Firebase documentation for Apple platforms
Official Firebase documentation for Android
Java development kit version 8 (for iOS app) (official Oracle documentation)
Java development kit version 17 (for Android app) (official Oracle documentation)