1. Create a new section
On the previous step, we have configured a development package and set it as the current Creatio package. On this step, set up the new section’s interface using the built-in no-code tools.
Set up the section
Use the Section Wizard to set up a section.
To do this:
-
Click
 to open the System Designer.
 -
Click Section wizard in the System setup block.
-
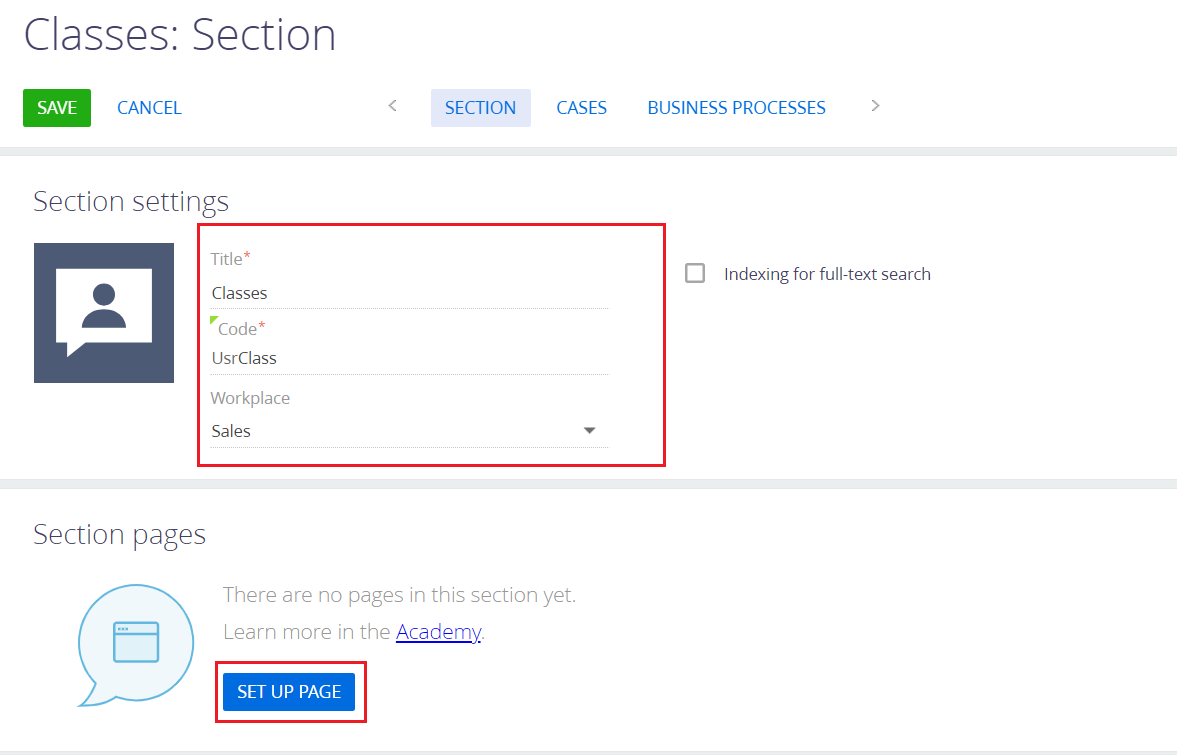
Fill out the fields for a new section.
- Set Title to "Classes".
- Set Code to "UsrClass".
- Set Workplace to "Sales".
-
Click Set up page to set up a section page.
-
Add fields to the page:
-
Select a field of the desired type in the menu on the left.
-
Drag&drop the field to the page.
-
Fill out the properties of the field:
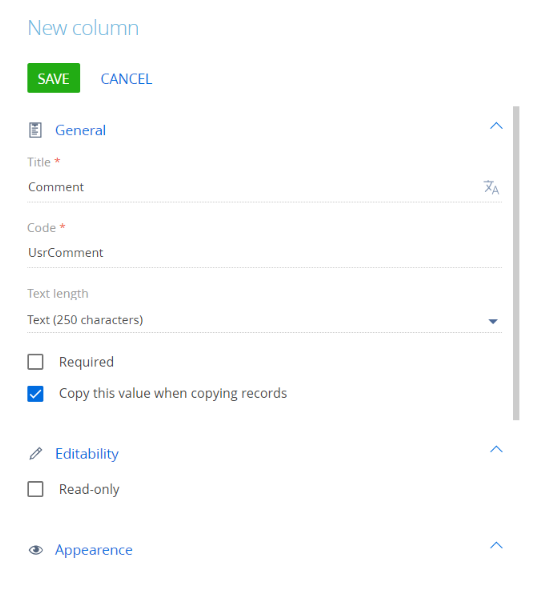
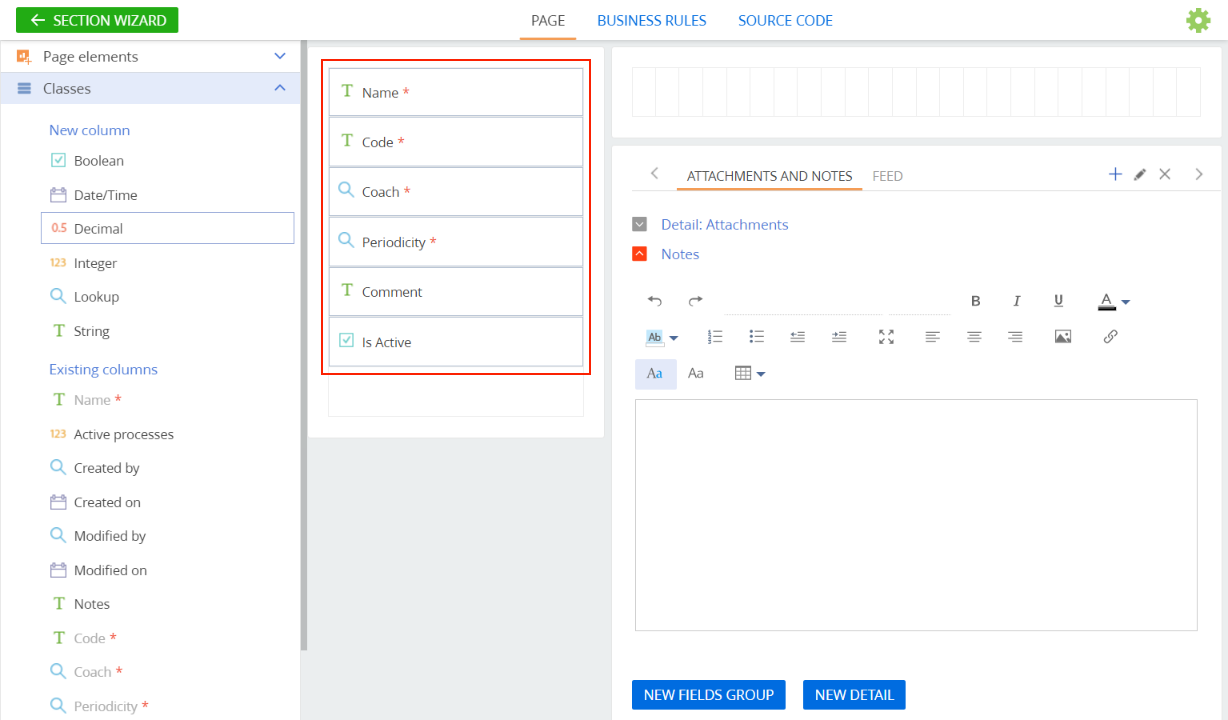
Add these fields to the page:
Title
Code
Data type
Name*
UsrName
String
Code*
UsrCode
String
Coach*
UsrCoach
The existing "Employee" lookup
Periodicity*
UsrPeriodicity
A new "Periodicity" lookup
Comment
UsrComment
String
Is Active
UsrIsActive
Boolean
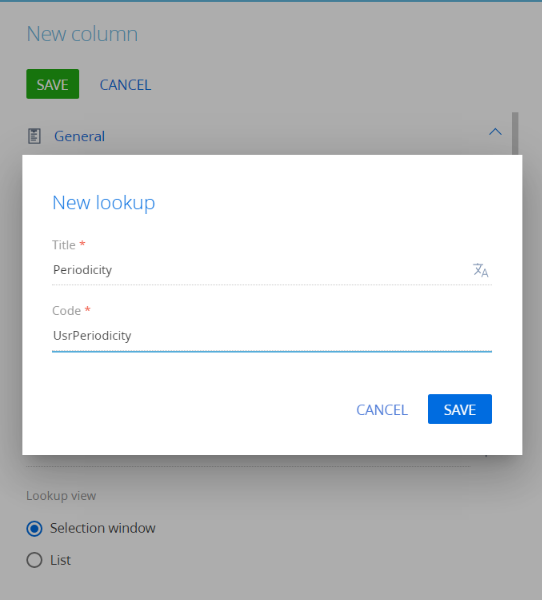
To add a new lookup for the "Periodicity" field:
- Click Add new lookup.

-
-
Aside from the fields, the section page will also contain the class exercise schedule. Add a new detail (using the New detail button) to display group classes on the section page.
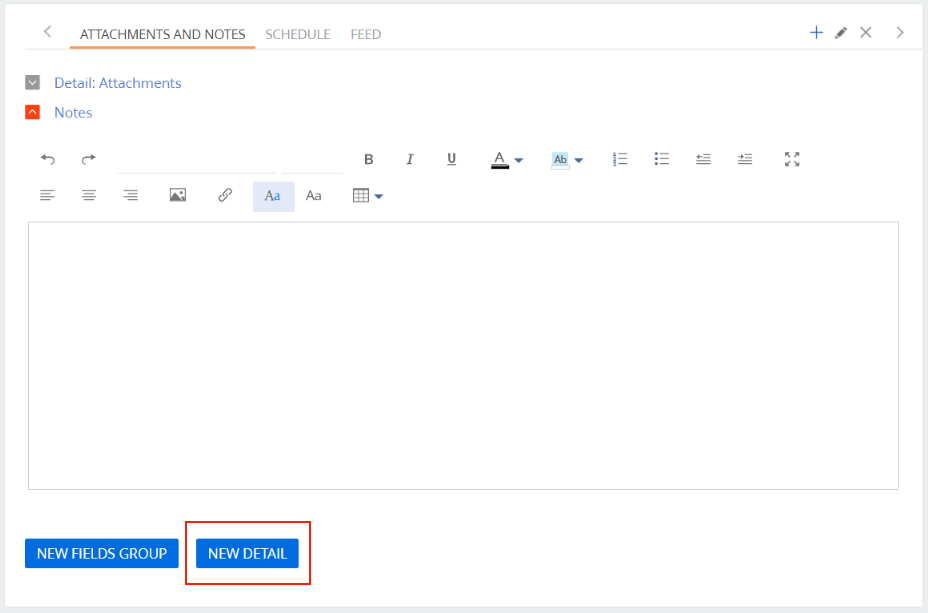
Click Add new detail → Add using new object.
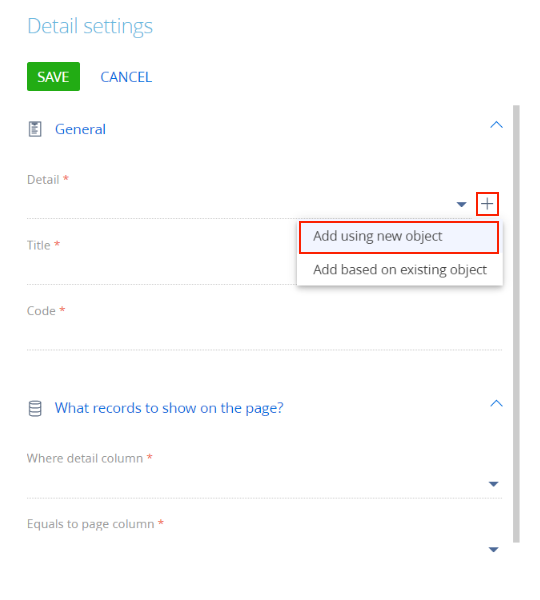
Fill out the detail’s properties:
- Set Object title to "Group training".
- Set Detail title to "Group trainings".
- Set Code to "UsrGroupTraining".
- Set Make the list editable to yes.
- Set Connect by lookup to "Classes".
- Set Lookup column title to "Class".
- Set Lookup column code to "UsrClass".
-
Save the section. At this point, the section is already available in Creatio.
-
Set up the way the columns on the section record list are displayed separately.
- Open the section list.
- Click View → Select fields to display in the toolbar.
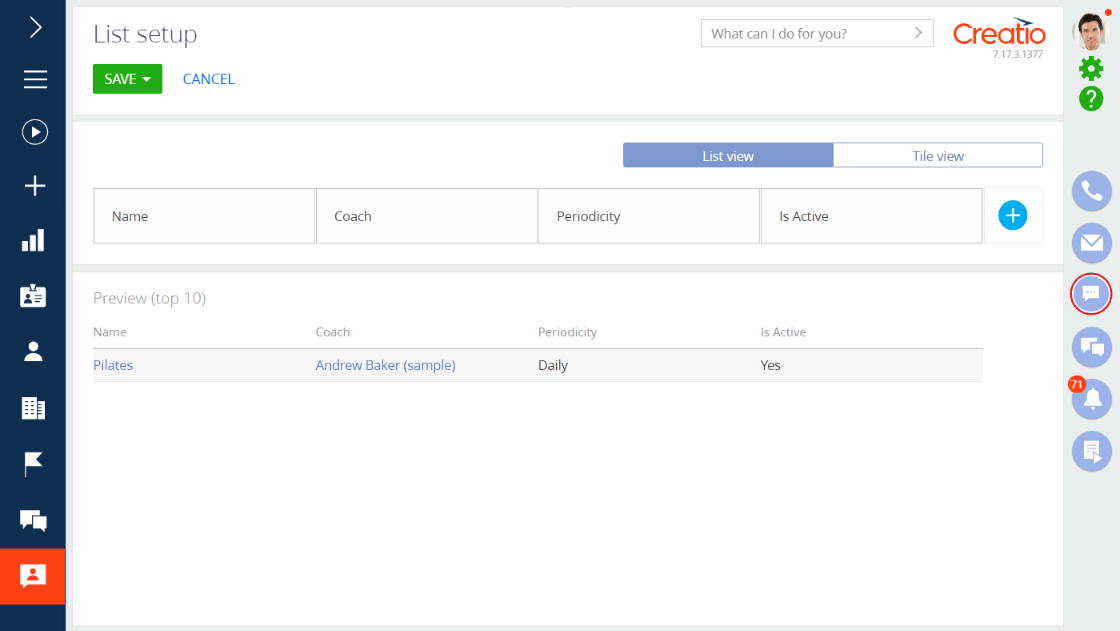
- Save the changes.
Set up a detail
Set the group exercise schedule for the section as the final step in creating a new section by adding the details' required fields and choosing how they should appear in the detail list. You can do this directly on the class’s page.
-
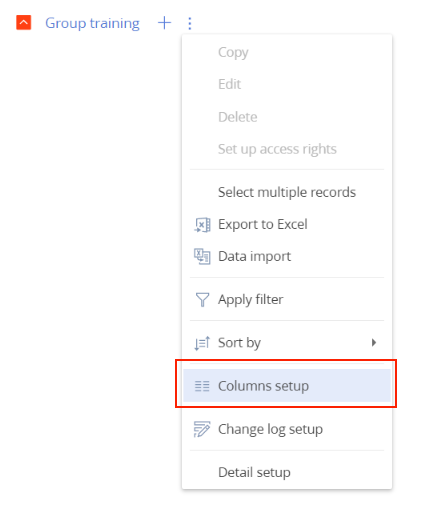
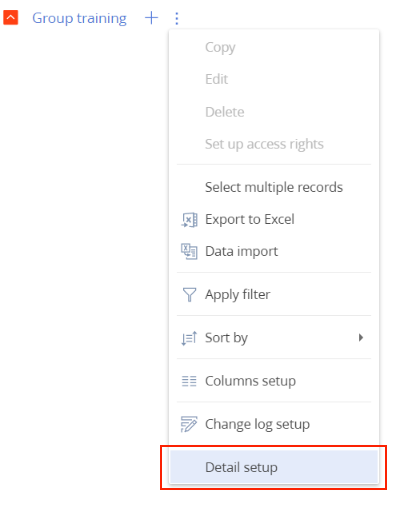
Click New to create a new record in the Classes section’s list. On the page that opens, go to the "Group exercise" detail and open the Detail Wizard. Select Detail setup in the detail’s menu.
-
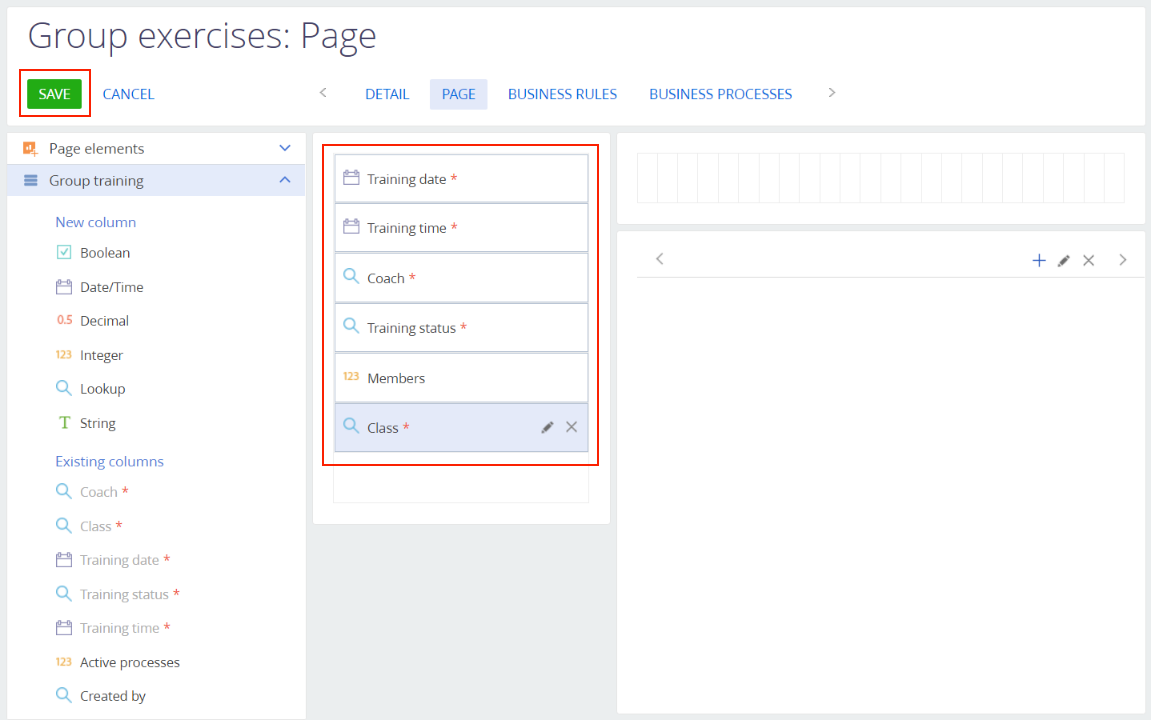
Use the Detail Wizard to set up the detail’s fields on the Page tab. Note that Creatio adds a required field "Class" when creating a detail in the Section Wizard. You should just drug&drop this field to the page.
Title
Code
Data type
Training date*
UsrTrainingDate
Date
Training time*
UsrTrainingTime
Time
Coach*
UsrCoach
The existing "Employee" lookup
Training status*
UsrTrainingStatus
A new "Training status" lookup
Members
UsrMembers
Integer
Class*
UsrClass
The existing "Classes" lookup
To add a new lookup for the "Training status" field:
-
Click Add new lookup.
-
Fill out the lookup’s properties:
- Set Title to "Training status".
- Set Code to "UsrTrainingStatus".
-
Save the detail page.
-
-
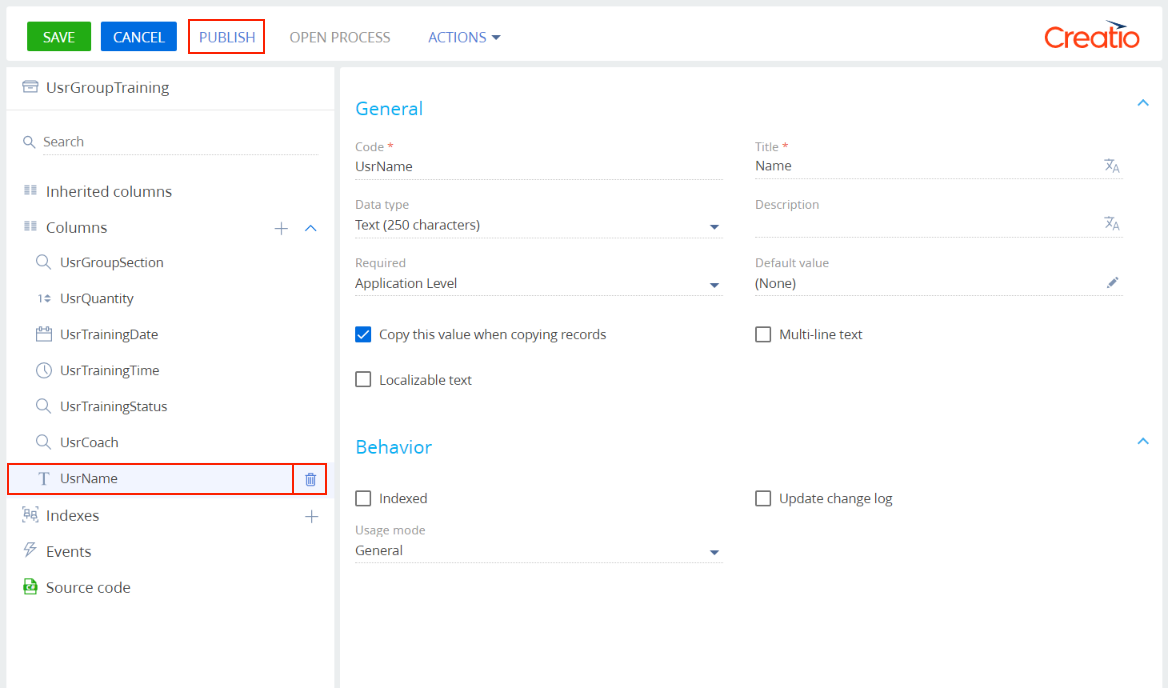
Note that Creatio adds a required field "Name" when creating a detail in the Section Wizard. This field is not required for this example. Delete it.
- Go to the Configuration section.
- As a result, the Section and Detail Wizard will create a set of required schemas and attached data in the "TryItPackage." Select the "
UsrGroupTraining" schema. This is the schema of the object on which the "Group trainings" detail is based. - Double-click the schema.
- Delete the "UsrName" column from the object’s column list.
- Publish the schema.
-
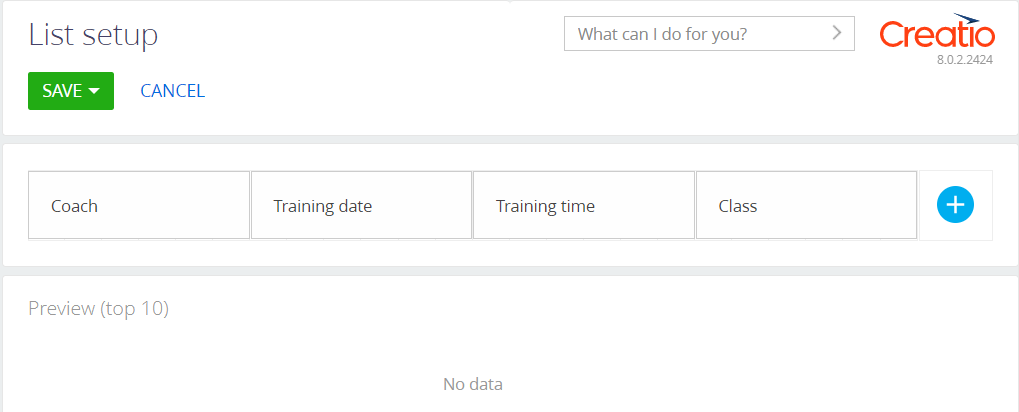
The timetable detail is almost finished. Set up the detail’s columns as the final step.
As a result, we have fully configured the new section's interface. On the next step:
- fill out the new lookups.
- add the gym number system setting.
- attach the new data to the development package.
