Add test for the custom class
Add tests for the custom class implemented in the UsrNUnitSourceCode schema of the "Source code" type in the sdkNUnit user-made package.
1. Install NUnit Visual Studio adapter
Install NUnit adapter as a Visual Studio extension
Option 1:
- Download the extension from the Visual Studio Marketplace.
- Double-click the *.vsix file and run the installation.
- Select the needed Visual Studio versions during the installation.
Option 2:
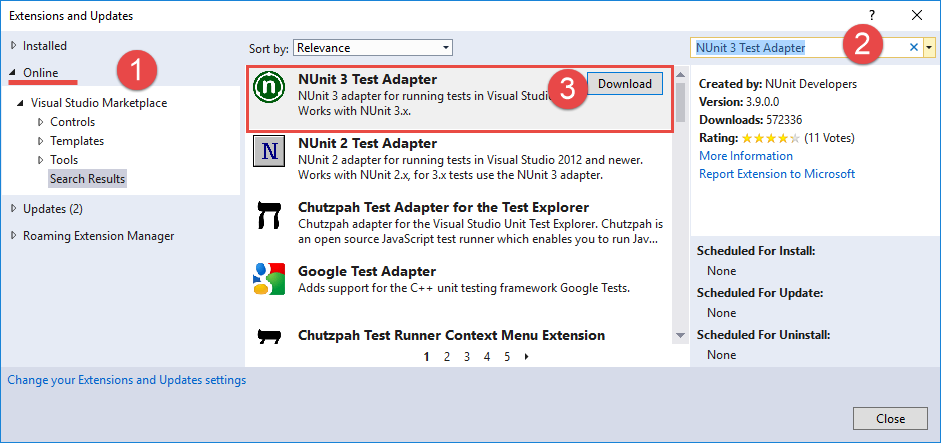
- Click Tools → Extensions and Updates in Visual Studio.
- Select the Online filter (1).
- Enter "NUnit 3 Test Adapter" (2) in the search bar.
- Select the
NUnit 3 Test Adapterextension (3) in the search results. - Click Download to install the extension.
Install NUnit adapter as a NuGet package
-
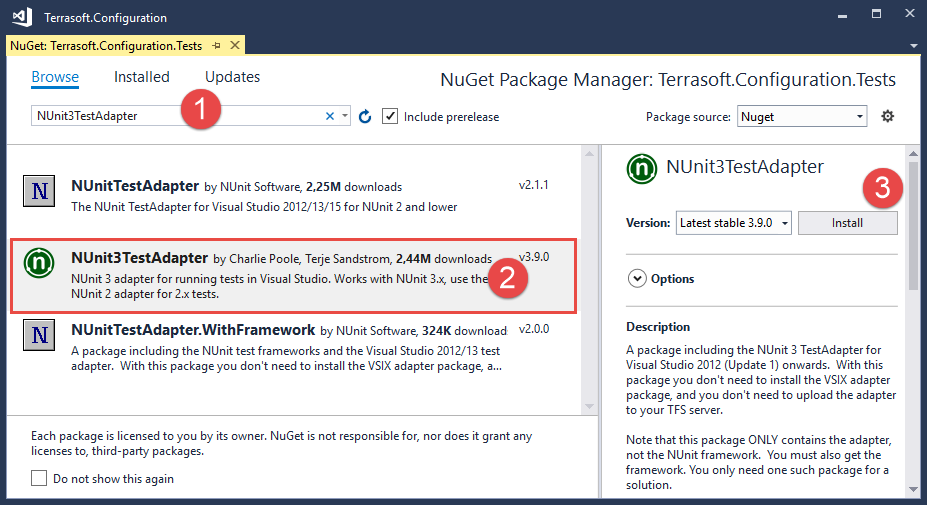
Right-click the test project name, for example,
Terrasoft.Configuration.Tests.csproj, and select the Manage NuGet Packages... command. -
Enter "NUnit3TestAdapter" (1) in the search bar.
-
Select the
NUnit 3 Test Adapterpackage (2) extension in the search results. -
Click Install to install the package.
Learn more about installing the NuGet package: official vendor documentation (Microsoft).
2. Export the package to the file system
You can create unit tests for .NET classes from Creatio packages only in the file system development mode.
This example uses the sdkNUnit user-made package.
To download a package to the file system:
- Set up Creatio for the file system development mode. Instructions: External IDEs.
- Select Download packages to file system in the File system development mode group of the action menu.
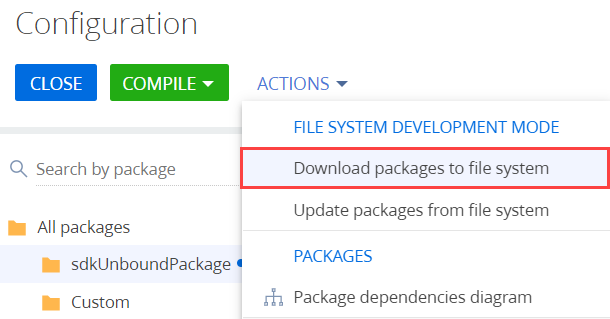
As a result, the packages will be downloaded along the ..\Terrasoft.WebApp\Terrasoft.Configuration\Pkg path to the directory whose name matches the package name. The sdkNUnit package contains the UsrNUnitSourceCode schema of the "Source code" type.
The UsrNUnitSourceCode class that contains the methods to write tests is implemented in the source code of the UsrNUnitSourceCode schema.
namespace Terrasoft.Configuration {
    public class UsrNUnitSourceCode {
        /* String property. */
        public string StringToTest {
            get {
                return "String to test";
            }
        }
        /* The method that verifies the equality of the two strings. */
        public bool AreStringsEqual(string str1, string str2) {
            return str1 == str2;
        }
    }
}
3. Set up the unit test project
This example creates unit tests in the Terrasoft.Configuration.Tests.csproj pre-configured project that is delivered together with the Terrasoft.Configuration.sln solution.
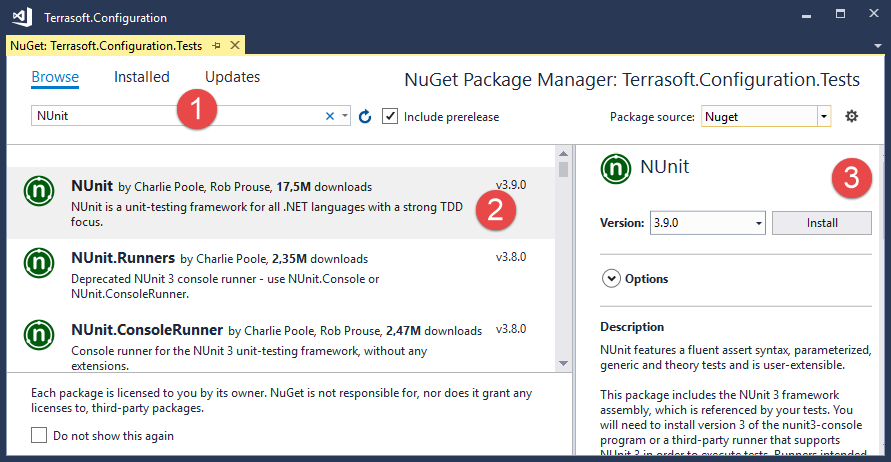
To create tests in the Terrasoft.Configuration.Tests.csproj project using the NUnit framework, add the NUnit NuGet package to the project dependencies. To do this:
- Right-click the
Terrasoft.Configuration.Testsproject name in the Solution Explore. - Select Manage NuGet Packages....
- Enter "NUnit" (1) in the search bar.
- Select the
NUnitpackage (2) in the search results. - Click Install to install the package.
4. Create tests
The name of the class that contains the tests must consist of the class name and the "Tests" suffix. To group tests in a project, it is also convenient to place them in a directory whose name matches the tested package name and has the ".Tests" suffix.
To create tests:
-
Create a
sdkNUnit.Testsdirectory in theTerrasoft.Configuration.Tests.csprojproject. -
Create a
UsrNUnitSourceCodeTestsclass in thesdkNUnit.Testsdirectory. Visual Studio will save the class source code to theUsrNUnitSourceCodeTests.csfile.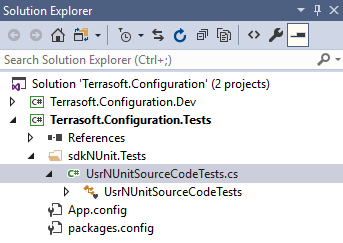
-
Add the methods that implement tests to the
UsrNUnitSourceCodeTestsclass.UsrNUnitSourceCodeTestsusing NUnit.Framework;namespace Terrasoft.Configuration.Tests.sdkNUnitTests {[TestFixture]class UsrNUnitSourceCodeTests {/* The tested class instance. */UsrNUnitSourceCode objToTest = new UsrNUnitSourceCode();/* The testing string. */string str = "String to test";[Test]public void ClassReturnsCorrectStringProperty() {/* Test the string property value.The value must be populated and match the required value. */string res = objToTest.StringToTest;Assert.That(res, Is.Not.Null.And.EqualTo(str));}[Test]public void StringsMustBeEqual() {/* Test the value equality of the two strings. */bool res = objToTest.AreStringsEqual(str, "String to test");Assert.That(res, Is.True);}[Test]public void StringsMustBeNotEqual() {/* Test the value inequality of the two strings.This test will fail since the values are equal. */bool res = objToTest.AreStringsEqual(str, "String to test");Assert.That(res, Is.False);}}}
The [TestFixture] attribute indicates that the UsrNUnitSourceCodeTests class contains tests. Add the [Test] attribute for each method that tests a specific functionality of the class. Learn more about the attributes of NUnit framework: official vendor documentation (NUnit).
Use the Assert.That() method for testing. The method takes the tested value. Use objects that constrain the tested value as arguments. Learn more about the constraint model: official vendor documentation (NUnit).
5. Test the class
-
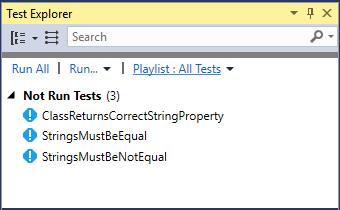
Click Test → Windows → Test Explorer in the Visual Studio.
-
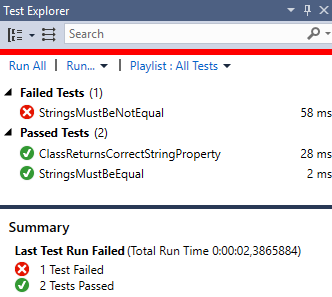
Execute the Run All command to run the tests. Successfully passed tests will be moved to the Passed Test group, and failed tests will be moved to the Failed Test group.
Learn more about the Test Explorer window functionality: official vendor documentation (Visual Studio).
Resources
Installing the NuGet package (official Microsoft documentation)
Attributes of NUnit framework (official NUnit documentation)
[Test Explorer] window functionality (official Visual Studio documentation)