Configuration elements of the Object type
An "Object" type schema is an entity that lets you create a new data object for app and define its structure in Creatio, for example, columns and relationships. It determines what data the object stores and how it relates to other objects across the platform. When you create an object, Creatio automatically generates the required database structures to store the object data.
Use an "Object" type schema when you need to:
- Create a new custom object
- Extend an existing object with new columns and indexes
- Define relationships via "Lookup" type columns for pages, business processes, and integrations
The items of the Add drop-down list in the main workspace of the Configuration section represent the object types you can add in Creatio IDE. View the object types in the figure below.

The "Object" type schema in the Type drop-down list in the main workspace of the Configuration section represents the object. View the type of the object schema in the figure below.

Implement an object
To implement an object:
-
Open the Configuration section. Instructions: Open the Configuration section.
-
Select a user-made package to add the schema.
-
Add an object schema. To do this, click Add → Object in the main workspace. This opens the Object Designer that provides a visual interface to manage columns, relationships, and object properties.
-
Fill out the schema properties.
Property
Property description
Code*
The schema name. Starts with the prefix. Can contain Latin characters and digits. The object name can contain up to and including 128 characters.
Title*
The localizable schema title. The schema title is generated automatically and matches the value of the Code property without the prefix.
Package
The user-made package where you create the schema. The property is populated automatically and non-editable.
Description
The localizable schema description.

-
Specify the object ID if the Parent object property contains a custom object.
Since a Creatio object is a database table view, it must contain the "Id" column. "Id" is the system column that serves as the primary key in the database table. Creatio populates the Id property automatically if the Parent object property contains a base object.
To specify the object ID for custom parent object:
- Go to the Columns node.
- Click
 → Other → Unique identifier.
-
Publish the schema. This operation changes the configuration and might affect Creatio behavior. We recommend performing it in a dedicated development environment to minimize potential impact on users.
- When you need to generate static content and update the database structures without running configuration compilation, click Save. For example, use this option to apply only object structure changes, such as adding or updating columns.
- When you need to generate static content and update the database structures including configuration compilation, click Save and publish. For example, use this option to apply object changes that require configuration compilation, such as updating an embedded process of the object.
Learn more about static content regeneration cases: Static content bundling service.
Learn more about configuration compilation cases: Compile the configuration.
Implement a replacing object
The schema of the Replacing object type represents the replacing object. A "Replacing object" type schema lets you extend an existing object schema without changing the original schema directly. Use it when you need to add custom columns, relationships, or logic to an out-of-the-box object in custom app. Learn more: Replace configuration elements.
To implement a replacing object:
-
Open the Configuration section. Instructions: Open the Configuration section.
-
Select a user-made package to add the schema.
-
Set up the package dependencies. You must add the package that contains the replaced object to the dependency list.
-
Add a replacing object schema. To do this, click Add → Replacing object in the main workspace. This opens the Object Designer that provides a visual interface to manage columns, relationships, and object properties.
-
Select the parent object whose functionality is extended.
For example, to extend the functionality of the "Base object" (
BaseEntitycode) object, select the "BaseEntity" schema in the Parent object property. Creatio adds columns inherited from the parent object to the Inherited columns property of the object schema automatically. After you select the parent object, Creatio populates other object properties and populates the Id property value in the Object settings property block automatically. If you attempt to save the object without the Id property value, Creatio displays a corresponding message.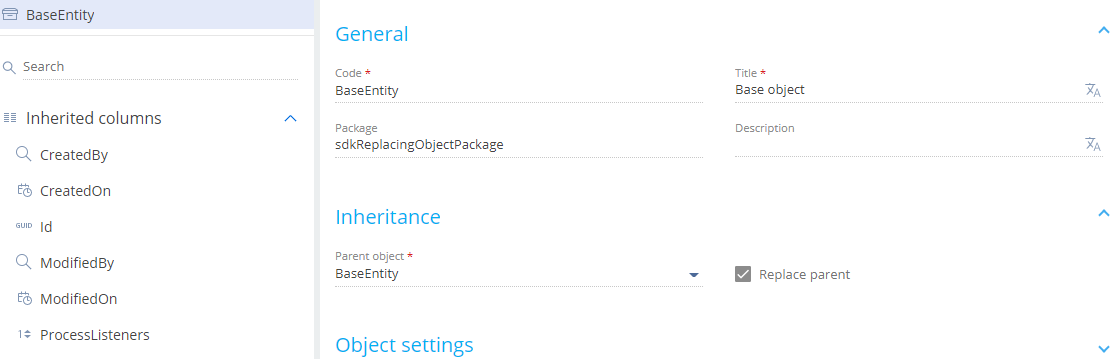
-
Implement the functionality that distinguishes the replacing object from the replaced object.
-
Publish the schema. This operation changes the configuration and might affect Creatio behavior. We recommend performing it in a dedicated development environment to minimize potential impact on users.
- When you need to generate static content and update the database structures without running configuration compilation, click Save. For example, use this option to apply only object structure changes, such as adding or updating columns.
- When you need to generate static content and update the database structures including configuration compilation, click Save and publish. For example, use this option to apply object changes that require configuration compilation, such as updating an embedded process of the object.
Learn more about static content regeneration cases: Static content bundling service.
Learn more about configuration compilation cases: Compile the configuration.
Add a custom object column
-
Go to the Columns node.
-
Click
 → select the column data type. Available column data types are listed in the table below.
Group
Column data type
Description
Text
Text (50 characters)
Stores text values up to 50 characters.
Text (250 characters)
Stores text values up to 250 characters.
Text (500 characters)
Stores text values up to 500 characters.
Rich text
Stores formatted text content.
Unlimited length text
Stores text values of unlimited length.
Phone number
Stores phone number values as text.
Web link
Stores URL values as text.
Email address
Stores email address values as text.
Encrypted string
Stores sensitive text data in encrypted form.
CRC
Stores checksum values for data integrity control.
Number
Integer
Stores integer numeric values.
Decimal(0.1)
Stores decimal numeric values that have 1 decimal places.
Decimal(0.01)
Stores decimal numeric values that have 2 decimal places.
Decimal(0.001)
Stores decimal numeric values that have 3 decimal places.
Decimal(0.0001)
Stores decimal numeric values that have 4 decimal places.
Decimal(0.00000001)
Stores decimal numeric values that have 8 decimal places.
Currency
Stores currency values that have 2 decimal places.
Date/Time
Date/Time
Stores date and time values.
Date
Stores date values.
Time
Stores time values.
Other
Boolean
Stores boolean values: "true" or "false."
Image
Stores image data.
Image Link
Stores links to image resources.
File
Stores file data.
Color
Stores color values.
Unique identifier
Stores unique ID (GUID) values.
BLOB
Stores binary large object (BLOB) data.
—
Lookup
Stores links to related object records.
-
Fill out the column properties.
Property
Property description
General property block
Code*
The column name. Starts with the prefix. Can contain Latin characters, digits, special characters. Make sure that the Code property is different from other codes. Otherwise, Creatio will display an error message when you attempt to publish the object.
Title*
The localizable column title.
Data type
The column data type. Creatio populates the property automatically depending on the column data type selected when adding a column. Creatio lets you change column data type during its configuration, but only within the "Text," "Number," and "Date/Time" groups. For other column groups, this property is non-editable.
Description
The localizable column description.
Required
Whether the column is required. Select "Yes" if the column is required for the object.
Default value
Specify the default column value. To do this:
- Go to the Default value property
- Click
 .
. - Fill out the default value properties based on the selected column data type.
Behavior property block
Usage mode
Column usage mode.
Creatio IDE supports the following column usage modes:
- General. Standard column mode in the app. Columns are displayed in the configuration and are available in the app.
- Advanced. We recommend using the "General" usage mode instead of "Advanced," since they work the same way and "Advanced" is deprecated.
- None. Columns are displayed as system columns in the configuration and are not available in the app.
Creatio platform does not limit the number of object columns. However, we do not recommend having more than 100 columns per object, because it might affect platform performance.
Add an object index
Besides columns, Creatio IDE lets you add indexes to the object. Indexes are created automatically in the database table when you publish an object. Add an object index to optimize query performance for large datasets.
You can add an object index in the following ways:
- Single column index
- Composite index
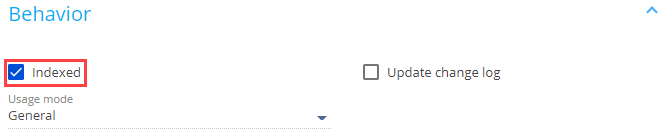
To add a single column index, select the Indexed checkbox in the Behavior property block. Out of the box, Creatio indexes lookup columns.
To add a composite object index:
-
Go to the Indexes node.
-
Click
. -
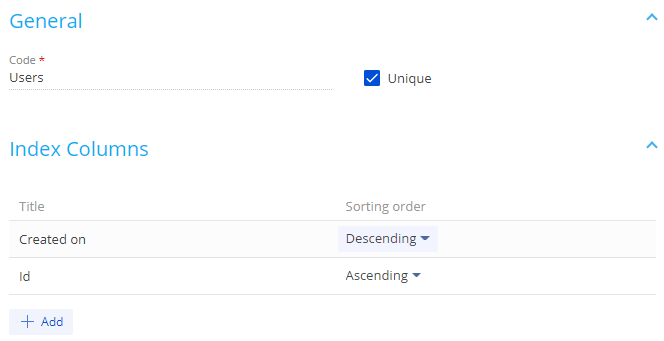
Fill out the index properties.
Property
Property value
Code*
The index code.
Unique
Select the checkbox to enable integrity constraints for index columns, i.e., remove the possibility of adding repeating value combinations.
Index Columns
Select the columns to add to the index. To do this:
- Click Add in the Index Columns property block.
- Select an object column.
- Specify the sorting order.
Set up the cascade connection
Set up the cascade connection to control how related records are handled. Cascade connections can be configured only for "Lookup" type columns, as they define relationships between objects.
To set up the cascade connection:
-
Add a new "Lookup" type column or select an existing "Lookup" type column in the Object Designer.
-
Go to the Data source property block.
-
Select or clear the Do not control integrity checkbox based on your business goals.
-
Select the option in the On lookup value deletion item block.

For example, set up a cascade connection to the "Contact" (Contact code) object connected to the "Account" (Account code) object via the "AccountId" lookup column. To do this, select "Account" in the "Lookup" type column.
The cascade connection setup options are as follows:
- If you need to delete the account without deleting the contacts connected to the account, select the Do not control integrity checkbox.
- If you need to confirm deletion the account without deleting the contacts connected to the account, do not select the Do not control integrity checkbox and select the Block deletion if there are connected records in current object with this value item, Creatio checks for connected contacts. If Creatio detects them, it displays a warning message asking you to confirm the deletion.
- If you need to delete both the account and connected contacts, do not select the Do not control integrity checkbox and select the Delete records from current object with this value option.
Deactivate object records
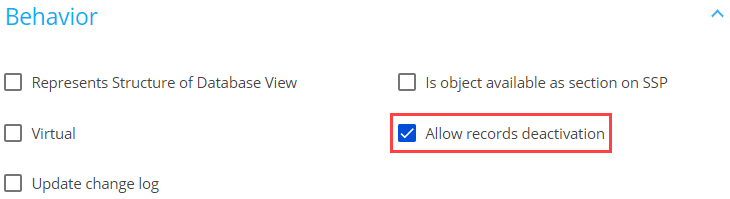
Creatio lets you deactivate object records to exclude them from the business logic. For example, this can be useful if the data is outdated and no longer used. You can deactivate records of any object.
To deactivate object records, select the Allow records deactivation checkbox in the Behavior property block.
reatio can filter inactive records automatically for certain UI elements.
The automatic record filtering is available for the following UI elements:
- drop-down list
- lookup value selection box
- quick filter
The automatic record filtering is not available for the following UI elements:
- lookup content page
- section
- advanced filter
The UseRecordDeactivation parameter of the EntitySchemaQuery class lets you manage the filtering of inactive records. The default value is false. If you set the UseRecordDeactivation parameter to true, the select query to the object that has record deactivation enabled will contain the filter that excludes inactive record.
View the example that deactivates records in the front-end below.
var esq = Ext.create("Terrasoft.EntitySchemaQuery", {
    rootSchemaName: "MyCustomLookup",
    useRecordDeactivation: true,
});
View the example that deactivates records in the back-end below.
var esq = new EntitySchemaQuery(userConnection.EntitySchemaManager, "ContactType") {
    UseRecordDeactivation = true
};
esq.PrimaryQueryColumn.IsAlwaysSelect = true;
View the resulting SQL query below.
SELECT [ContactType].[Id] [Id]
FROM [dbo].[ContactType] [ContactType] WITH(NOLOCK)
WHERE [ContactType].[RecordInactive] = 0
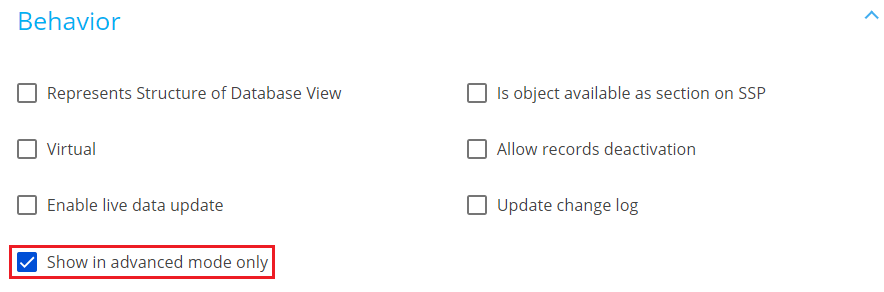
Hide rarely used objects
To hide rarely used objects in Creatio Studio, select the Show in advanced mode only checkbox in the Behavior property block.
To view hidden objects, make sure the IsAdvancedObjectDisplayModeDisabled additional feature is disabled. Instructions: Manage the status of an additional feature.
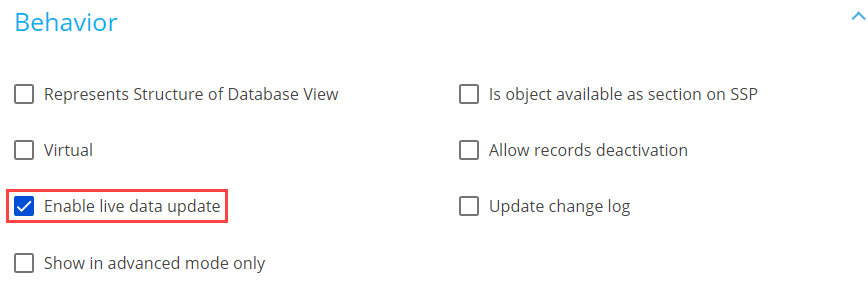
Display record updates automatically
Creatio receives and displays record data updates from other users on an open form page automatically without requiring a manual refresh. Learn more: Display form page field updates automatically.
This functionality is enabled for fields of directly linked records out of the box. To enable the functionality for record fields, select the Enable live data update checkbox in the Behavior property block.
See also
Replace configuration elements