Create a case based on a message from the internal feed of another case
The example is relevant to Service Creatio products.
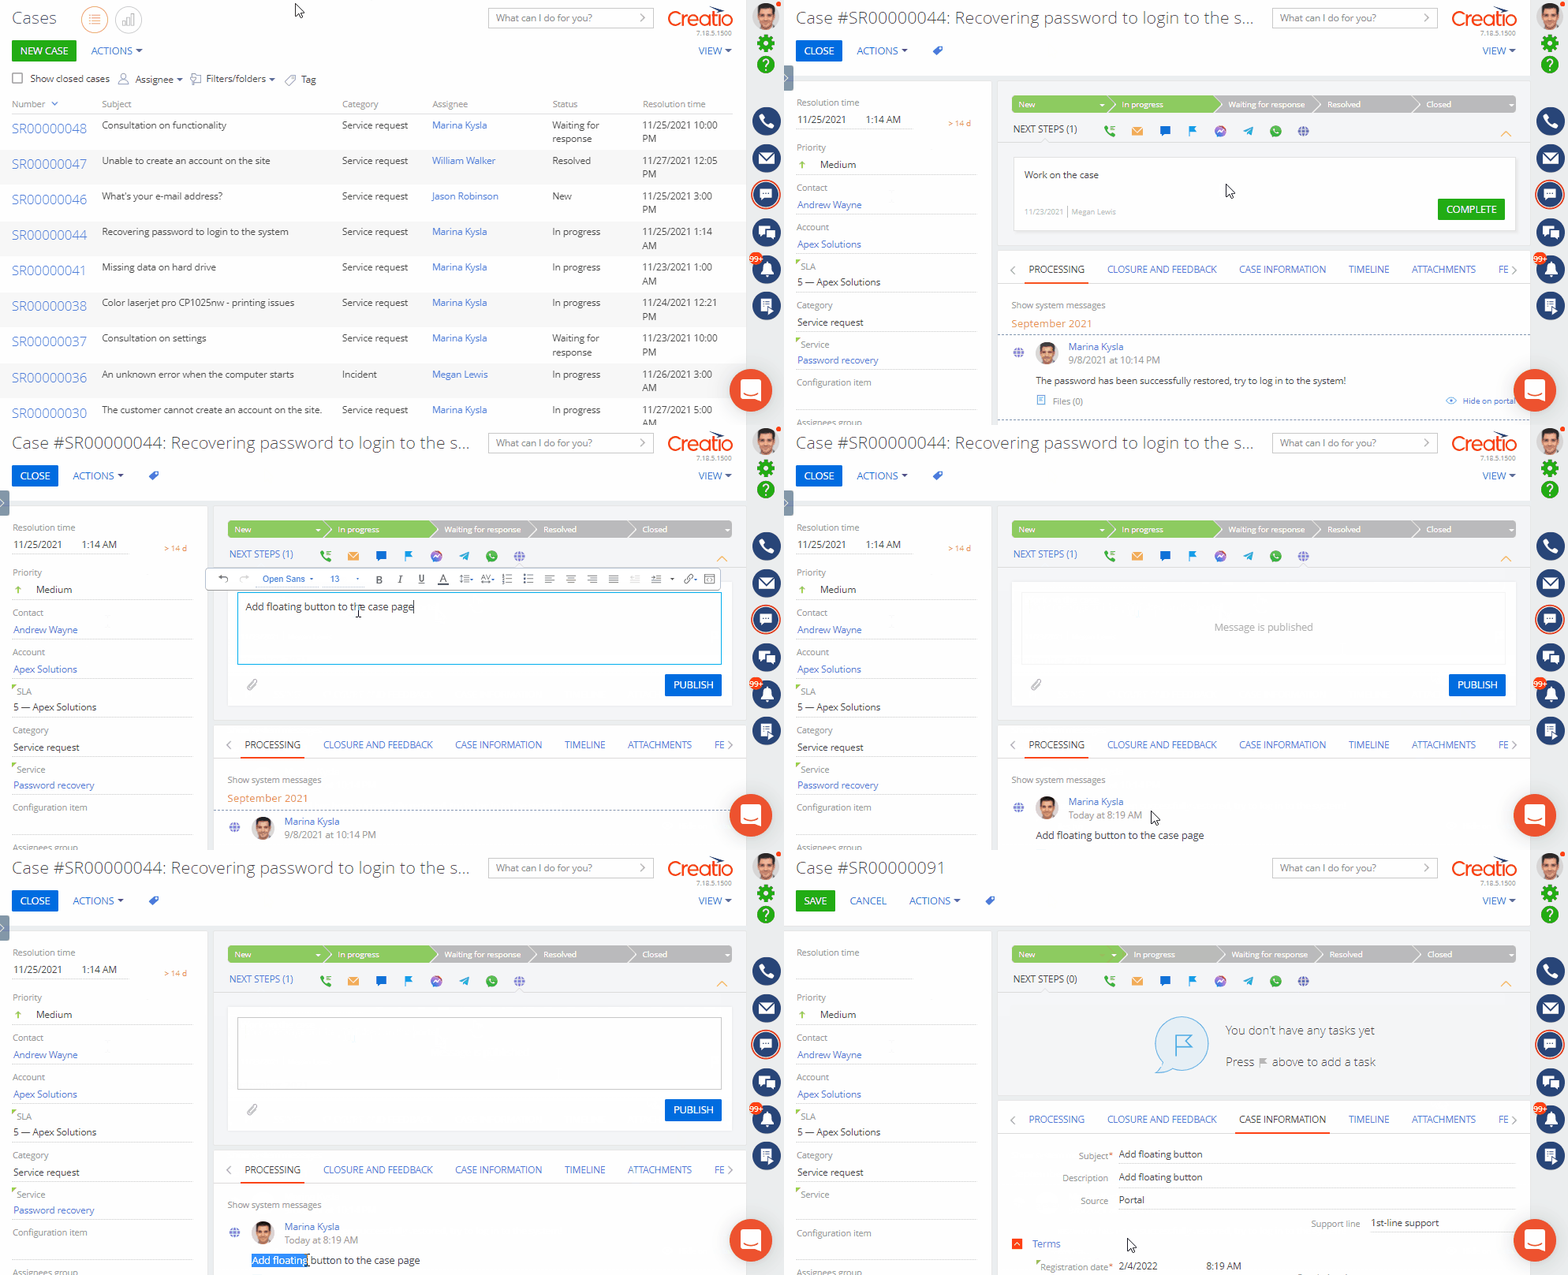
Add a pop-up button to the Processing tab of the case page. Display the button when you select text in emails and self-service portal messages sent from the internal case feed. Create a new case on button click. Populate the Subject and Description fields automatically. Set the field values to selected text.
Create a replacing view model schema of the case page
-
Go to the Configuration section and select a user-made package to add the schema.
-
Click Add → Replacing view model on the section list toolbar.
/scr_add_replacing_module.png)
-
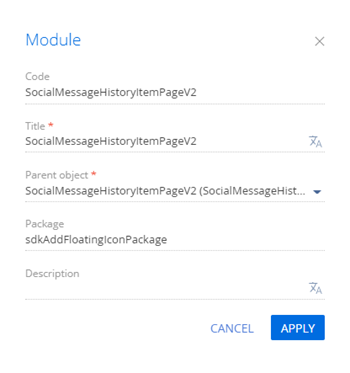
Fill out the schema properties.
- Set Code to "SocialMessageHistoryItemPageV2."
- Set Title to "SocialMessageHistoryItemPageV2."
- Select "SocialMessageHistoryItemPageV2" in the Parent object property.
-
Implement the pop-up button logic.
-
Implement the following methods in the
methodsproperty:onSelectedTextChanged(). Passes the selected text to theHighlightedHistoryMessageattribute. Triggered on text selection.onSelectedTextButtonClick(). Creates a case, retrieves the case subject from theHighlightedHistoryMessageattribute. TheBaseMessageHistoryparent schema defines the case creation logic. Triggered on pop-up button click.getMessageFromHistory(). An overloaded parent schema method that retrieves the subject of the selected message.
-
Add a configuration object that contains the settings of the the
Messagepackage'sSelectionHandlerMultiLineLabelelement to thediffarray of modifications. The element implements the mechanism that creates a new case based on selected text.
View the source code of the replacing view model schema of the case page below.
SocialMessageHistoryItemPageV2define("SocialMessageHistoryItemPageV2", ["SocialMessageConstants", "css!SocialMessageHistoryItemStyle"], function(socialMessageConstants) {return {/* The name of the record page object's schema. */entitySchemaName: "BaseMessageHistory",/* The details of the record page's view model. */details: /**SCHEMA_DETAILS*/{}/**SCHEMA_DETAILS*/,/* The methods of the record page's view model. */methods: {/* Overload the base method. Retrieve the subject of the selected message. */getMessageFromHistory: function() {var message = this.get("HighlightedHistoryMessage");if (this.isHistoryMessageEmpty(message)) {message = this.get("[Activity:Id:RecordId].Body");}return message;},/* The handler of the text selection event. */onSelectedTextChanged: function(text) {this.set("HighlightedHistoryMessage", text);},/* The handler of the pop-up button click. */onSelectedTextButtonClick: function() {/* Prepare case data from history. */this.prepareCaseDataFromHistory();}},/* Display the button on the record page. */diff: /**SCHEMA_DIFF*/[/* The properties to add the pop-up button to the page. */{/* Execute the operation that modifies the existing element. */"operation": "merge",/* The meta name of the component to change. */"name": "MessageText",/* The properties to pass to the element's constructor. */"values": {/* The properties of the view generator. */"generator": function() {return {/* The value of the id HTML tag. */"id": "MessageText",/* The value of the marker. */"markerValue": "MessageText",/* The name of the component class. */"className": "Terrasoft.SelectionHandlerMultilineLabel",/* Set up the CSS styles. */"classes": {"multilineLabelClass": ["messageText"]},/* The caption. */"caption": {"bindTo": "Message"},"showLinks": true,/* Bind the change event of the selected text to the handler method. */"selectedTextChanged": {"bindTo": "onSelectedTextChanged"},/* Bind the click event of the selected text's pop-up button to the handler method. */"selectedTextHandlerButtonClick": {"bindTo": "onSelectedTextButtonClick"},/* Flag the pop-up button as visible. */"showFloatButton": true};}}}]/**SCHEMA_DIFF*/};}); -
-
Click Save on the Designer's toolbar.
Outcome of the example
To view the outcome of the example:
- Refresh the Cases section page.
- Open a case page.
As a result, Creatio will add a pop-up button to the Processing tab of the case page. The button appears when you select text from emails and self-service portal messages sent from the internal case feed. Click the button to create a new case. Creatio populates the Subject and Description fields automatically. The field values are set to selected text.