Add the custom UI component implemented using remote module to the library of the Freedom UI Designer
1. Implement a custom UI component using remote module
To implement a custom UI component using remote module, follow the instruction in a separate article: Implement custom UI component using remote module.
2. Implement an input within remote module
To implement an input within remote module, follow the instruction in a separate article: Implement the business logic of the custom UI component using remote module.
3. Implement the input validation
To implement the input validation, follow the instruction in a separate article: Implement the validation in the custom UI component using remote module.
4. Add the custom UI component to the library of the Freedom UI Designer
-
Set up the component layout in the library of the Freedom UI Designer.
- Open the
input.component.tsfile. - Flag the component using the
CrtInterfaceDesignerItemdecorator that has thetoolbarConfigproperty. The property manages the element layout in the library of the Freedom UI Designer. - Import the required functionality from the libraries into the component.
- Upload the image to display in the library of the Freedom UI Designer and specify the path to the image in the
iconproperty. In this example, the image is in theinputdirectory. - Transfer the icon in the
stringformat. To do this, run thenpm install raw-loader --save-devcommand at the command line terminal of Microsoft Visual Studio Code. - Save the file.
input.component.ts file...
/* Import the required functionality from the libraries. */
import { CrtInput, CrtInterfaceDesignerItem, CrtOutput, CrtValidationInfo, CrtValidationInput, CrtViewElement } from '@creatio-devkit/common';
...
/* Add the CrtInterfaceDesignerItem decorator to the InputComponent component. */
@CrtInterfaceDesignerItem({
/* Manage the element layout in the library of the Freedom UI Designer. */
toolbarConfig: {
caption: 'Custom Input',
name: 'CustomInput',
/* The path to the component image. */
icon: require('!!raw-loader?{esModule:false}!./icon.svg'),
defaultPropertyValues: {
label: 'Custom input'
}
}
})
... - Open the
-
Build the project. To do this, run the
npm run buildcommand at the command line terminal of Microsoft Visual Studio Code.
As a result, Microsoft Visual Studio Code will add the build to the dist directory of the Angular project. The build will have the sdk_remote_module_package name.
Outcome of the example
To view the outcome of the example, open the Requests form page page in the working area of the Requests app page.
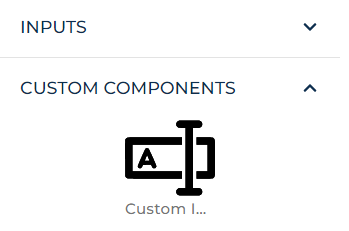
As a result, Creatio will display the Custom input component in the Custom components library group of the Freedom UI Designer.

Creatio will display the custom UI component when you add it to the canvas of the Freedom UI Designer as well.

Source code
/* Import the required functionality from the libraries. */
import { Component, EventEmitter, Input, OnInit, Output } from '@angular/core';
import { CrtInput, CrtInterfaceDesignerItem, CrtOutput, CrtValidationInfo, CrtValidationInput, CrtViewElement, ViewEncapsulation } from '@creatio-devkit/common';

@Component({
  selector: 'usr-input',
  templateUrl: './input.component.html',
  styleUrls: ['./input.component.scss'],
  encapsulation: ViewEncapsulation.ShadowDom
})

/* Add the CrtViewElement decorator to the InputComponent component. */
@CrtViewElement({
  selector: 'usr-input',
  type: 'usr.Input'
})

/* Add the CrtInterfaceDesignerItem to the InputComponent component. */
@CrtInterfaceDesignerItem({
  /* Manage the element layout in the library of the Freedom UI Designer. */
  toolbarConfig: {
    caption: 'Custom Input',
      name: 'CustomInput',
      /* The path to the component image. */
      icon: require('!!raw-loader?{esModule:false}!./icon.svg'),
      defaultPropertyValues: {
        label: 'Custom input'
      }
  }
})

export class InputComponent implements OnInit {

  constructor() { }

  /* Add decorators to the value propety. */
  @Input()
  @CrtInput()
  /* The input value. */
  public value: string = '';

  /* Add decorators to the label property. */
  @Input()
  @CrtInput()
  /* The input name. */
  public label!: string;

  /* Add decorators to the EventEmitter<string>() event. */
  @Output()
  @CrtOutput()
  /* Track input value changes. */
  public valueChange = new EventEmitter<string>();

  /* Add decorators to the valueValidationInfo property. */
  @Input()
  @CrtValidationInput()
  /* Display information that the input value is invalid. */
  public valueValidationInfo!: CrtValidationInfo;

  ngOnInit(): void {
  }

}