Call a custom web service from Postman
Integrate external applications with custom Creatio web services via HTTP requests to the services. Editing and debugging tools, such as Postman or Fiddler, help to understand the request creation principles.
Postman is a request testing toolset. The purpose of Postman is to send test requests from the client to the server and receive the server's responses. The example in this article calls a custom web service that uses cookie-based authentication from Postman.
Call a custom web service that uses cookie-based authentication from Postman.
This example uses the UsrCustomConfigurationService custom web service. Learn more about developing the service in a separate article: Develop a custom web service that uses cookie-based authentication.
Since this custom web service uses cookie-based authentication, authorize in Creatio first. Do this by calling the AuthService.svc system web service. Learn more about authentication in a separate article: Authentication.
1. Create a request collection
-
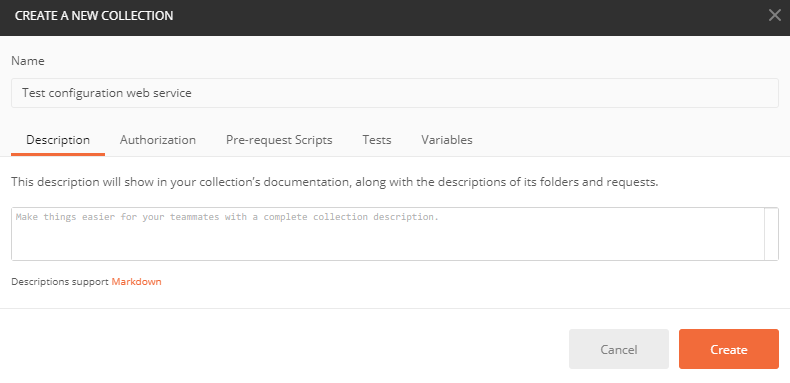
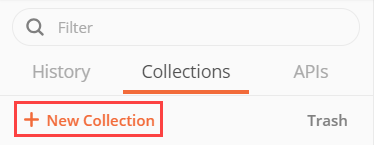
Go to the Collections tab on the Postman request toolbar and click + New Collection.
-
Fill out the request collection fields:
-
Click Create to create a request collection.
2. Set up an authentication request
-
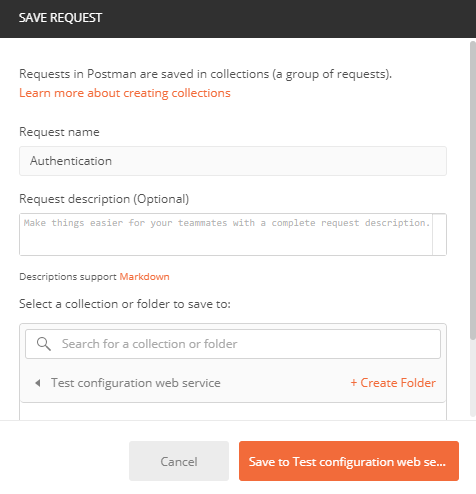
Go to the request working area in Postman and right-click the name of the
Test configuration web servicecollection → Add request. -
Fill out the request fields:
-
Click Save to Test configuration web service to add the request to the collection.
-
Select the
POSTrequest method in the drop-down list of the Postman workspace toolbar.
-
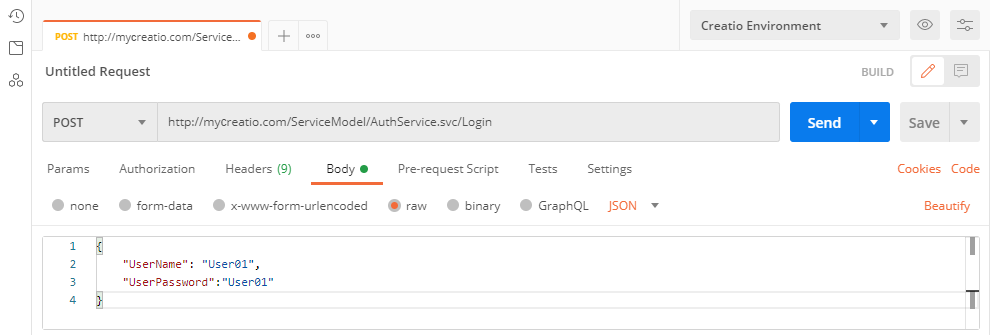
Enter the string of the authentication service request in the Postman workspace toolbar.
- Template of the AuthService.svc service URL
- Example of the AuthService.svc service URL
[Creatio application URL]/ServiceModel/AuthService.svc/Loginhttp://mycreatio.com/ServiceModel/AuthService.svc/Login -
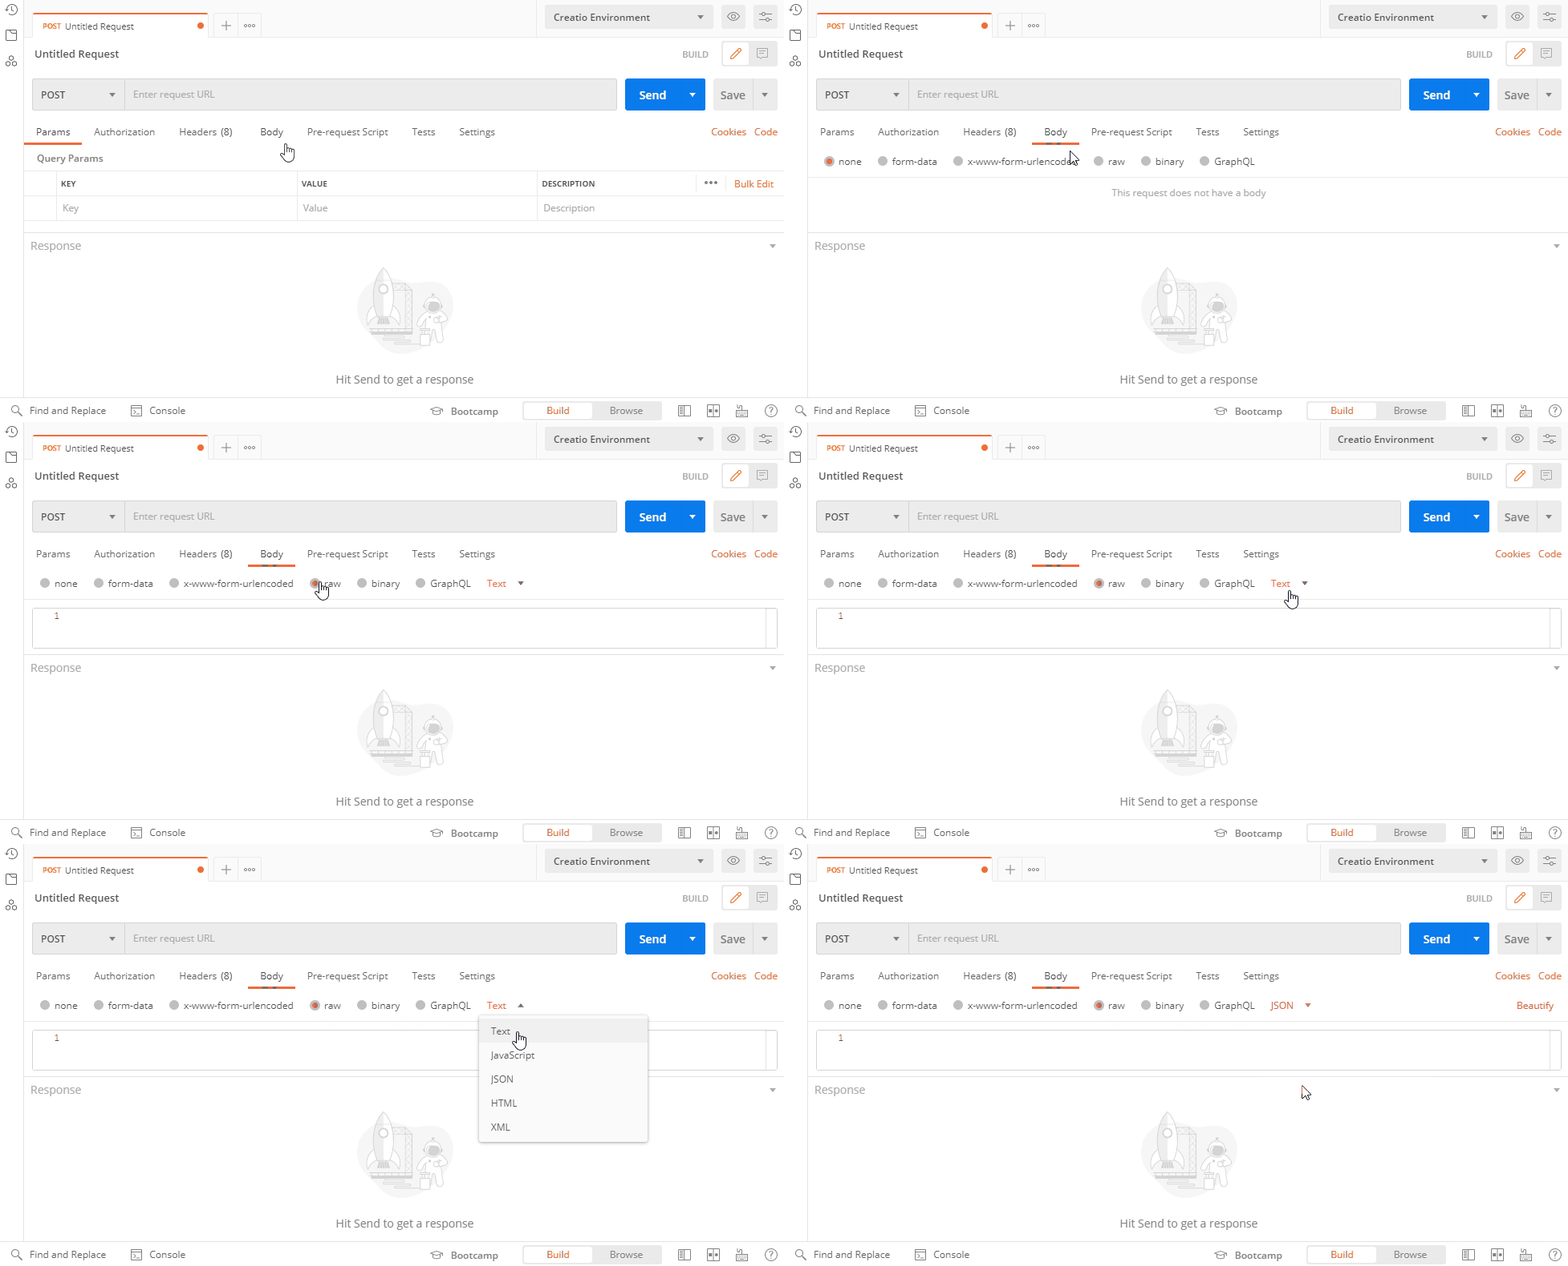
Set the request data format:
-
Go to the Body tab in the Postman workspace and fill out the body of the
POSTrequest. The body is a JSON object that contains the login credentials.Body of the POST request{
"UserName": "User01",
"UserPassword":"User01"
}
3. Execute the authentication request
Click Send in the Postman workspace toolbar to execute the request from Postman.
As a result, Postman will receive a response that contains a JSON object. View the response body on the Postman Body tab.

The indicators of a successfully executed request are as follows:
- The server returns the 200 OK status code.
- The
Codeparameter of the response body contains "0."
The response also contains BPMLOADER, .ASPXAUTH, BPMCSRF, and UserName cookies. Postman displays them on the Cookies and Headers tab.

Use these cookies in further requests to Creatio services that use cookie-based authentication.
If you enabled the CSRF attack protection, always use the BPMCSRF cookie for request methods (POST, PUT, DELETE) that modify (add, change, or delete) the entity. If you do not use the BPMCSRF cookie, the server returns the 403 Forbidden status code. Creatio does not check for the BPMCSRF cookie for GET requests. You do not have to use the BPMCSRF cookie with Creatio demo sites since they have CSRF attack protection disabled by default.
The request fails if it contains errors in the string or the body.
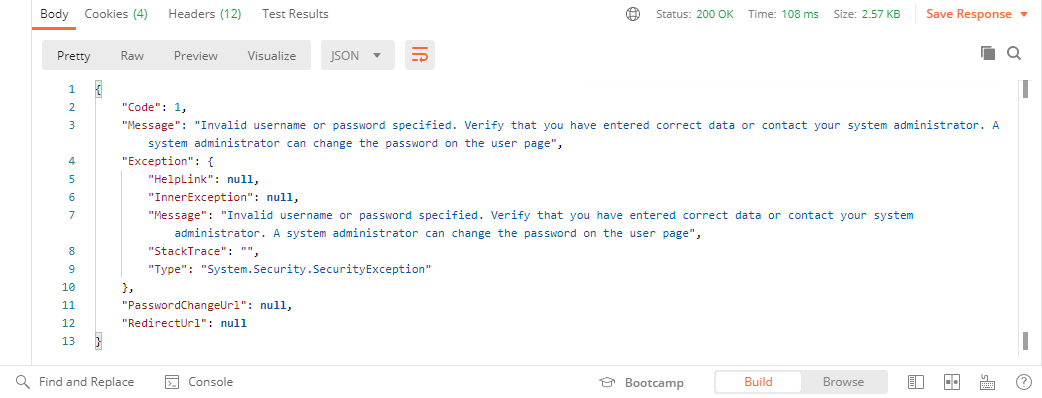
The indicators of an unsuccessfully executed request are as follows:
- The
Codeparameter of the response body contains "1." - The
Messageparameter of the response body contains the reason for the authentication failure.
4. Set up the request to the custom web service that uses cookie-based authentication
The UsrCustomConfigurationService custom web service accepts GET requests only.
To set up the request to the custom web service that uses cookie-based authentication:
-
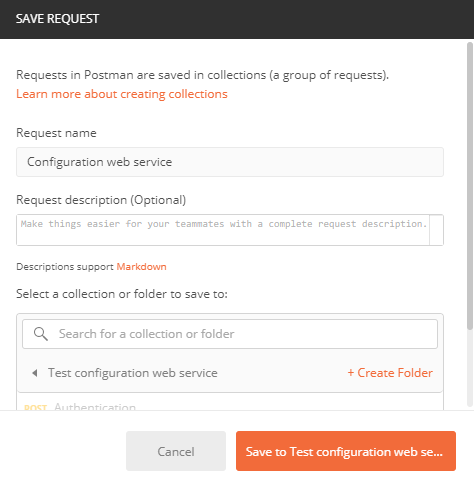
Go to the request working area in Postman and right-click the name of the
Test configuration web servicecollection → Add request. -
Fill out the request fields:
-
Click Save to Test configuration web service to add the request to the collection.
-
Postman selects the
GETmethod by default. Enter the string of theUsrCustomConfigurationServicecustom web service request in the request field of the Postman workspace toolbar.- Template of the custom web service's URL
- Example of the custom web service's URL
[Creatio application URL]/0/rest/UsrCustomConfigurationService/GetContactIdByName?Name=[Contact name]http://mycreatio.com/0/rest/UsrCustomConfigurationService/GetContactIdByName?Name=Andrew Baker -
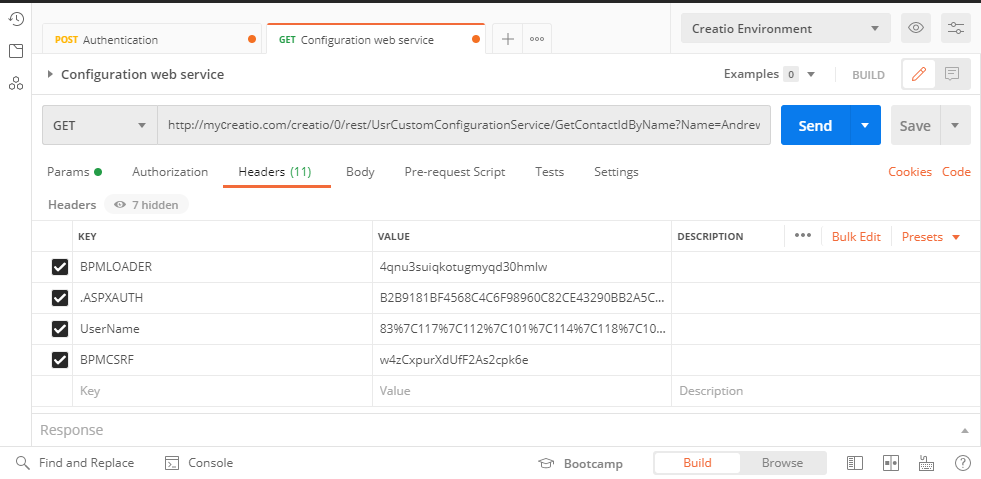
Go to the Headers tab in the Postman workspace and add the cookies received as a result of the authorization request to the headers of the custom web service request. Add the cookie name to the Key field and copy the corresponding cookie value to the Value field.
5. Execute the request to the custom web service that uses cookie-based authentication
Click Send on the workspace toolbar to execute a request from Postman.
Outcome of the example
As a result, Postman will receive a response that contains a JSON object. View the response body on the Postman Body tab.
If Creatio finds the contact from the Name parameter in the database, the GetContactIdByNameResult property will return the contact ID value.
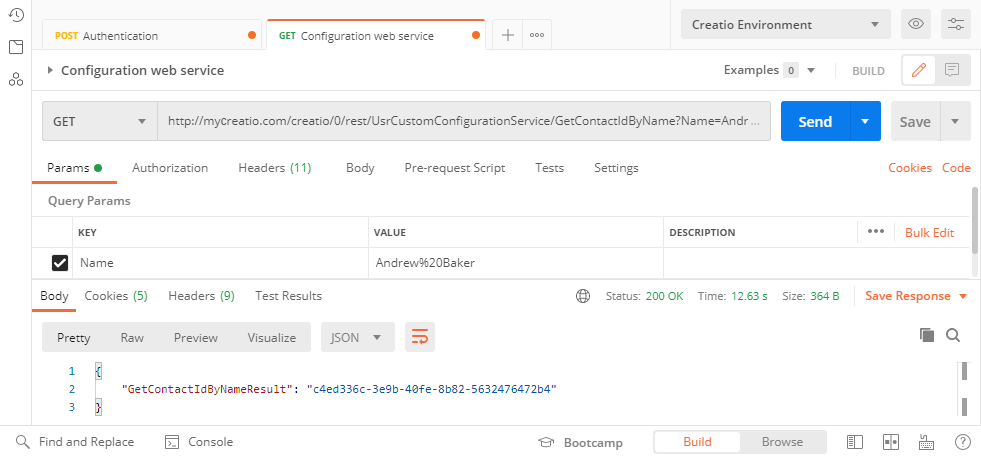
If Creatio finds no contacts from the Name parameter in the database, the GetContactIdByNameResult property will return an empty string.
