Create records of a specific type using typified Freedom UI page
This functionality is available for Creatio 8.0.10 and later.
To implement the example:
- Set up the page UI. Read more >>>
- Set the record type available for creation. Read more >>>
- Lock the field on the page for adding records. Read more >>>

1. Set up the page UI
-
Open the Customer 360 app in the Application Designer.
-
Open the Advanced settings tab in the Application Designer. To do this, click
 in the top right → "Application management" → "Application Hub" → Customer 360 app → "Advanced settings."
 -
Create a user-made package to add the schema. To do this, click
 → Create new package → fill out the package properties → Save.
For this example, create the
sdkCreateSpecificAccountuser-made package. -
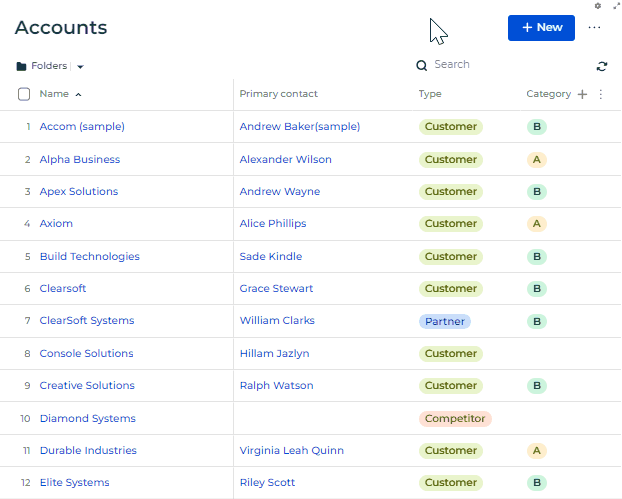
Open the Accounts list page. To do this, click
 in the top right → Application management → Application Hub → Customer 360 → Accounts list page.
 -
Select the page field that determines the record type you can create.
- Select the New button on the working area of the Freedom UI Designer. This opens the element setup menu.
- Click
 . This opens the element setup area.
 - Go to the Actions block.
- Click the Add field button. This opens the Select field window.
- Select the checkbox for the Type field.
- Click Select.
-
Save the changes.
2. Set the record type available for creation
Configure the business logic in the Client Module Designer. For this example, set the record type available for creation.
-
Open the source code of the Freedom UI page. To do this, click
 .
. -
Set up how to handle the action executed on button click.
- Find the ID of the "Customer" value in the Account types lookup. For this example, the ID is "03a75490-53e6-df11-971b-001d60e938c6."
- Go to the
viewConfigDiffschema section →AddButtonelement. - Bind the ID of the "Customer" value to the
clickedbutton event.
viewConfigDiff schema sectionviewConfigDiff: /**SCHEMA_VIEW_CONFIG_DIFF*/[/* Button that creates a new record. */{"operation": "merge","name": "AddButton","values": {/* Send the base request handler to open the new page of the "Account" entity. Populate the "Type" field using the "Customer" value. */"clicked": {"request": "crt.CreateRecordRequest","params": {"entityName": "Account","defaultValues": [{"attributeName": "Type","value": "03a75490-53e6-df11-971b-001d60e938c6"}]}},...,}},]/**SCHEMA_VIEW_CONFIG_DIFF*/, -
Save the changes.
As a result, the Type field on the New record window in the Accounts section will be populated by the "Customer" value, but it can be changed.
To forbid changing the field value, lock the Type field on the page for adding record from the Accounts section.
3. Lock the field on the page for adding records
-
Find the page for adding records from the Accounts section.
-
Open the Accounts list page. To do this, click
in the top right → Application management → Application Hub → Customer 360 → Accounts list page. -
Go to the Actions block.
-
Click View pages setup link. This opens the Pages setup window.
-
Find the name of page for adding records in the Page for adding record field.
For this example, the name of the page for adding records is Accounts mini page.
-
Close the page.
-
-
Open the Accounts mini page. To do this, click
in the top right → Application management → Application Hub → Customer 360 → Accounts mini page. -
Lock the page field that includes the record type you can create.
- Select the Type field on the working area of the Freedom UI Designer. This opens the element setup menu.
- Click . This opens the element setup area.
- Go to the Editability block.
- Select the Read-only checkbox.
-
Save the changes.
View the result
- Open the Accounts section.
- Click New.
As a result:
- Creatio will populate the Type field on the New record window in the Accounts section using the "Customer" non-editable value.
- You will be able to create an account of the "Customer" type only. View the result >>>
Source code
- Accounts_ListPage
- Accounts_MiniPage
/* Declare the AMD module. */
define("Accounts_ListPage", /**SCHEMA_DEPS*/[]/**SCHEMA_DEPS*/, function/**SCHEMA_ARGS*/()/**SCHEMA_ARGS*/ {
    return {
        viewConfigDiff: /**SCHEMA_VIEW_CONFIG_DIFF*/[
            /* Button that creates a new record. */
            {
                "operation": "merge",
                "name": "AddButton",
                "values": {
                    /* Send the base request handler to open the new page of the "Account" entity. Populate the "Type" field using the "Customer" value. */
                    "clicked": {
                        "request": "crt.CreateRecordRequest",
                        "params": {
                            "entityName": "Account",
                            "defaultValues": [
                                {
                                    "attributeName": "Type",
                                    "value": "03a75490-53e6-df11-971b-001d60e938c6"
                                }
                            ]
                        }
                    },
                    "caption": "#ResourceString(AddButton_caption)#",
                    "visible": true,
                    "clickMode": "default"
                }
            },
            {
                "operation": "remove",
                "name": "SearchFilter",
                "properties": [
                    "targetAttributes"
                ]
            },
            {
                "operation": "merge",
                "name": "SearchFilter",
                "values": {
                    "_filterOptions": {
                        "expose": [
                            {
                                "attribute": "SearchFilter_Items",
                                "converters": [
                                    {
                                        "converter": "crt.SearchFilterAttributeConverter",
                                        "args": [
                                            "Items"
                                        ]
                                    }
                                ]
                            }
                        ],
                        "from": [
                            "SearchFilter_SearchValue",
                            "SearchFilter_FilteredColumnsGroups"
                        ]
                    }
                }
            }
        ]/**SCHEMA_VIEW_CONFIG_DIFF*/,
        viewModelConfigDiff: /**SCHEMA_VIEW_MODEL_CONFIG_DIFF*/[
            {
                "operation": "merge",
                "path": [
                    "attributes",
                    "Items",
                    "modelConfig"
                ],
                "values": {
                    "filterAttributes": [
                        {
                            "loadOnChange": true,
                            "name": "FolderTree_active_folder_filter"
                        },
                        {
                            "name": "Items_PredefinedFilter",
                            "loadOnChange": true
                        },
                        {
                            "name": "SearchFilter_Items",
                            "loadOnChange": true
                        }
                    ]
                }
            }
        ]/**SCHEMA_VIEW_MODEL_CONFIG_DIFF*/,
        modelConfigDiff: /**SCHEMA_MODEL_CONFIG_DIFF*/[]/**SCHEMA_MODEL_CONFIG_DIFF*/,
        handlers: /**SCHEMA_HANDLERS*/[]/**SCHEMA_HANDLERS*/,
        converters: /**SCHEMA_CONVERTERS*/{}/**SCHEMA_CONVERTERS*/,
        validators: /**SCHEMA_VALIDATORS*/{}/**SCHEMA_VALIDATORS*/
    };
});
/* Declare the AMD module. */
define("Accounts_MiniPage", /**SCHEMA_DEPS*/[]/**SCHEMA_DEPS*/, function/**SCHEMA_ARGS*/()/**SCHEMA_ARGS*/ {
    return {
        viewConfigDiff: /**SCHEMA_VIEW_CONFIG_DIFF*/[
            {
                "operation": "merge",
                "name": "Type",
                "values": {
                    /* The property that locks the field from editing. */
                    "readonly": true
                }
            }
        ]/**SCHEMA_VIEW_CONFIG_DIFF*/,
        viewModelConfigDiff: /**SCHEMA_VIEW_MODEL_CONFIG_DIFF*/[]/**SCHEMA_VIEW_MODEL_CONFIG_DIFF*/,
        modelConfigDiff: /**SCHEMA_MODEL_CONFIG_DIFF*/[]/**SCHEMA_MODEL_CONFIG_DIFF*/,
        handlers: /**SCHEMA_HANDLERS*/[]/**SCHEMA_HANDLERS*/,
        converters: /**SCHEMA_CONVERTERS*/{}/**SCHEMA_CONVERTERS*/,
        validators: /**SCHEMA_VALIDATORS*/{}/**SCHEMA_VALIDATORS*/
    };
});