Develop C# code in a configuration project
Develop a custom web service using Visual Studio.
After successful compilation, Visual Studio places the resulting Terrasoft.Configuration.dll assembly in the Bin directory. IIS uses the assembly automatically in Creatio.
1. Preconfigure Creatio
Set up the IDE for file system development.
2. Create, read, or update a package from the SVN repository
Create a sdkPackageInFileSystem user-made package in the Configuration section using SVN or not using SVN.
When developing in the file system, it is more convenient to manage version control system repositories using client applications, such as Tortoise SVN or Git, instead of the out-of-the-box Creatio integration.
3. Create a Source code schema
Create a Source code schema in the package:
- Set Code to "UsrGreetingService."
- Set Title to "UsrGreetingService."
- Set Package to "sdkPackageInFileSystem."
4. Develop the solution in Visual Studio
-
Download the existing schemas from the database to the file system.
To do this, execute the Download packages to file system action of the Actions drop-down list in the Configuration section toolbar.
/scr_download_to_fs.png)
As a result, Creatio will add the
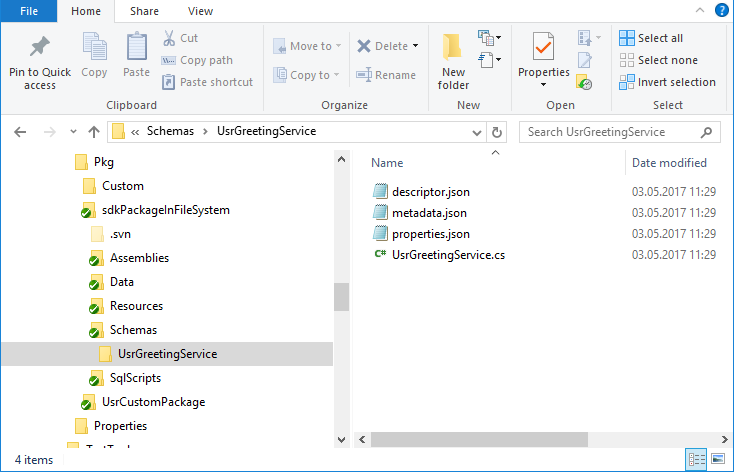
UsrGreetingService.csfile of the schema source code to thePkg\sdkPackageInFileSystem\Schemas\directory in the file system. In this case, theUsrGreetingServiceSchema.sdkPackageInFileSystem_Entity.csschema file generated by Creatio is placed in theAutogenerated\Srcdirectory. note
noteTo add a schema to SVN, add the entire
UsrGreetingServicedirectory, including the JSON files. -
To develop in Visual Studio, open the Terrasoft.Configuration.sln solution.
-
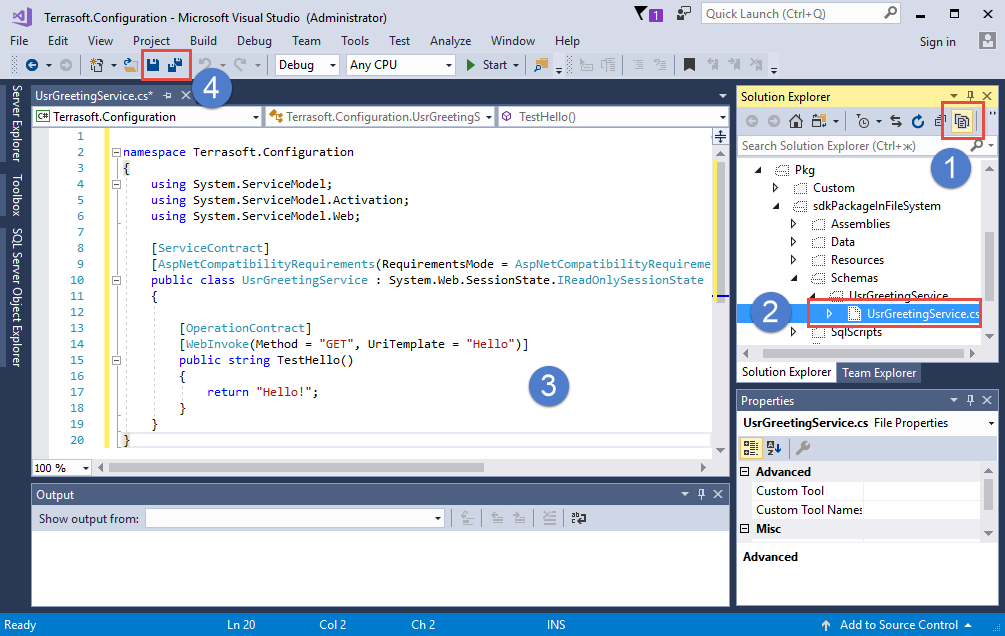
Go to the Explorer of the Visual Studio solution, enable the display of all file types (1), open the
UsrGreetingService.cs(2) file, and add the needed source code (3).
Example of the source code that must be added to the
UsrServiceGreeting.csfile contents to implement a custom web service.UsrServiceGreeting.csnamespace Terrasoft.Configuration {
using System.ServiceModel;
using System.ServiceModel.Activation;
using System.ServiceModel.Web;
/* The class the implements the configuration service. */
[ServiceContract]
[AspNetCompatibilityRequirements(RequirementsMode = AspNetCompatibilityRequirementsMode.Required)]
public class UsrGreetingService: System.Web.SessionState.IReadOnlySessionState {
/* Service operation. */
[OperationContract]
[WebInvoke(Method = "GET", UriTemplate = "Hello")]
public string TestHello() {
return "Hello!";
}
}
}
5. Save, compile, and debug the source code
-
Save the source code (4) after you change it and before you compile and debug it.
Usually, Visual Studio saves code automatically, but since the Visual Studio compiler is not used, you must save the code manually.
-
Compile the changed source code by running the
Build WorkspaceorRebuild Workspacecommand after saving the code. If the compilation is successful, the web service becomes available.Service URLhttp://{CreatioURL}/0/rest/UsrGreetingService/Hello
-
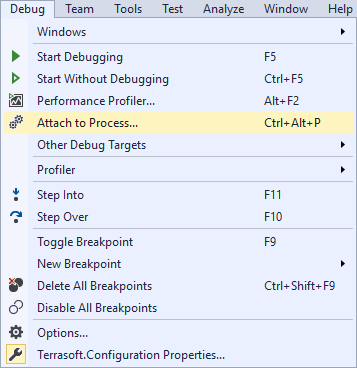
Attach the debugger to the process of the IIS service that runs Creatio to start debugging. To do this, execute the
Debug→Attach to processmenu command. This opens a window.
Select the IIS worker process that runs the Creatio application pool from the list of processes.
noteThe name of the worker process can vary depending on the configuration of your IIS server. Specifically, the process name is
w3wp.exein regular IIS andiiexpress.exein IIS Express.By default, the IIS worker process runs under the account whose name matches the name of the application pool. To display processes of all users, not just the current user, select the Show processes from all users checkbox.
Recompile the code after attaching the debugger to the IIS worker process.
After that, you can start debugging using Visual Studio means, for example, set breakpoints, view the values of variables, call stack, etc.
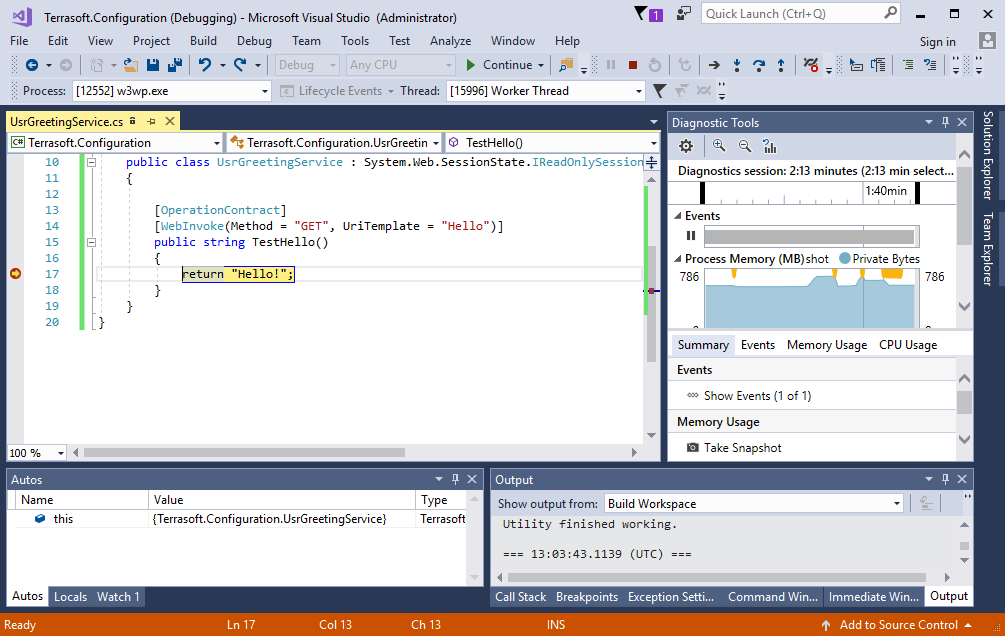
For example, after you set the breakpoint on the line that returns from the
TestHello()method, recompile Creatio, and execute the service request, the debugger stops the program execution on the breakpoint.