Configuration elements of the Client module type
A configuration element of the Client module type is a separate functionality block you can upload and run on demand. The purpose of the client module is front-end Creatio development.
Client modules have the following types:
- Non-visual module. Read more >>>
- Visual module. Read more >>>
- Replacing module. Read more >>>
Learn more: Client module types.
The items of the Add drop-down list in the toolbar of the Configuration section workspace represent the client module types you can add in Creatio IDE.
View the client module types in the figure below.
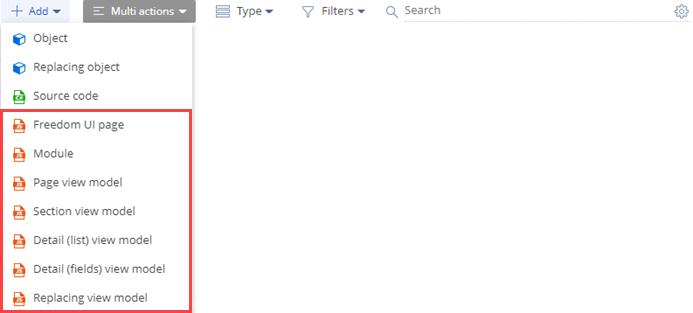
The Client module schema type in the Type drop-down list in the toolbar of the Configuration section workspace represents the client module. The client schema is the basis of Creatio configuration. As far as software implementation is concerned, a schema is a core class inherited from the base Schema class.
View the type of the client module schema in the figure below.

Implement a non-visual module
The Module schema type represents the non-visual module.
General procedure to implement a non-visual module:
-
Open the Configuration section. Instructions: Open the Configuration section.
-
Select a user-made package to add the schema.
-
Add a module schema. To do this, click Add → Module on the section list toolbar. This opens the Module Designer.

-
Fill out the schema properties.
Property
Property value
Property description
Code required
The schema name
Starts with the prefix. Learn more: Manage configuration elements. Can contain Latin characters and digits.
Title required
The localizable schema title
The title of the configuration element schema is generated automatically and matches the value of the Code property without the prefix.
Package
The user-made package where you create the schema
The property is populated automatically and non-editable.
Description
The localizable schema description
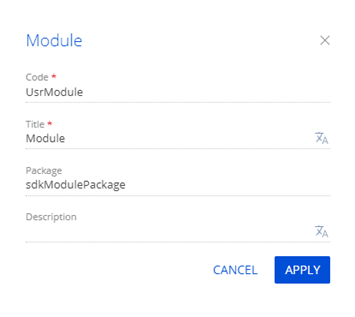
-
Apply the changes.
If needed, use
 in the properties area to change the schema properties.
 -
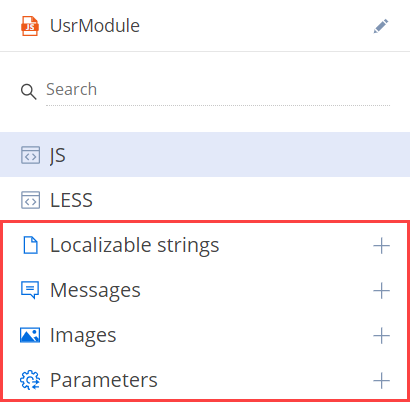
Fill out the additional properties (optional). To do this, use
 in the properties area.
View the additional properties in the figure below.
-
Implement the functionality. The module name in the
define()function must match the schema name in the Code property.Creatio displays the type of the error
 or warning
  – if any – to the left of the row number. Hover over the error type to view a tooltip with the error description.
 -
Save the changes.
Implement a visual module
Visual modules have the following types:
- Freedom UI page schema, available for Creatio 8 Atlas and later. Read more >>>
- View model schema. Read more >>>
The Module schema type represents the visual module.
Freedom UI page schema
-
Open the Configuration section. Instructions: Open the Configuration section.
-
Select a user-made package to add the schema.
-
Add a Freedom UI page schema. To do this, click Add → Freedom UI page on the section list toolbar.

-
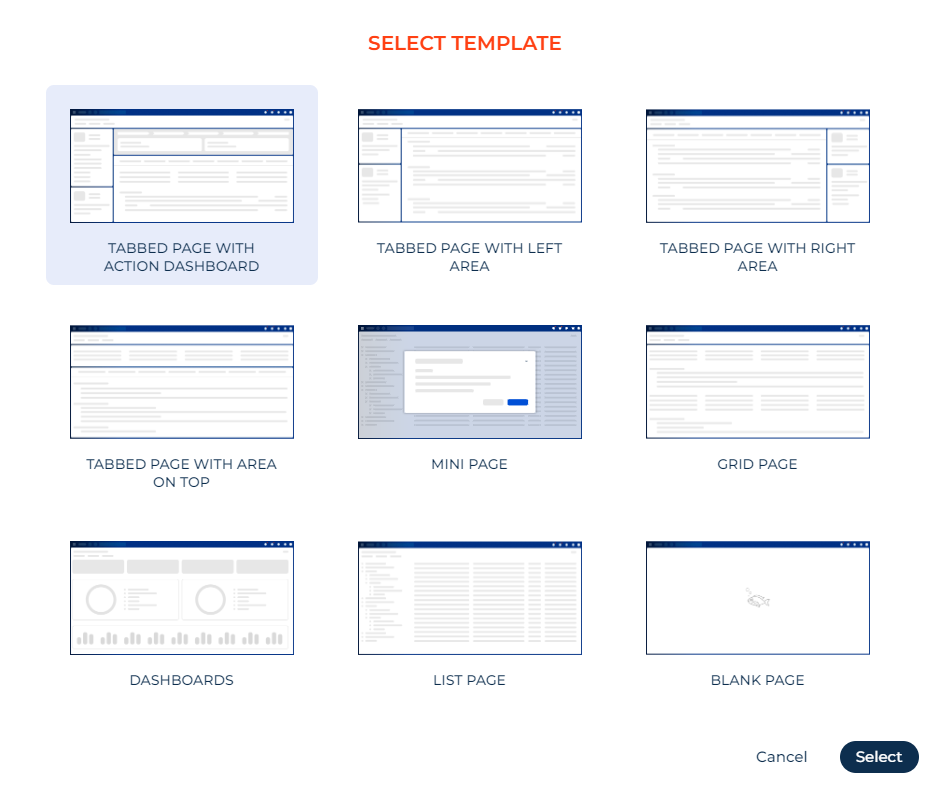
Select a template of the Freedom UI page to add based on your business goals. This opens the Freedom UI Designer.
-
Open the schema properties area. To do this, click
 in the action panel.
 -
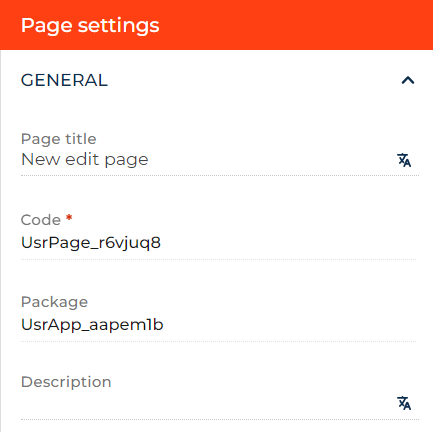
Fill out the schema properties.
Property
Property value
Property description
Page title
The localizable schema title
Code required
The schema name
Starts with the prefix. Learn more: Manage configuration elements. Can contain Latin characters and digits.
Package
The user-made package where you create the schema
The property is populated automatically and non-editable.
Description
The localizable schema description
-
Set up the Freedom UI page using tools of Freedom UI Designer. Learn more: Element setup examples (user documentation).
-
Customize the Freedom UI page using development tools (optional).
-
Open the Module Designer. To do this, click
 → Save.
 -
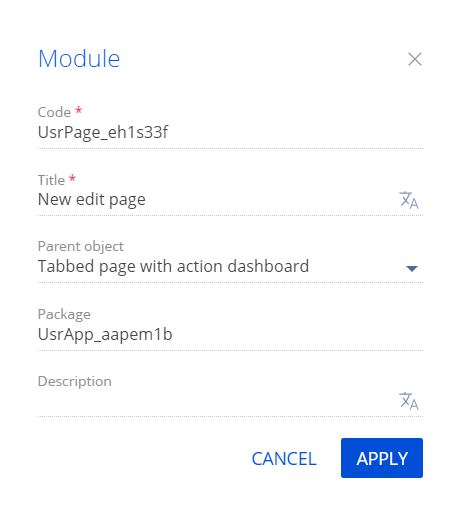
If needed, change the schema properties. To do this, use
 in the properties area.
Property
Property value
Property description
Code required
The schema name
Matches the Code properties specified in the Freedom UI Designer.
Title required
The localizable schema title
Matches the Page title property specified in the Freedom UI Designer.
Parent object
The object whose properties the module inherits
Creatio populates the property automatically based on the template selected when adding the Freedom UI page in the Configuration section. We do not recommend editing the Parent object property after you add elements to the schema. This can cause page malfunction.
Package
The user-made package where you create the schema
Matches the Package property specified in the Freedom UI Designer. The property is populated automatically and non-editable.
Description
The localizable schema description
Matches the Description property specified in the Freedom UI Designer.
-
Apply the changes.
-
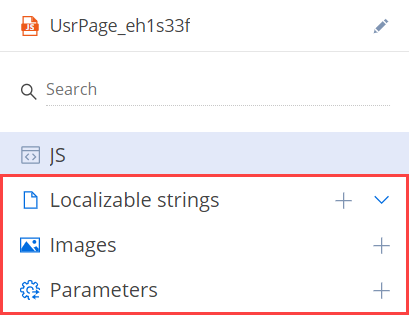
Fill out the additional properties (optional). To do this, use
 in the properties area.
View the additional properties in the figure below.
-
Implement the functionality. The module name in the
define()function must match the schema name in the Code property.Creatio displays the type of the error
 or warning
  – if any – to the left of the row number. Hover over the error type to view a tooltip with the error description.
You can use TypeScript to customize Freedom UI pages in Creatio version 8.0.10 and later.
-
-
Save the changes.
If you set up the page using only tools of Freedom UI Designer , save the changes in Freedom UI Designer.
If you customize the page using development tools , save the changes in Module Designer.
View model schema
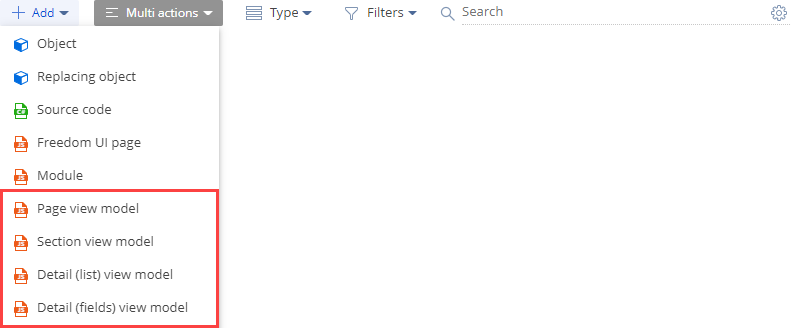
View model schema has the following types:
- Page view model
- Section view model
- Detail (list) view model
- Detail (fields) view model
General procedure to implement the view model schema:
-
Open the Configuration section. Instructions: Open the Configuration section.
-
Select a user-made package to add the schema.
-
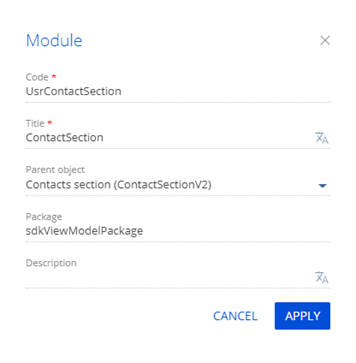
Add a module schema. To do this, click Add on the section list toolbar → select the type of the view model schema. This opens the Module Designer.
-
Fill out the schema properties.
Property
Property value
Property description
Code required
The schema name
Starts with the prefix. Learn more: Manage configuration elements. Can contain Latin characters and digits.
Title required
The localizable schema title
The title of the configuration element schema is generated automatically and matches the value of the Code property without the prefix.
Package
The user-made package where you create the schema
The property is populated automatically and non-editable.
Parent object
The object whose properties the module inherits
Select the parent object in the drop-down list.
Description
The localizable schema description
-
Apply the changes.
If needed, use
 in the properties area to change the schema properties.
 -
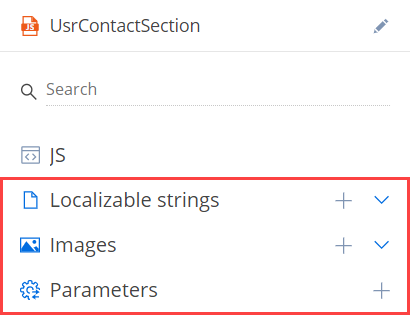
Fill out the additional properties (optional). To do this, use
 in the properties area.
View the additional properties in the figure below.
-
Implement the functionality. The module name in the
define()function must match the schema name in the Code property. The view model schema inherits from theBaseModulePageV2base schema.Creatio displays the type of the error
 or warning
  – if any – to the left of the row number. Hover over the error type to view a tooltip with the error description.
 -
Save the changes.
Implement a replacing module
The Replacing view model schema type represents the replacing module. Learn more: Replace configuration elements.
General procedure to implement a replacing module:
-
Open the Configuration section. Instructions: Open the Configuration section.
-
Select a user-made package to add the schema.
-
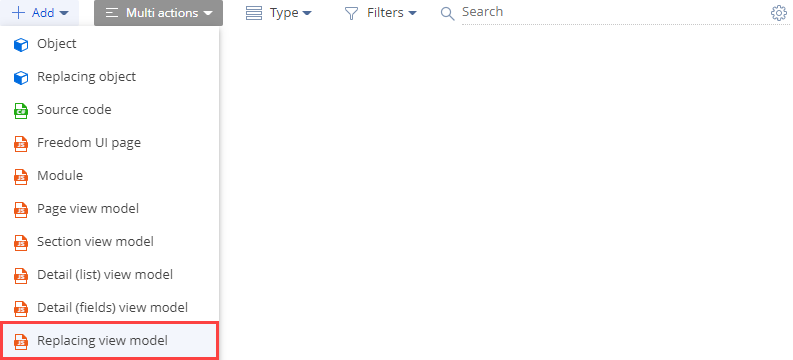
Add a replacing module schema. To do this, click Add → Replacing view model on the section list toolbar. This opens the Module Designer.
-
Select the parent object.
To replace a section or page with the module, specify the view model schema to replace in the drop-down list of the Parent object required property. For example, to create a replacing schema for the Contacts section, specify the
ContactSectionV2schema as the parent object. After you select the parent object, Creatio populates other module properties automatically.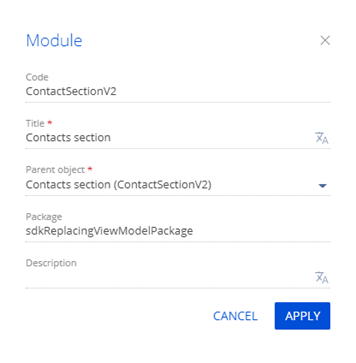
-
Apply the changes.
If needed, use
 in the properties area to change the schema properties.
 -
Fill out the additional properties (optional). To do this, use
 in the properties area.
View the additional properties in the figure below.
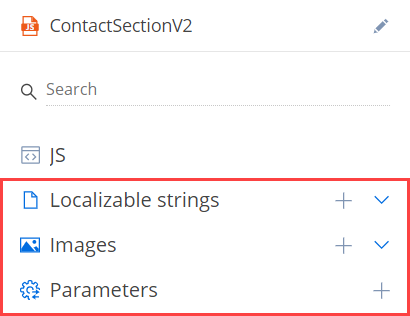
-
Implement the functionality. The module name in the
define()function must match the schema name in the Code property.Creatio displays the type of the error
 or warning
  – if any – to the left of the row number. Hover over the error type to view a tooltip with the error description.
 -
Save the changes.
Use hot keys
To display the index of available hot keys:
- Open the Module Designer.
- Click
 on the toolbar.
Hot key | Action |
|---|---|
Ctrl+A | Select all |
Ctrl+Z | Undo |
Shift+Ctrl+Z | Redo |
Ctrl+F | Find |
F3 | Find next |
Shift+F3 | Find previous |
Shift+Ctrl+F | Replace |
Shift+Ctrl+R | Replace all |
Ctrl+Y | Delete line |
Alt+Left | Go to line start |
Alt+Right | Go to line end |
Alt+G | Jump to line |
F11 | Fullscreen code editor |
Esc | Exit fullscreen mode |
Ctrl+Space | Call autocomplete |
Ctrl+S | Save the changes. Available for Creatio 8.0.10 and later. |
See also
Replace configuration elements
Resources
Element setup examples (user documentation)