Create a contract
Use the Contracts section to manage the contracts that you sign with the customers as part of closing a sales deal. The section stores information about:
- contract parties
- purchase amount
- addenda
- specifications
- scan copies
- current status
- links to other records, e.g., orders, documents and invoices
The section includes multiple quick filters.
-
By contract issue date (the Date field). Displays contracts created within the specified period. To view the contracts created on a specific day, set the day as both the start and end date.
-
By validity period (the End date field). Displays contracts that became inactive before current date.
Create a contract from the Contracts section
To create a contract:
-
Open the Contracts section.
-
Click New. This opens the contract page. Creatio generates contract numbers automatically according to the "Contract number mask" ("ContractCodeMask" code) system setting. A new contract page has the following default values in its fields:
Start date
The user’s current date. Required.
Owner
The current user’s contact. Required.
Status
"Draft" for all new contracts. The field uses the Contract statuses lookup.
Type
"Contract" for all new records. This value becomes non-editable after you save the new record. Required.
Currency
Contract currency. Creatio base currency for all new contracts. Required.
-
Specify the contract properties.
Account
The other party of the contract. Required.
Account's banking details
Select data from the Banking details expanded list of the selected account. The field unlocks once you fill out the account.
Our company
The account that represents your party in the contract. You can select from accounts of the "Our company" type. Required.
Our banking details
Select data from the banking details specified on your company page. The field unlocks once you fill out the Our company field.
Amount
Select those ordered products you need to connect to the contract.
Order
Select order linked to the contract.
-
Add subsequent agreements, addenda or specifications to the Subordinate contracts expanded list. Only contract records that have the "Specification" and "Addendum" types are available on the Subordinate contracts expanded list.
Click to add a new subordinate contract. The Parent contract field on the subordinate contract page will be populated automatically.
 -
Open the Contract details tab → Products expanded list → click
to add product list to the contract. -
Save the contract.
You can submit contract for approval to other Creatio users, for example, managers, using the out-of-the-box approval function. To do this, use the Send for approval button on the invoice page. The action opens an additional page where you set approval parameters. Approving contracts is identical to approving orders and invoices. Learn more: Approvals.
Create a contract from an order
-
Go to the Orders section and open the required record.
-
Create a new contract based on this order. To do this click
 → Create new contract (Fig. 1).
Fig. 1 Add contract based on order 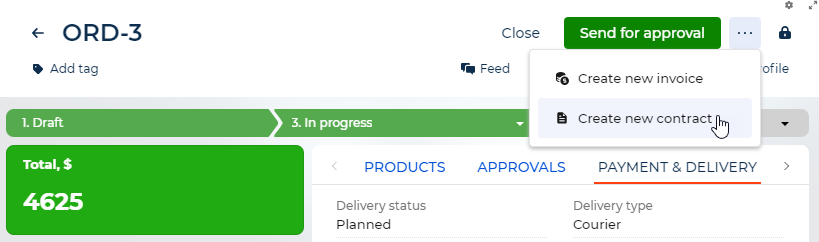
As a result, Creatio will open the contract created based on the order. The document numbers are generated automatically according to the "Document number mask" ("ContractCodeMask" code) system setting. The following data in the contract is populated using the order data:
-
The Products list.
-
The Contact, Account and Owner fields.
-
The Amount, Amount, base currency values.
-
The Order field.
Also, the Start date field is populated using the current date, the Type field will contain "Contract" and the Status field is set to "Draft."
If necessary, you can generate a print-ready form of the contract for the customer. To do this, click  and download the print-ready form. Additionally the form file is automatically saved in Attachments toggle panel.