Send a test email
Send test emails to preview the email content in an email client and check how the message will look like for your recipients. The marketing email metrics and analytics ignore test emails.
Verify your email domain before sending a test email. Learn more: Email domain verification. Besides that, specify a valid sender's address in the email.
We recommend against using words like "Test", "Hello", "Checking" as the email subject when sending test emails. The recipient server might perform a series of checks that could mark such emails as spam. We recommend preparing the test email content of the same quality as the content intended for the end recipients.
Send a test email in Freedom UI
- Open the email in the section list. Go to the Design content tab and click the Send test email button in the upper right area of the tab.
- In the Send test email dialog, enter the email addresses in the Send test to field. Use commas "," or semicolons ";" as separators.
- In the Choose contact to test personalization field, specify the contact whose data will be used to populate personalization macros in the test email.
- If the email has multilingual versions, select the language in the Select multilingual template field. Note that all bulk email variants based on display conditions will be sent as separate emails.
- Click Send.
As a result, the test email will be sent to the specified addresses. Creatio stores the values you entered. Should you need to send the test email again, Creatio will populate these fields automatically. You can use those values or update them.
Send a test email in Classic UI
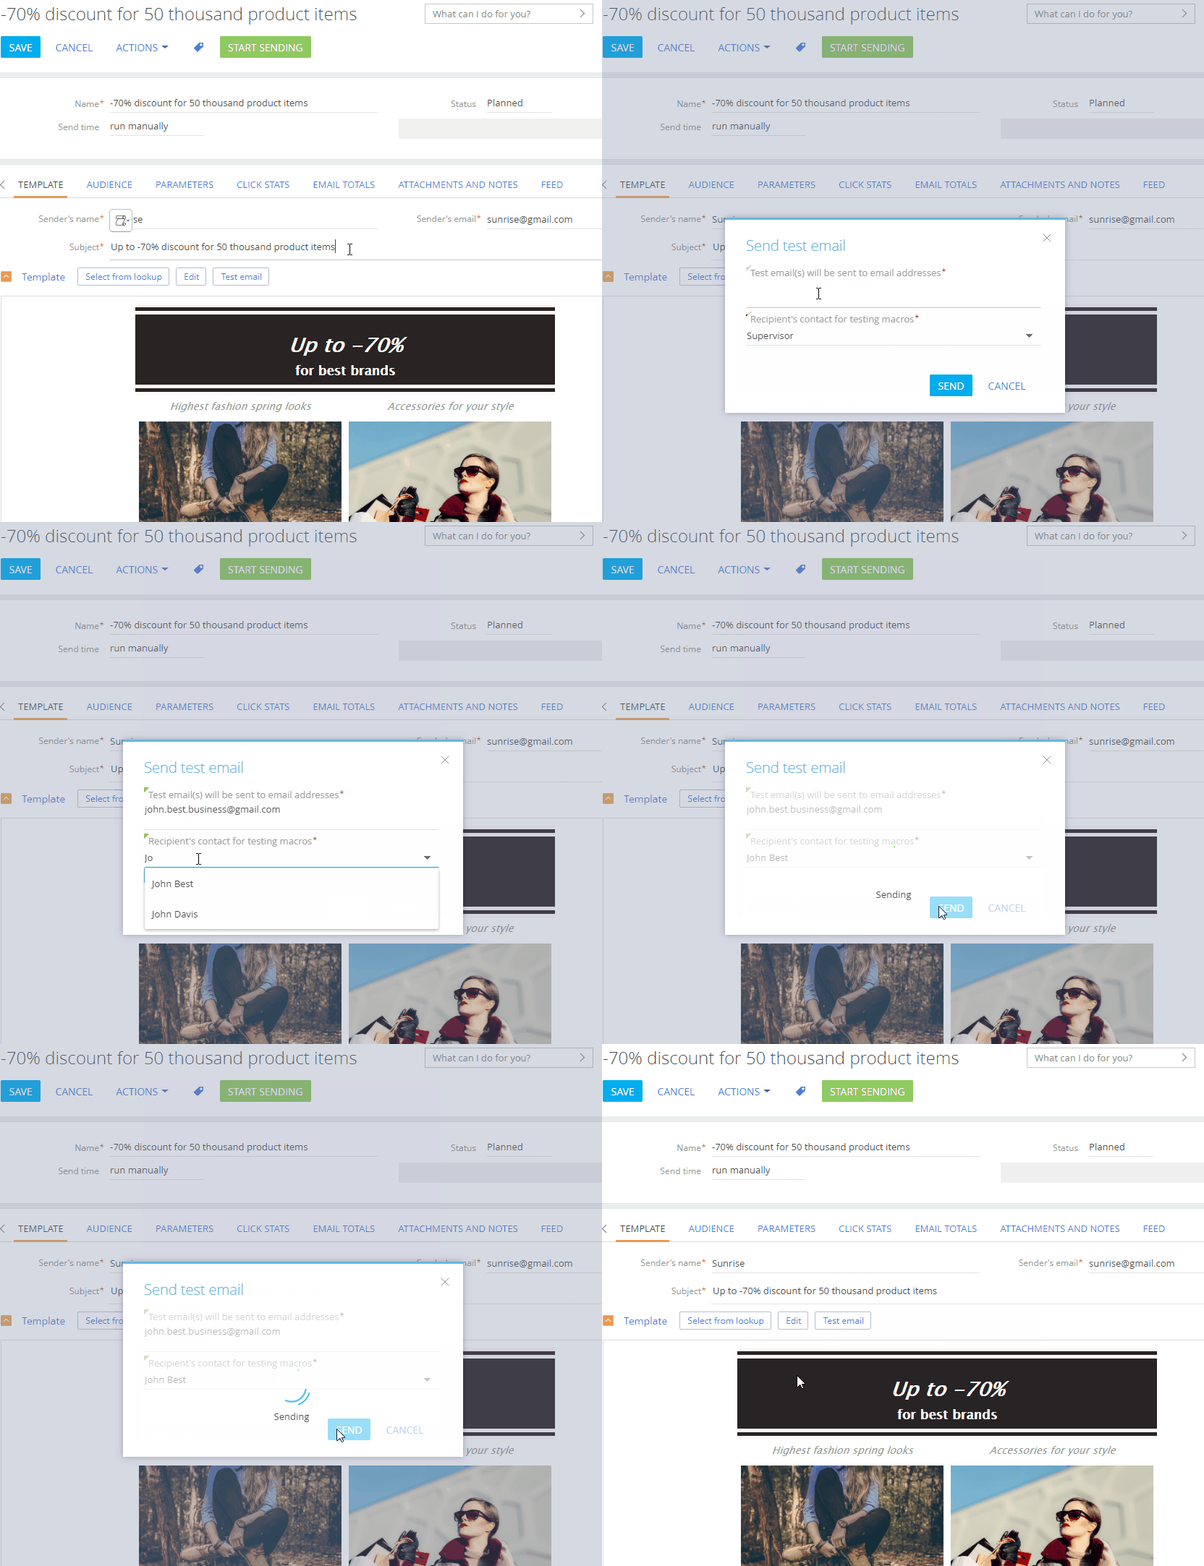
You can send a test email from the relevant email page or the Content Designer by clicking the Test email button (Fig. 1).
-
Open the email in the section list. Click the Test email button on the Template tab (Fig. 1).
-
Enter the recipient email addresses in the Test email(s) will be sent to email addresses field. Use commas "," or semicolons ";" as separators.
-
In the Recipient's contact for testing macros field, specify the contact whose data will be used in the test email.
You can generate the test email's macros based on a contact connected to one of several objects. Specify the object in the Audience source field at the top of the email page. The name of the Recipient's contact for testing macros field changes depending on the object you selected. For example, if you select the "Lead" value in the Audience source field, the field name will change to Recipient's lead for testing macros. You can select any contact that is connected to the object.
By default, if you select the "Contact" object in the Audience source field, the campaign will use the contact specified in the "Test email recipient" ("TestSendingBulkEmailContact" code) system setting.
noteCreatio stores the values you entered in the previous steps. Should you need to send the test email again, Creatio will populate these fields automatically. You will be able to either use those values once more or update them.
-
Click Send.
As a result, the test email will be sent to the specified addresses. You can send test emails from the Content Designer in a similar way.
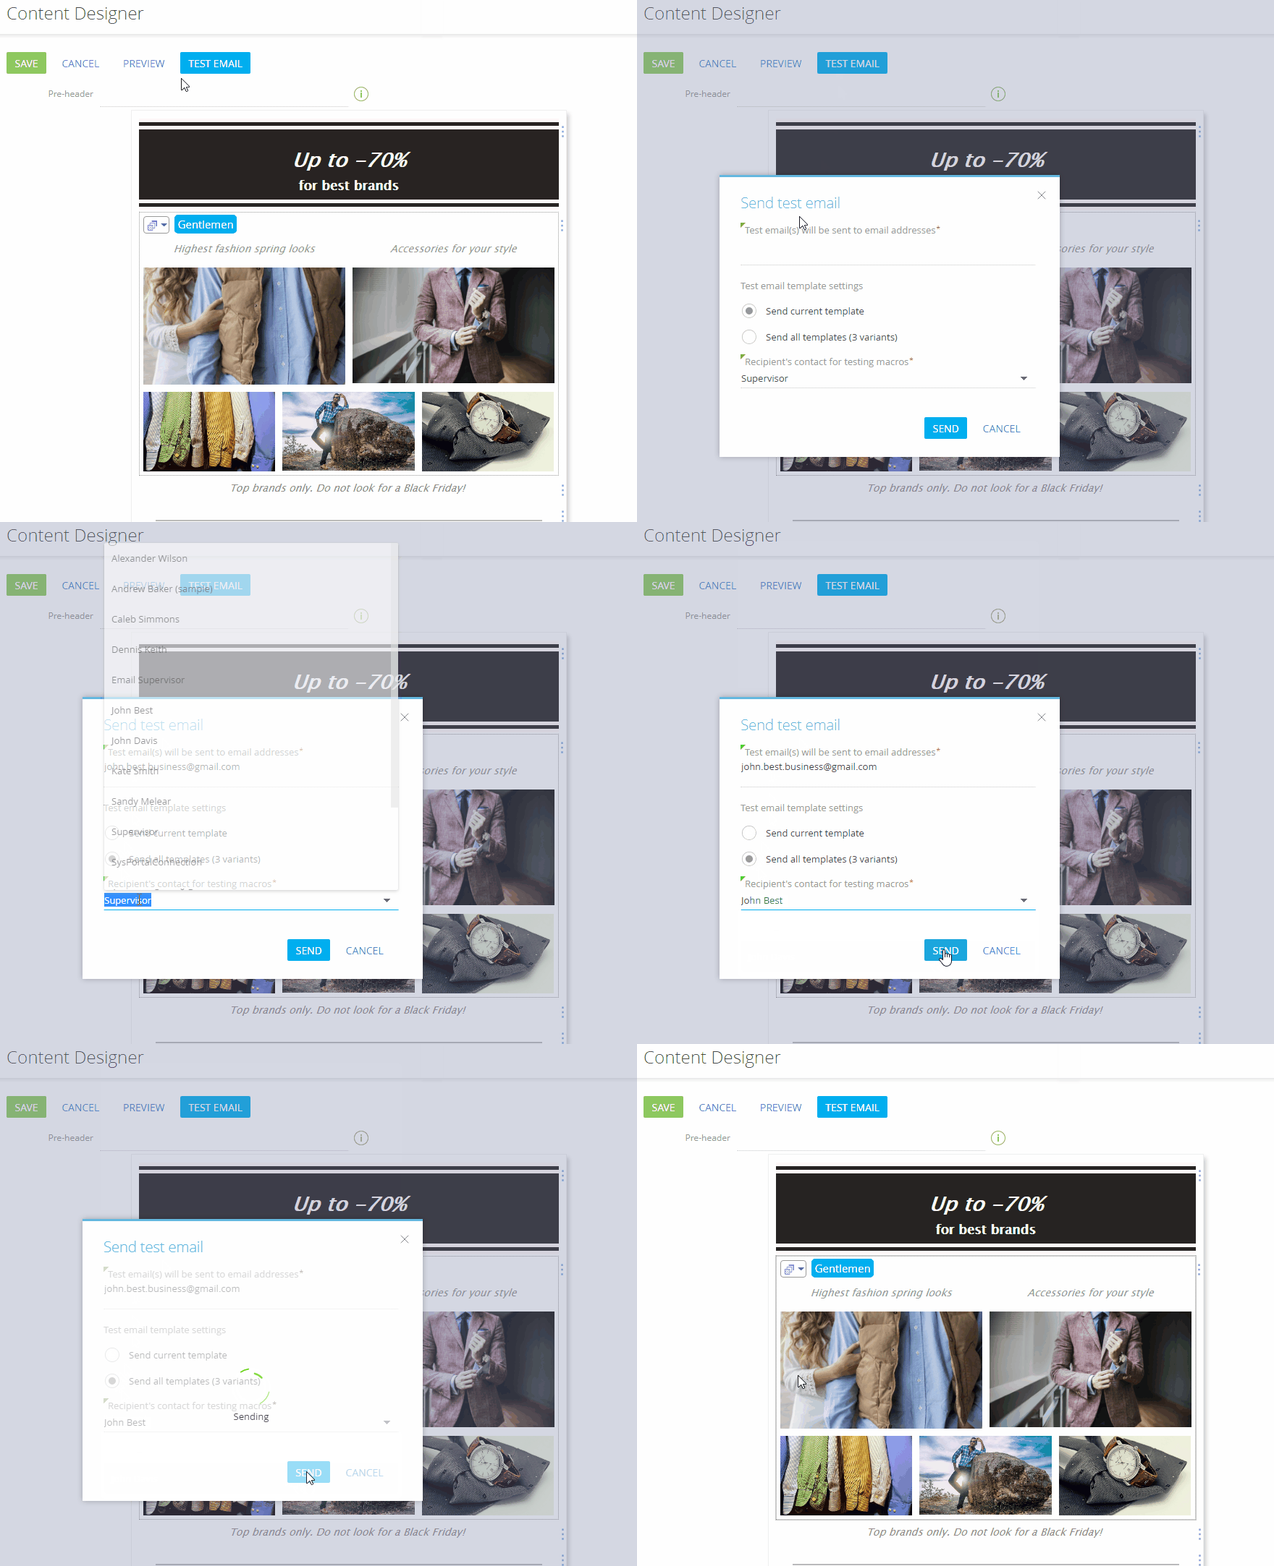
If you send test emails with dynamic content, the "Send test email" window will display a Test email template settings field (Fig. 2). Choose between sending the current email template version or all template versions in this field.
Learn more about how to create emails with dynamic content in Classic UI: Configure dynamic content for emails.
See also
Set up an unsubscribe link in emails
Configure restriction of the number of emails for sending