Portal Creatio first steps
Creatio portal is available for both on-site and cloud deployment options. The portal is ready for use out of the box. We recommend having a look at what the portal functions have to offer.
Log in to the portal
You need a portal user account to access the portal. Users can access the portal via an invitation email or sign up by themselves if you enable self-registration. If you need to create a single account, you can do it manually in the primary application:
-
Click
 → "System users."
 -
Click Add → "Portal user."
-
Select a contact, fill out the Username and Password fields.
-
Save the changes.
As a result, Creatio will create a new portal user, add them to the "All portal users" role and assign them a portal license.
noteThe name of the portal license consists of the portal configuration and the Creatio deployment method, e. g., "Creatio self-service portal cloud" or "Creatio Customer Portal on-site".
The main application and the portal have two different login pages. To log in to the portal:
-
Log out of the primary application (Fig. 1).
Fig. 1 Log out of the primary application 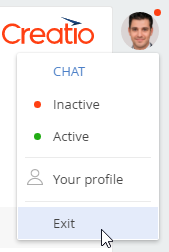
-
Add /login/SSPLogin.aspx to the URL inyou’re the address bar. Example of a link: mysite.creatio.com/login/SSPLogin.aspx. As a result, you will be redirected to the portal home page.
-
Enter your login credentials and click Login.
Study the portal functionality and move on to further setup.
Portal customization overview
You can tailor the portal’s functionality to your company’s business goals.
-
Set up sections available on the portal. You can add up to 3 custom sections on the portal. Note that you can only add custom sections in the "customer portal" configuration. Learn more: Creatio portal overview, Customize Portal Creatio.
-
Customize the portal. Personalize the portal to reflect your brand:
-
Upload your logo. The logo is displayed on the portal main page and the login page.
-
Add the customer support contact options to the portal login page.
-
Add charts and other analytics to the portal main page.
Learn more: Customize the portal.
-
-
Set up roles and access permissions. You can group multiple portal users into portal organizations, and assign administrators for these organizations from among the portal users. Additionally, you can set up different access permissions for the data available on the portal for these organizations. Learn more: Manage users and access permissions on the portal.
noteSince Creatio version 8.0.9 "Portal user" user type and "All portal users" root role were renamed to "External user" and "All external users," respectively.
-
Set up user authentication. There are multiple ways to add new portal users to Creatio: manually, by importing from Excel, by synchronizing with LDAP, via SSO (Single-Sign-On), via an invitation email, via self-registration. Learn more: Manage users and access permissions on the portal.
-
Create partner programs and display partner metrics in the "Partner portal" configuration. You can also process leads and opportunities in collaboration with your partners using lead and corporate sales management processes. Learn more: Channel sales.
See also
Manage Portal Creatio in the main application
Customize Portal Creatio in Classic UI