Schedule sales rep visits
Schedule visits of your sales reps to the sales outlets and build routes on the map using the Activities section.
Use the Visit scheduling view, the Calendar view, and the section list to schedule a visit. You can build optimal routes in the Visit scheduling view.
Use the Visit scheduling view of the Activities section to plan field meetings.
The Visit scheduling view has the following functional areas:
- Account list. The area displays the list of locations (e.g., sales outlets) with scheduled visits. The list includes only the accounts that have the same owner specified as the one that is selected in the calendar. You can filter the records in the accounts list by selecting the Apply filter option from the
 button menu.
 - A sales rep’s calendar in the Visit scheduling view is similar to the standard user calendar. The titles of days in the calendar contain additional buttons that allow the user to build the sales rep's daily route.
- Route map. The map that displays the daily route of a sales rep.
Schedule visits automatically
Use the cyclic tasks functionality to automatically plan field staff visits to sales outlets in Field Module for Creatio. A cyclic task is an activity that includes multiple visits planned for a certain period of time. You can create cyclic tasks in the Cyclic tasks section. One cyclic task may schedule multiple visits over a certain period.
After installing the "Field Management" app, make sure you add the Cyclic tasks section to the needed workplaces.
1. Add a cyclic task
-
Go to the Cyclic tasks section.
-
Click the New task button.
-
On the displayed page, populate the required fields: specify the name of the cyclic task, the start and the end dates, and the owner. The owner must be a contact for which the system user is created.
-
On the General information tab:
-
Click
 in the Visit categories detail to add a new visit category record.
 -
Specify the name of the category in the Name field.
-
In the Quantity field, specify the total number of visits you want to schedule for the selected time frame. The Days between visits and the Visits frequency per month field values are populated automatically.
noteIf you change the values in either one of the Quantity, Days between visits and the Visits frequency per month fields, the values in the other two fields will be automatically recalculated based on the total task execution period.
-
Select the lookup value in the Visit rule field to specify the rule according to which the visit will be performed. Visit rules determine the actions that the sales rep is expected to perform during the visit. Use the Field visit rules lookup to set up custom visit rules, if needed.
-
Add the accounts of the "Sales outlet" and "Retail chain" types to the Accounts detail. Creatio will be scheduling visits to these accounts.
-
-
Save the cyclic task.
noteWe recommend planning your visits quarterly to analyze product promotion results correctly.
2. Schedule med rep visits using cyclic tasks
After adding a cyclic task. proceed to schedule visits. To do this:
-
Open the cyclic task created on the previous step. Use the Calculate available visits command of the Actions menu on the cyclic task page to calculate available visit slots. As a result, Creatio will populate the Available quantity of visits field of the cyclic task page (Fig. 1).
Fig. 1 Available visit quantity 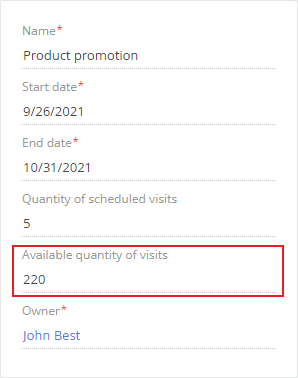
-
When the calculation is finished, the Schedule visits action will become available on the cyclic task page (Fig. 2).
Fig. 2 The Schedule visits action 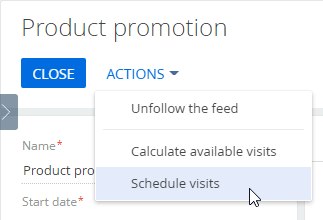
-
Run the Schedule visits action to start the process of automatic visit scheduling in accordance with the configured parameters and the sales rep’s calendar. Creatio will notify you when the import process is complete. The Quantity of scheduled visits field will display the number of scheduled visits. The visit activities will appear on the Activity detail of the corresponding accounts.
Automatic scheduling of visits
The algorithm for automatic visit planning is as follows:
-
Creatio determines the route starting point. The current location of a sales rep responsible for the visit can be a starting point. The location is determined based on the information from the Addresses detail of the corresponding contact page. If the contact’s address is not specified, the system will use the address from the connected account page.
-
Creatio determines the closest sales outlet to the starting point. The optimal car route is determined within the 200 km radius.
-
Creatio checks the working hours of the sales rep and retail outlet.
noteWhen checking the working hours, Creatio analyzes the calendar of the sales rep employee. Sales outlet work hours are determined in the "Base calendar" system setting ("BaseCalendar" code).
-
Creatio creates the first visit.
If the visit time is outside of the working hours, Creatio will look for the next closest location. The procedure repeats until all visits have been scheduled.
Schedule visits manually
Before scheduling visits, make sure that the rule that applies to the visit corresponds to the needed time period. If several field rules apply to one visit, Creatio will let you choose which rule to apply to that visit. Learn more: Set up visit rules and actions for sales reps.
To schedule a visit:
-
In the Activities section, select the Visit scheduling view (Fig. 3).
Fig. 3 Selecting the Visit scheduling view 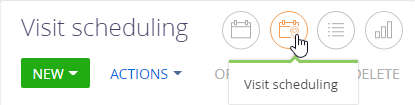
-
Use the filters in the calendar area to select the time period and a sales rep employee.
-
Select an outlet to schedule a visit to in the list of accounts to the left, then drag it and drop into the needed time in the calendar (Fig. 4).
Fig. 4 Adding a visit to the calendar 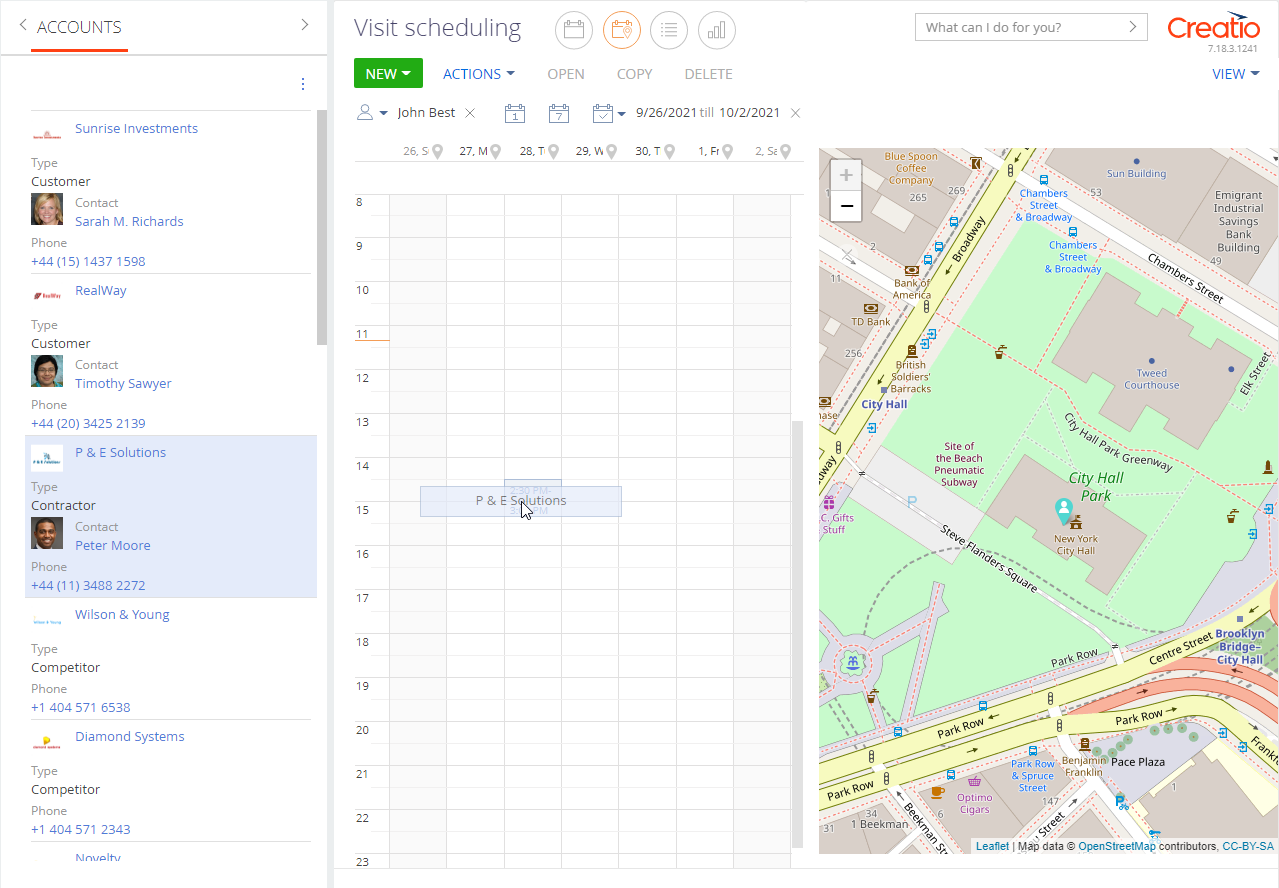
You can also schedule a visit of field staff in the Calendar view of the Activities section. Click Add action → "Visit" on the toolbar to schedule a visit (Fig. 5). This method of scheduling a visit requires populating the Contact or Account field on the visit page. If both fields are blank, you will not be able to save the record.

As a result, Creatio will add a new "Visit" activity with the "Visit" type. The primary contact of the account will be specified as the contact of the visit. The list of actions will be added to the visit according to the corresponding visit rule. Creatio sets the duration of the visit will according to the corresponding visit rule. If necessary, you can change the visit duration manually.
After adding all visit activities of a sales rep on the calendar, use the map to view the changes in the sales rep's route for each day. Canceled visits are not taken into account when building a route.
To automatically connect a manually created visit to a cyclic task, the following parameters must coincide:
- visit time frame
- account
If the above parameters of a visit correspond to those of a cyclic task, the Cyclic task field on the General Information tab of the visit page will be populated with that cyclic task, and the cyclic task will treat the manually scheduled visit as if it was scheduled automatically (will not schedule duplicate visits, etc.).
Build a route for a field staff member
Build field staff routes on the map for more efficient visit scheduling. Creatio uses the timing of visits and the locations of the sales outlets to automatically chart routes that the sales reps should take.
The sales outlet is displayed on the map based on the GPS coordinates specified on the account page. If an account has several addresses, Creatio will use the address marked as "primary," regardless of the address type. You can view the address of an outlet on the map and the title of the corresponding visit by clicking the marker of the visit.
When all the visits are added to the map, build a route. Click the corresponding  button that is located next to the date in the calendar (Fig. 6).

As a result, the map will display all visits for the selected day. The order of visits on the map will correspond to their order in the schedule.
The  button in the day title will change its color. The button color will correspond to the color of the route on the map. The route color is different for each day.
You can view routes for several days by clicking  for multiple dates.
On the map, the point that the route starts from is your current location if your browser allows sharing this information. If your browser privacy settings do not permit sharing location, the first point of the route is the value specified in the "Default city for employees" system setting ("EmployeeCityDef" code).
See also
Install Field Management for Creatio
Set up visit rules and actions for sales reps