Google Workspace is a set of cloud services that lets Creatio administrators integrate the domain name of your application with Gmail and enable users to synchronize Google corporate email and calendars with Creatio.
Creatio registration in Workspace involves several steps:
-
Register and set up a Google Cloud Platform project, grant access to the API, and generate the keys (“Client ID” and “Client Secret”) for Creatio.
-
Enter the retrieved “Client ID” and “Client Secret” keys in Creatio calendar synchronization and email service settings.
Step 1. Set up a Google Cloud Platform project
To set up a Google project:
-
Open the https://console.cloud.google.com/cloud-resource-manager page.
-
Log in as a Workspace administrator.
-
Use a Google Cloud Platform project to register Creatio in Google Workspace. If you want to create a new project, proceed to step 4. If you want to use an existing project, skip steps 4-5 and proceed to step 6.
-
Take the following steps to create a new project:
- Click Create Project.
-
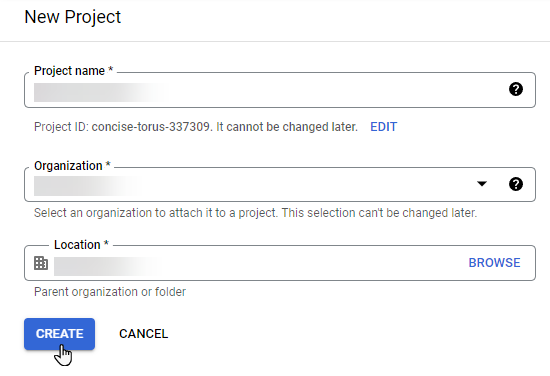
Fill out the following fields:
Enter an arbitrary project name in the Project name field. For example, “Creatio OAuth.”
Specify the name of your business in the Organization field to connect the project in Google Cloud to your company as opposed to an employee who created the account. Otherwise, select “No organization.” After you save the project, the field becomes non-editable.
Specify the folder to place the project in the Location field. If you specify an organization in the previous field, Google populates the value automatically. If you select “No organization” in the previous field, select the folder to place the project in your account.
- Click Create (Fig. 1).
Fig. 1 Create a project
-
Click Select project (Fig. 2) and select a project in the window that opens to proceed to the project setup.
Fig. 2 Select a project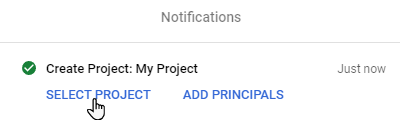
-
Grant permissions to use the project APIs Creatio requires. Find the Gmail API using the search bar (Fig. 3).
Fig. 3 The Gmail API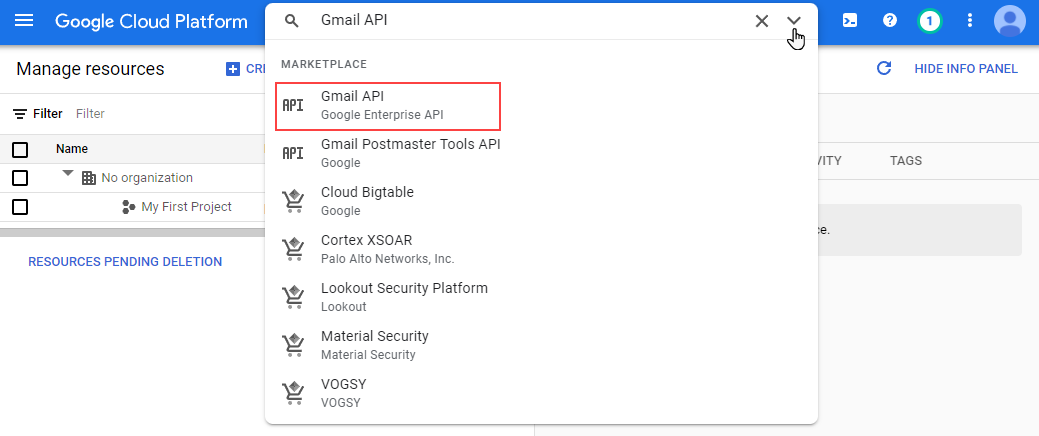
-
Open the Gmail API page. Make sure you selected the relevant project. Google displays the name of the active project in the header of the page that opens (Fig. 4).
To change the active project, click the name in the top bar and select the needed project in the window that opens (Fig. 5).Fig. 4 The name of the active project Fig. 5 Select the active project
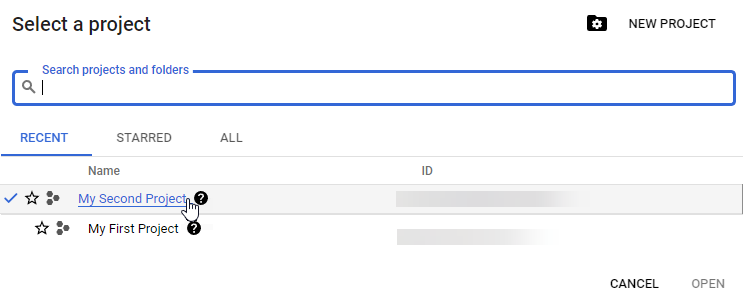
-
Click Enable to enable the Gmail API (Fig. 6).
Fig. 6 Enable the Gmail API
As a result, the API will appear in the index of available APIs on the control panel (Fig. 7).
Fig. 7 The index of available project APIs
-
Repeat steps 5-7 to activate the Contacts API and Calendar API.
-
Click
 in the top left of the settings page → APIs & Services → OAuth consent screen to specify the user type, app name, and app parameters (Fig. 8).Fig. 8 Open the OAuth consent screen
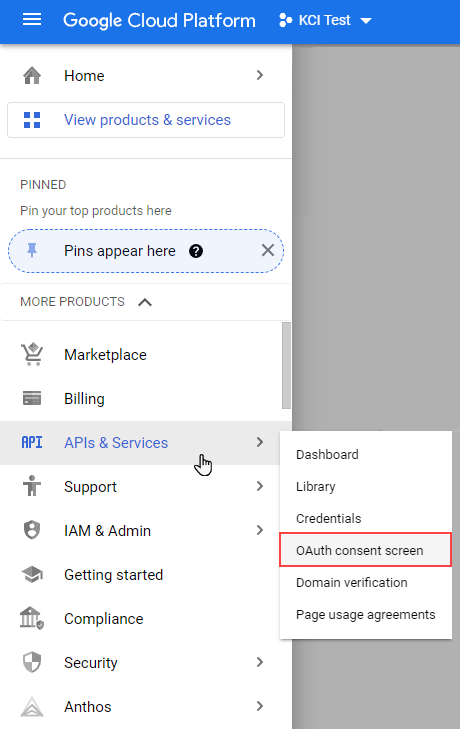
-
Specify the Internal user type to restrict access to Google services to users from your company (Fig. 9).
Fig. 9 Select the user type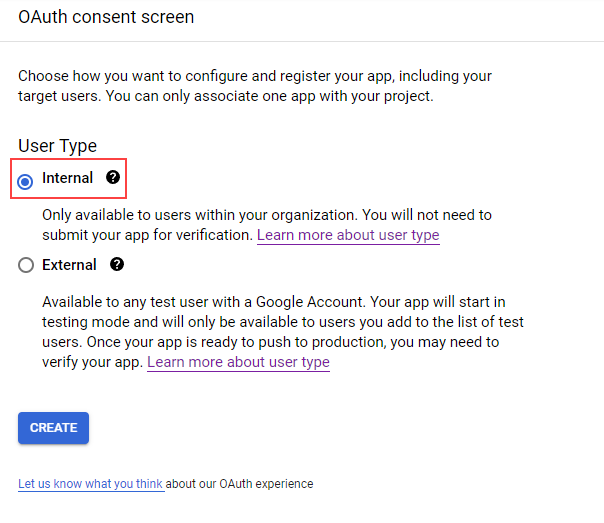
-
Fill out the domain parameters:
-
Enter the product name to display to users when they permit Creatio to use the Google account in the App name field. For example, “Creatio.”
-
Enter the email of the Workspace administrator or your support service in the User support email field.
-
Enter the domain of your Creatio application in the Authorized domains field. Specify “creatio.com” for Creatio cloud. Specify your individual domain for Creatio on-site.
-
Enter the email of the Workspace administrator in the Developer contact information field.
-
-
Click Add or remove scopes to proceed to scope setup (Fig. 10).
Fig. 10 Open the scope setup page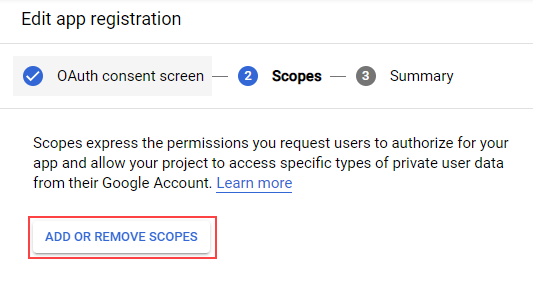
-
Set up the scopes of your domain users. To do this, select the rows whose API column value is “Gmail API” except for rows that have read-only scope, i. e., whose Scope column value matches the …/*.readonly pattern (Fig. 11).
Repeat the step for rows whose API column values are “Contacts API” and “Calendar API.”
Fig. 11 Set up the scopes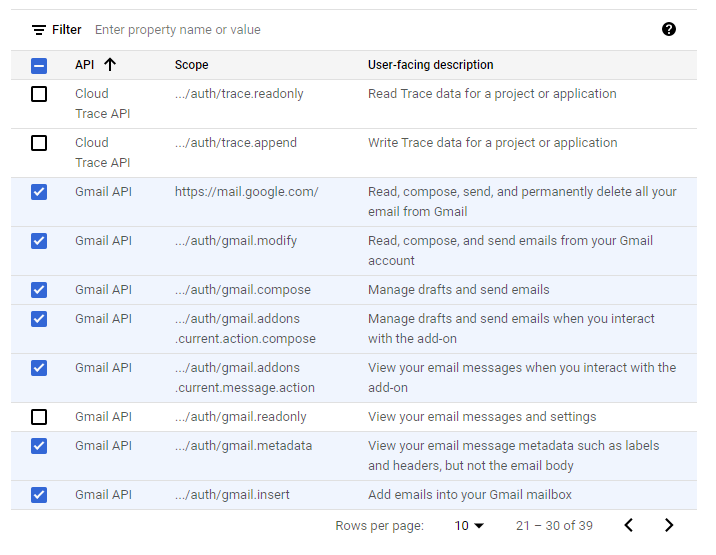
-
Click Save and continue.
Step 2. Retrieve the keys that integrate Google with external apps
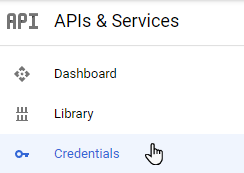
- Open the credentials page. To do this, select Credentials in the side menu (Fig. 12).
Fig. 12 Open the Credentials page
-
Click Create Credentials → OAuth client ID (Fig. 11) to create an OAuth 2.0 client ID.
Fig. 13 Select OAuth client ID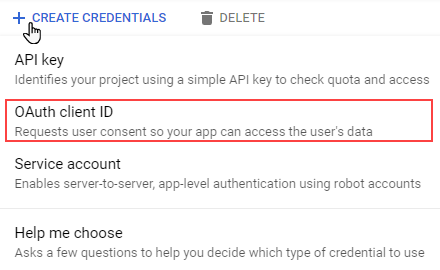
-
Fill out the required parameters to create an OAuth 2.0 client ID (Fig. 10):
-
Select “Web application” in the Application type parameter
-
Enter an arbitrary name of the OAuth 2.0 client in the Name parameter.
-
Enter the full Creatio URL in the Authorized JavaScript origins parameter. Specify the URL with the “creatio.com” domain for Creatio cloud. For example, “https://050651-studio.creatio.com.” Specify the URL with your individual domain for Creatio on-site.
-
Enter the links to Creatio in the following formats in the Authorized redirect URLs field:
For Creatio 7.17.0 and earlier:
https://your_website_url/0/ViewPage.aspx?Id=3b22f0ff-034a-48da-8758-a0660e5a26ff
https://your_website_url/0/rest/GoogleOAuthAuthenticator/ProcessAuthenticationCode
For Creatio 7.17.1 and later:
https://your_website_url/0/LegacySocialAccountAuthPage.aspx?Id=3b22f0ff-034a-48da-8758-a0660e5a26ff
https://your_website_url/0/rest/GoogleOAuthAuthenticator/ProcessAuthenticationCode
-
-
Copy the retrieved Client ID and Client Secret and save them to your device (Fig. 14).
Fig. 14 The Google keys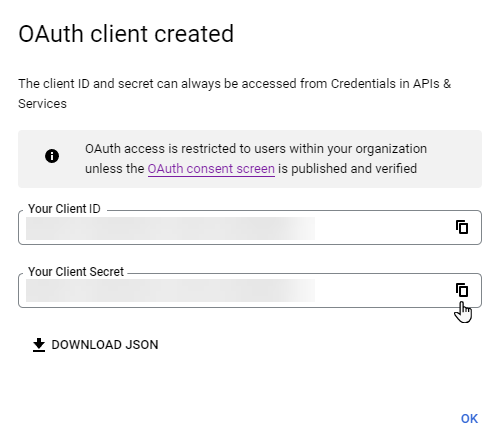
Step 3. Enter the Google keys in Creatio
Enter the Google keys that synchronize contacts and the calendar
Enter the retrieved “Client ID” and “Client Secret” keys in Creatio as the values of the “Google services access key” (“GoogleConsumerKey” code) and “Google secret access key” (“GoogleConsumerSecret” code) system settings, respectively. To do this:
-
Open Creatio.
-
Open the System Designer. For example, click the
 button.
 -
Go to the System setup block → System settings (Fig. 15).
Fig. 15 The System settings section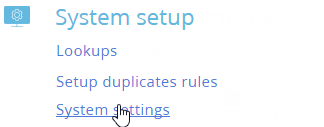
-
Select the “Google services access key” (“GoogleConsumerKey” code) system setting in the list and click Open.
-
Enter the “Client ID” code retrieved when you registered Creatio in Google (available in the Your client ID field of the Google API message) in the Default value field of the system setting and save the changes.
-
Select the “Google secret access key” (“GoogleConsumerSecret” code) system setting in the list and click Open.
-
Enter the “Client Secret” code retrieved as part of Creatio registration in Google (available in the Your client secret field of the Google API message) in the Default value field of the system setting and save the changes.
-
Select the “Use shared Google application” (“UseGoogleSharedApplication” code) system setting, click Open, and make sure that the Default value checkbox is cleared.
As a result, you will be able to set up the synchronization of Creatio tasks with Google.
Enter the Google keys for email synchronization
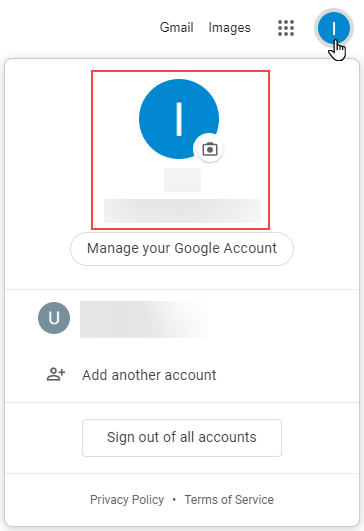
Since the project in Google Workspace has internal user type, make sure you are logged in the Google account as an authorized domain user when you add a new mailbox or set up email synchronization in Creatio. The account must also have the priority. To check the priority, go to https://www.google.com/ and make sure the account with the authorized domain in the email has the priority (Fig. 16)
Enter the retrieved “Client ID” and “Client Secret” codes in Creatio when you set up the secure OAuth 2.0 connection for the Gmail provider. To do this:
- Open Creatio.
- Open the System Designer. For example, click the button.
- Go to the System setup block → Lookups.
- Open the content of the List of email providers lookup.
- Open the Gmail provider settings.
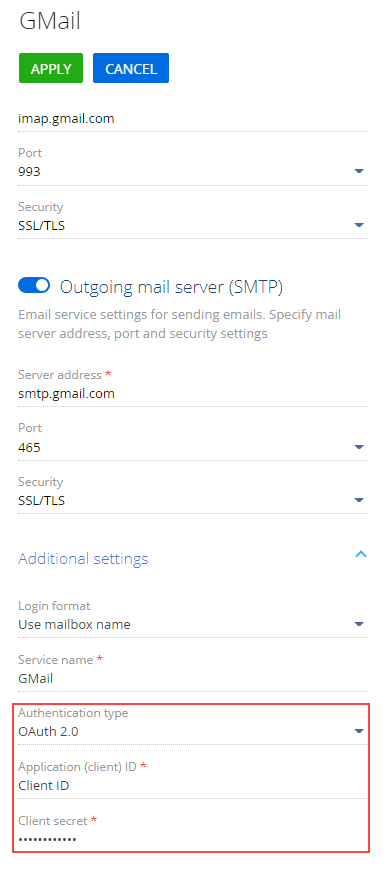
- Specify the OAuth 2.0 authentication method in the Additional settings area. This grants the email service limited access to the protected user resources without the need to pass the user credentials.
- Enter the “Client ID” and “Client Secret” codes retrieved earlier in the Application (client) ID and Client secret required fields, respectively.
Fig. 17 Set up OAuth 2.0 for Gmail
- Save the email provider settings.
As a result, users will be able to set up the synchronization of Google mailboxes and calendars with their Creatio accounts.