One of the primary components of a visit rule is the sale rep “to-do” list – the activities that sales reps are required to complete during a visit. Field sales for Creatio functionality enables sales reps with mobile apps to perform the following basic actions:
|
Check-in |
Creatio receives GPS coordinates of the sales rep's location and the visit status is changed to “In progress“. |
|
Presentation |
Opens a PowerPoint or PDF presentation on the sales rep's mobile device (the presentation must be added to the Attachments and notes detail of the visit record in the Activities section). If several presentations have been added to the detail, the sales rep will have to select the needed one. |
|
Order placement |
Creates a new order for the sales outlet account and opens the product selection page on the sales rep's mobile device. |
|
SKU Monitoring |
Opens the SKU monitoring window for the sales rep to enter changes in SKU (stock-keeping units), specify whether the products are on display in the sales outlet. The sales rep’s mobile device will display the SKU monitoring window. |
|
Check-out |
Creatio receives the GPS coordinates of the sales rep's location and the visit status is changed to “Completed“. |
You can supplement the list of sales rep visit actions by adding new records to the Visit actions type lookup. Employees mark visit actions as “complete” by toggling a switch in the mobile device. The connection between visit actions and system sections (e.g., creating a new contract based on a visit action) is carried out only through development.
Set up rules of a visit
-
Click
 to open the System Designer.
 -
Go to the System setup block → click Lookups.
-
Click the Field sales rules lookup.
-
On the lookup content page, click the New rule button.
-
Populate the required fields:
-
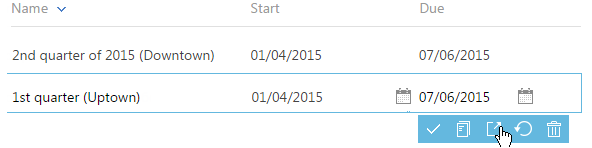
Populate the Name field, for example, “2nd quarter of 2020 (Downtown)“ or “1st quarter (Uptown)“.
-
In the Start and Due fields, specify the time limit of rule validity.
-
Specify visit duration (including travel time) in the corresponding field.
-
In the Number of visits field, enter the approximate number of visits of this type that a sales rep can perform during one day.
-
-
Click Save.
-
Similarly, specify the other rules. Normally, different visit rules apply to different periods and sales outlet locations.
As a result, these rules will be taken into account when building a schedule for the sales reps.
In the Visit scheduling view of the Activities section, drag a sales outlet from the list to the left and drop it into the calendar. The duration of the visit will be set automatically, according to the Visit duration value from the corresponding visit rule.
If several rules can be applied to a sales outlet, Creatio will let you choose which rule to use.
Manage sales rep visit actions
Use the Field visit rules lookup to set up the list of activities that must be completed during a visit.
To add an action:
-
Click
 to open the System Designer.
 -
Go to the System setup block → click Lookups.
-
Click the Field sales rules lookup.
-
Select a rule and click
 (Fig. 1).
 -
On the rule page, expand the Actions during visit detail and click +.
-
Populate the columns of the new record:
-
Select the visit action type: “Check-in“, “Check-out” “Presentation,“ etc.
-
Use the Actions priority order column, to set up a sequence of sales rep activities. For example, if the action is the first in the “to-do” list, enter “1“.
-
Select the Required checkbox for the actions that should not be skipped during a visit.
The sales rep will not be able to complete the visit until all the required actions are performed.
-
-
Click
 to save the visit action.
 -
Similarly, add the rest of the visit actions.
As a result, when you drag a sales outlet and drop it into the calendar in the Visit scheduling view of the Activities section, the Visit actions detail of the visit will be populated automatically. The list of actions on the detail will correspond to the list of actions set up in the lookup for the corresponding visit rule.
Add a presentation to a visit
The “Presentation“ visit action requires additional setup, so that the sales reps have full access to the presentation materials during the visit.
To add a presentation, create a new record in the Knowledge base section and add a PowerPoint presentation (*.pptx) or PDF file on its Attachments detail. Then, link the article to the “Presentation” visit action. As a result, your sales reps will be able to show the attached presentation from their mobile device during visits.
To add a presentation:
-
Click
 to open the System Designer.
 -
Go to the System setup block → click Lookups.
-
Click the Field sales rules lookup.
-
Open the needed rule and go to the Actions during visit detail.
-
Select the “Presentation” record and click
 .
. -
On the displayed page, expand the Presentation detail and click
 .
. -
In the displayed string, click
 in the field.
 -
In the displayed lookup, select a knowledge base article with an attached presentation.
-
If necessary, add other knowledge base articles with attachments.
As a result, when a sales rep performs the Presentation visit action, the PowerPoint presentation (or any other document) attached to the knowledge base article will open on their mobile device. If several presentations and materials have been attached, they will be available on the Attachments and notes detail of the visit.
Also, all visits planned in the calendar (the Visit scheduling view of the Activities section), will have links to the knowledge base articles specified on the Attachments and notes detail.
Set up a list of promoted products
When monitoring SKUs, a sales rep should be able to view only SKUs promoted for the current customer. This is done by setting up individual lists of promoted SKUs for each customer account. You can do this in one of the following ways:
-
Add all accounts where a product must be promoted on the Accounts detail of the product page. The information about SKUs will be automatically added to the Products detail of the account page after you save the product page.
-
Add the promoted products to the Products detail of the account page of the account where the products must be promoted. The information about accounts will be added to the Accounts detail of the product page.
As a result, the connection between promoted products and accounts will be set. When performing the SKU monitoring action, a sales rep will see only the SKUs promoted via this account.
The full product catalog is still available when the sales rep places an order during a visit. Thus, if a customer shows interest in products that are not promoted, they can still be added to the order.