After connecting Creatio to landing, some fields on Creatio lead pages may be omitted in the customer web form. You can set up autofill for such fields depending on your landing page specifics and purpose.
We recommend that you start with setting up the autofill defaults for the Need type and Need maturity fields. For example, the subscription form for your hardware special offer can automatically be connected to the “Hardware” need type. Your web form for the customers who are ready to communicate in person or to place an order can be connected to the need maturity values: “Discovered” or “Sales-ready.”
On the Default values tab, you can set up the autofill defaults for the lead page fields. You can set up the autofill feature for any field type including the mapped ones. In this case, the default value will be filled in the lead page field only if the customer left it blank.
To set up autofill of the lead fields:
-
Go to the Default values tab of the landing page. Click the
 button on the Default values for the lead fields detail (Fig. 1).Fig. 1 – Filling out the Default values for the lead fields detail
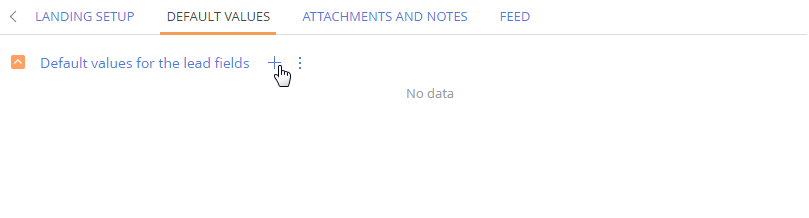
-
Select the Need type field (Fig. 2).
Fig. 2 – Selecting a field that must be filled in automatically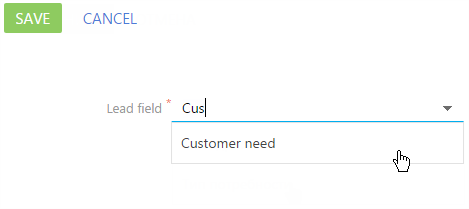
-
In the Value field, select the value which will be used to fill in the need type, for example, "Need for our products."
-
Click Save (Fig. 3).
Fig. 3 – Saving the autofill settings of the fields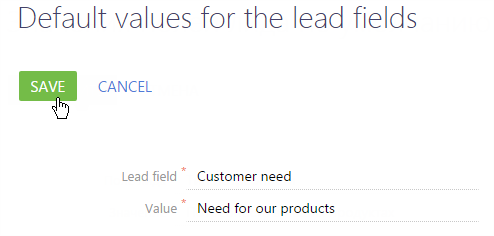
After the landing page form is submitted, the Customer need field of the lead page will be filled in automatically with the “Need for our products” value (Fig. 4).

After setting up an automatic population of page fields, proceed to set up populating the landing web form with customer data.