
1. Create a section
For this example, create the Books section in the Section Wizard. Take the section fields from the table below.
Learn more about how to create a section: Section.
2. Add demo records to the section
To add records to the Books section list:
- Add a record to the Contacts section and enter "David Flanagan" in the Full name field.
- Add a record to the Contacts section and enter "Andrew Troelsen" in the Full name field.
- Add a record to the Accounts section and enter "Apress" in the Name field.
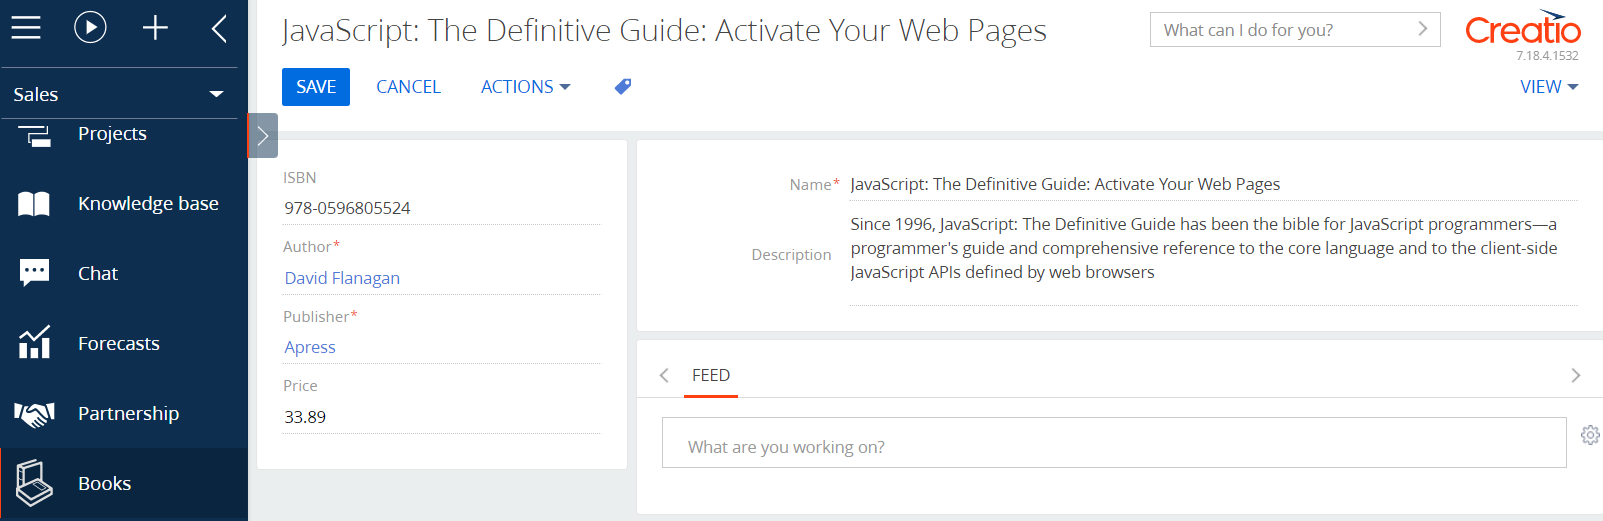
- Add the JavaScript: The Definitive Guide: Activate Your Web Pages book:
- Go to the Books section.
- Click New.
- Fill out the fields of the book mini page:
- Enter "JavaScript: The Definitive Guide: Activate Your Web Pages" in the Name field.
- Enter "978-0596805524" in the ISBN field.
- Select "David Flanagan" in the Author field.
- Select "Apress" in the Publisher field.
- Enter "33.89" in the Price field.
- Add the Pro C# 7: With .NET and .NET Core book in a similar way.
The Books section list must look like on the figure below.

3. Bind data to the package
Since the Books section records are connected to the Contacts section records by the UsrAuthor column, bind the author data to the package first.
To bind data to the package:
- Bind the contacts:
- Go to the Configuration section and select a custom package.
- Click Add on the workspace toolbar and select the Data configuration type.
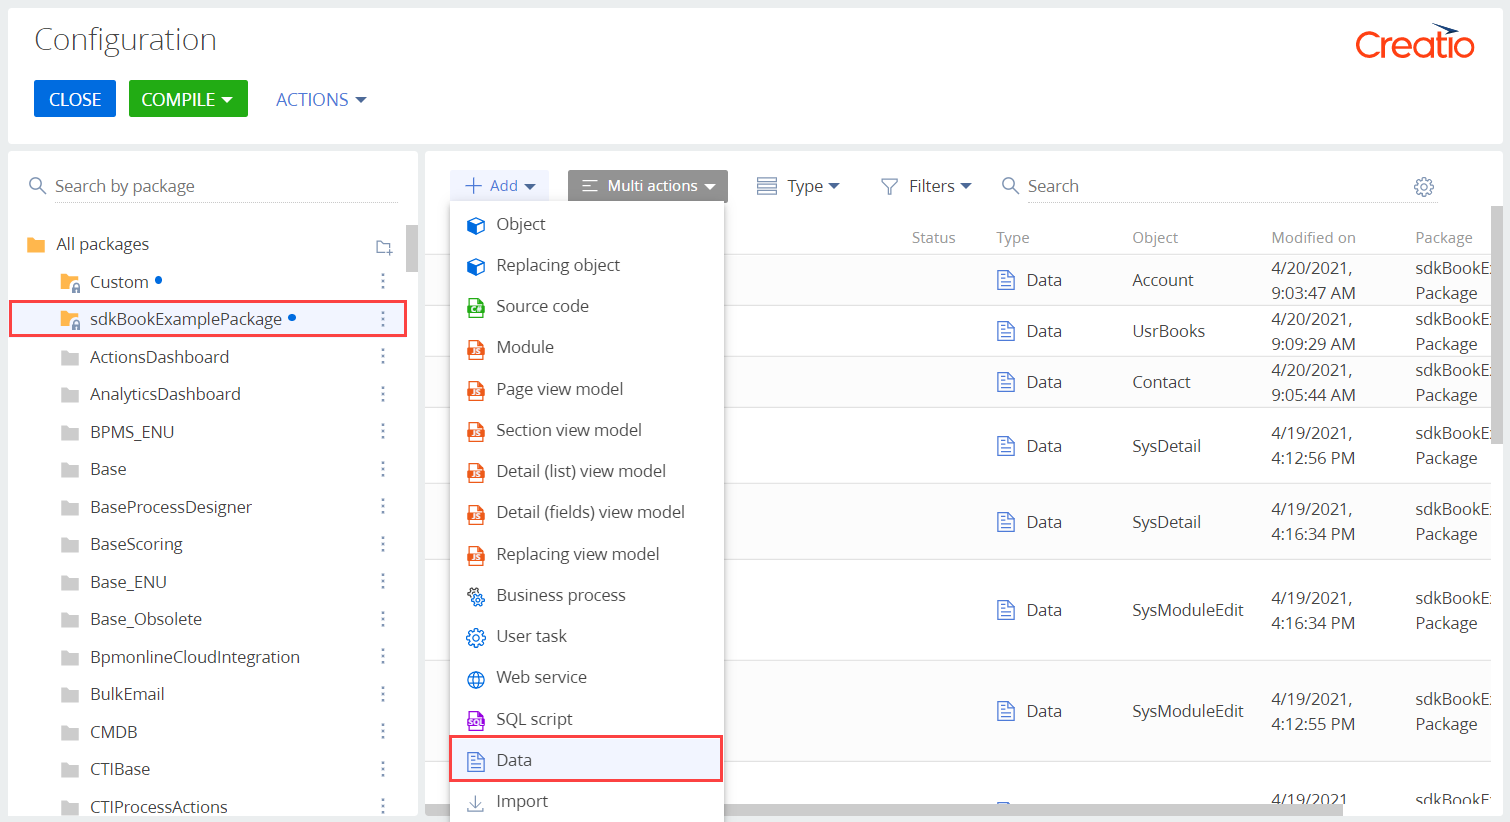
- Fill out the properties of the data binding page:
- Enter "ContactsInBooks" in the Name property.
- Select "Contact" in the Object property.
- Select "Installation" in the Installation type property.
- Select the records with "David Flanagan" and "Andrew Troelsen" values in the Full name field on the Bound data tab.
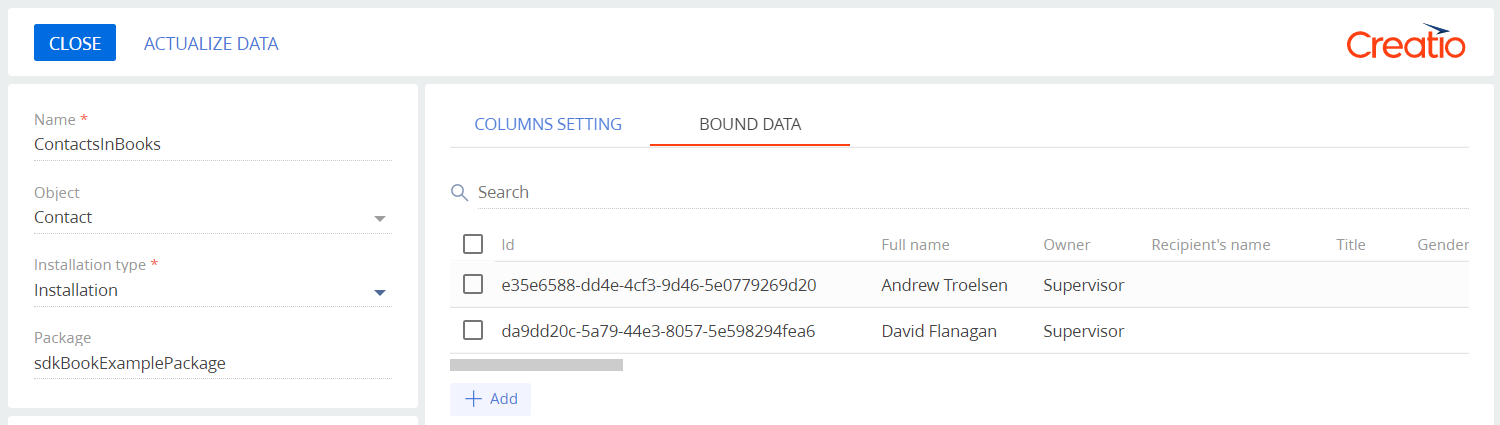
- Save the data.
- Bind the account:
- Go to the Configuration section and select a custom package.
- Click Add on the workspace toolbar and select the Data configuration type.
- Fill out the properties of the data binding page:
- Enter "AccountsInBooks" in the Name property.
- Enter "Account" in the Object property.
- Select "Installation" in the Installation type property.
- Select the record with the "Apress" value in the Name field on the Bound data tab.
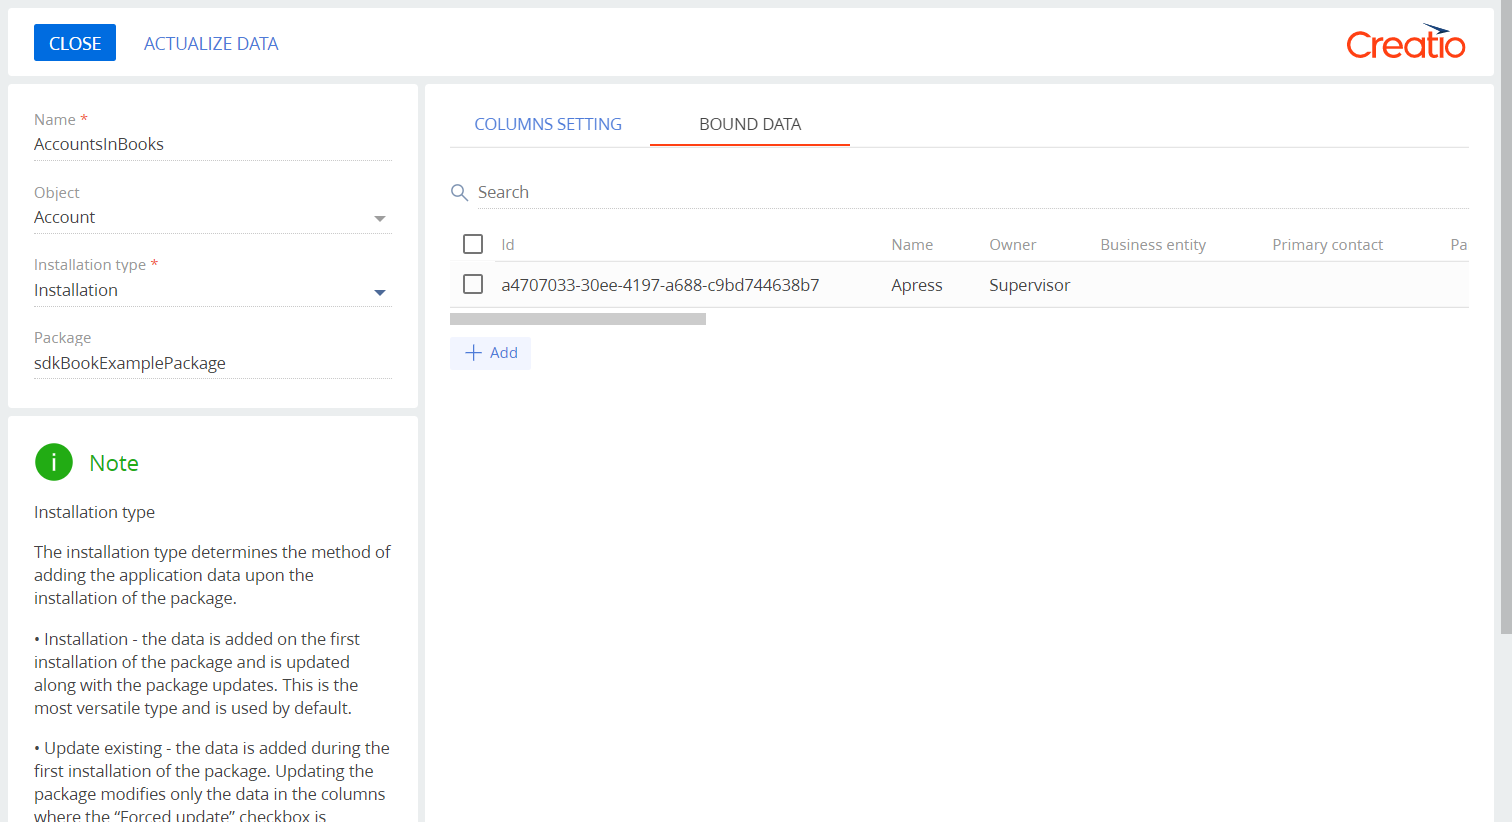
- Save the data.
- Bind the books:
- Go to the Configuration section and select a custom package.
- Click Add on the workspace toolbar and select the Data configuration type.
- Fill out the properties of the data binding page:
- Enter "Books" in the Name property.
- Select "UsrBooks" in the Object property.
- Select "Installation" in the Installation type property.
- Select the records with the "JavaScript: The Definitive Guide: Activate Your Web Pages" and "Pro C# 7: With .NET and .NET Core" values in the Name field on the Bound data tab.
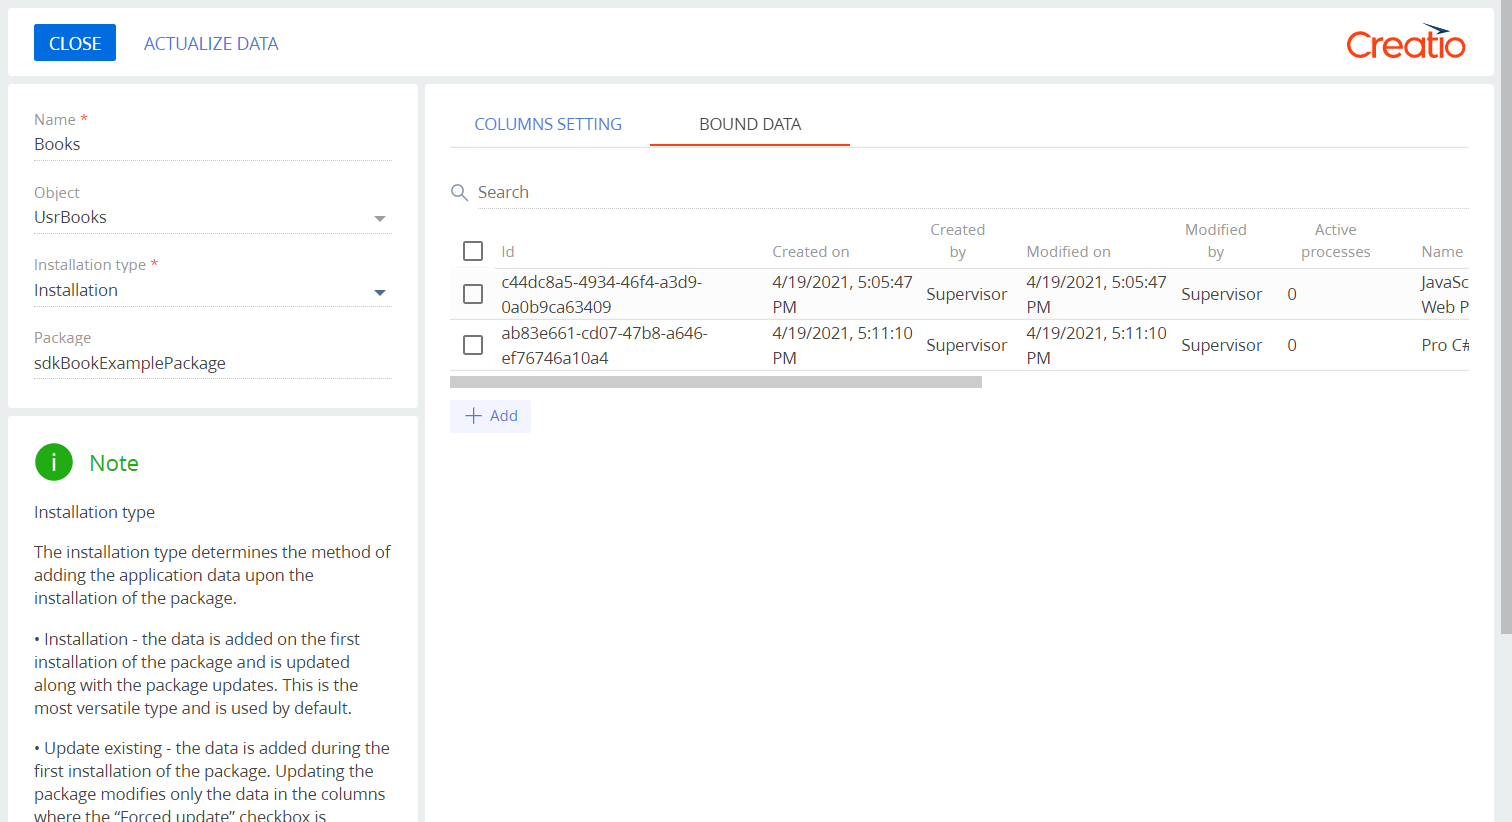
- Save the data.
4. Check the data bindings
As a result, Creatio will bind the data of the Books, Contacts, and Accounts" sections to the custom package.
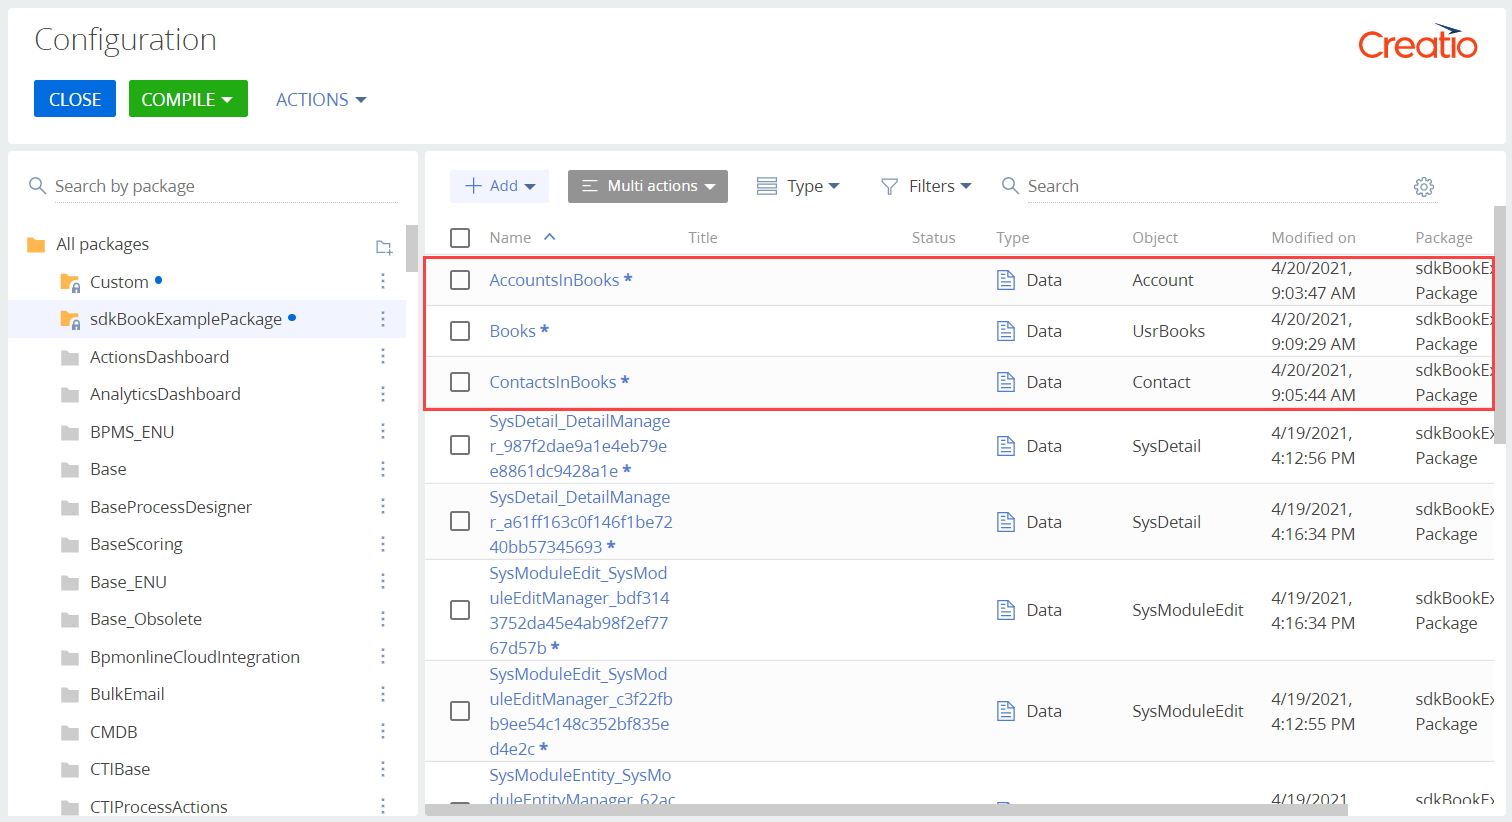
You can transfer the package between environments using the package export and import mechanism in Creatio IDE. After you install the package into another environment, the bound records will be displayed in the corresponding sections.